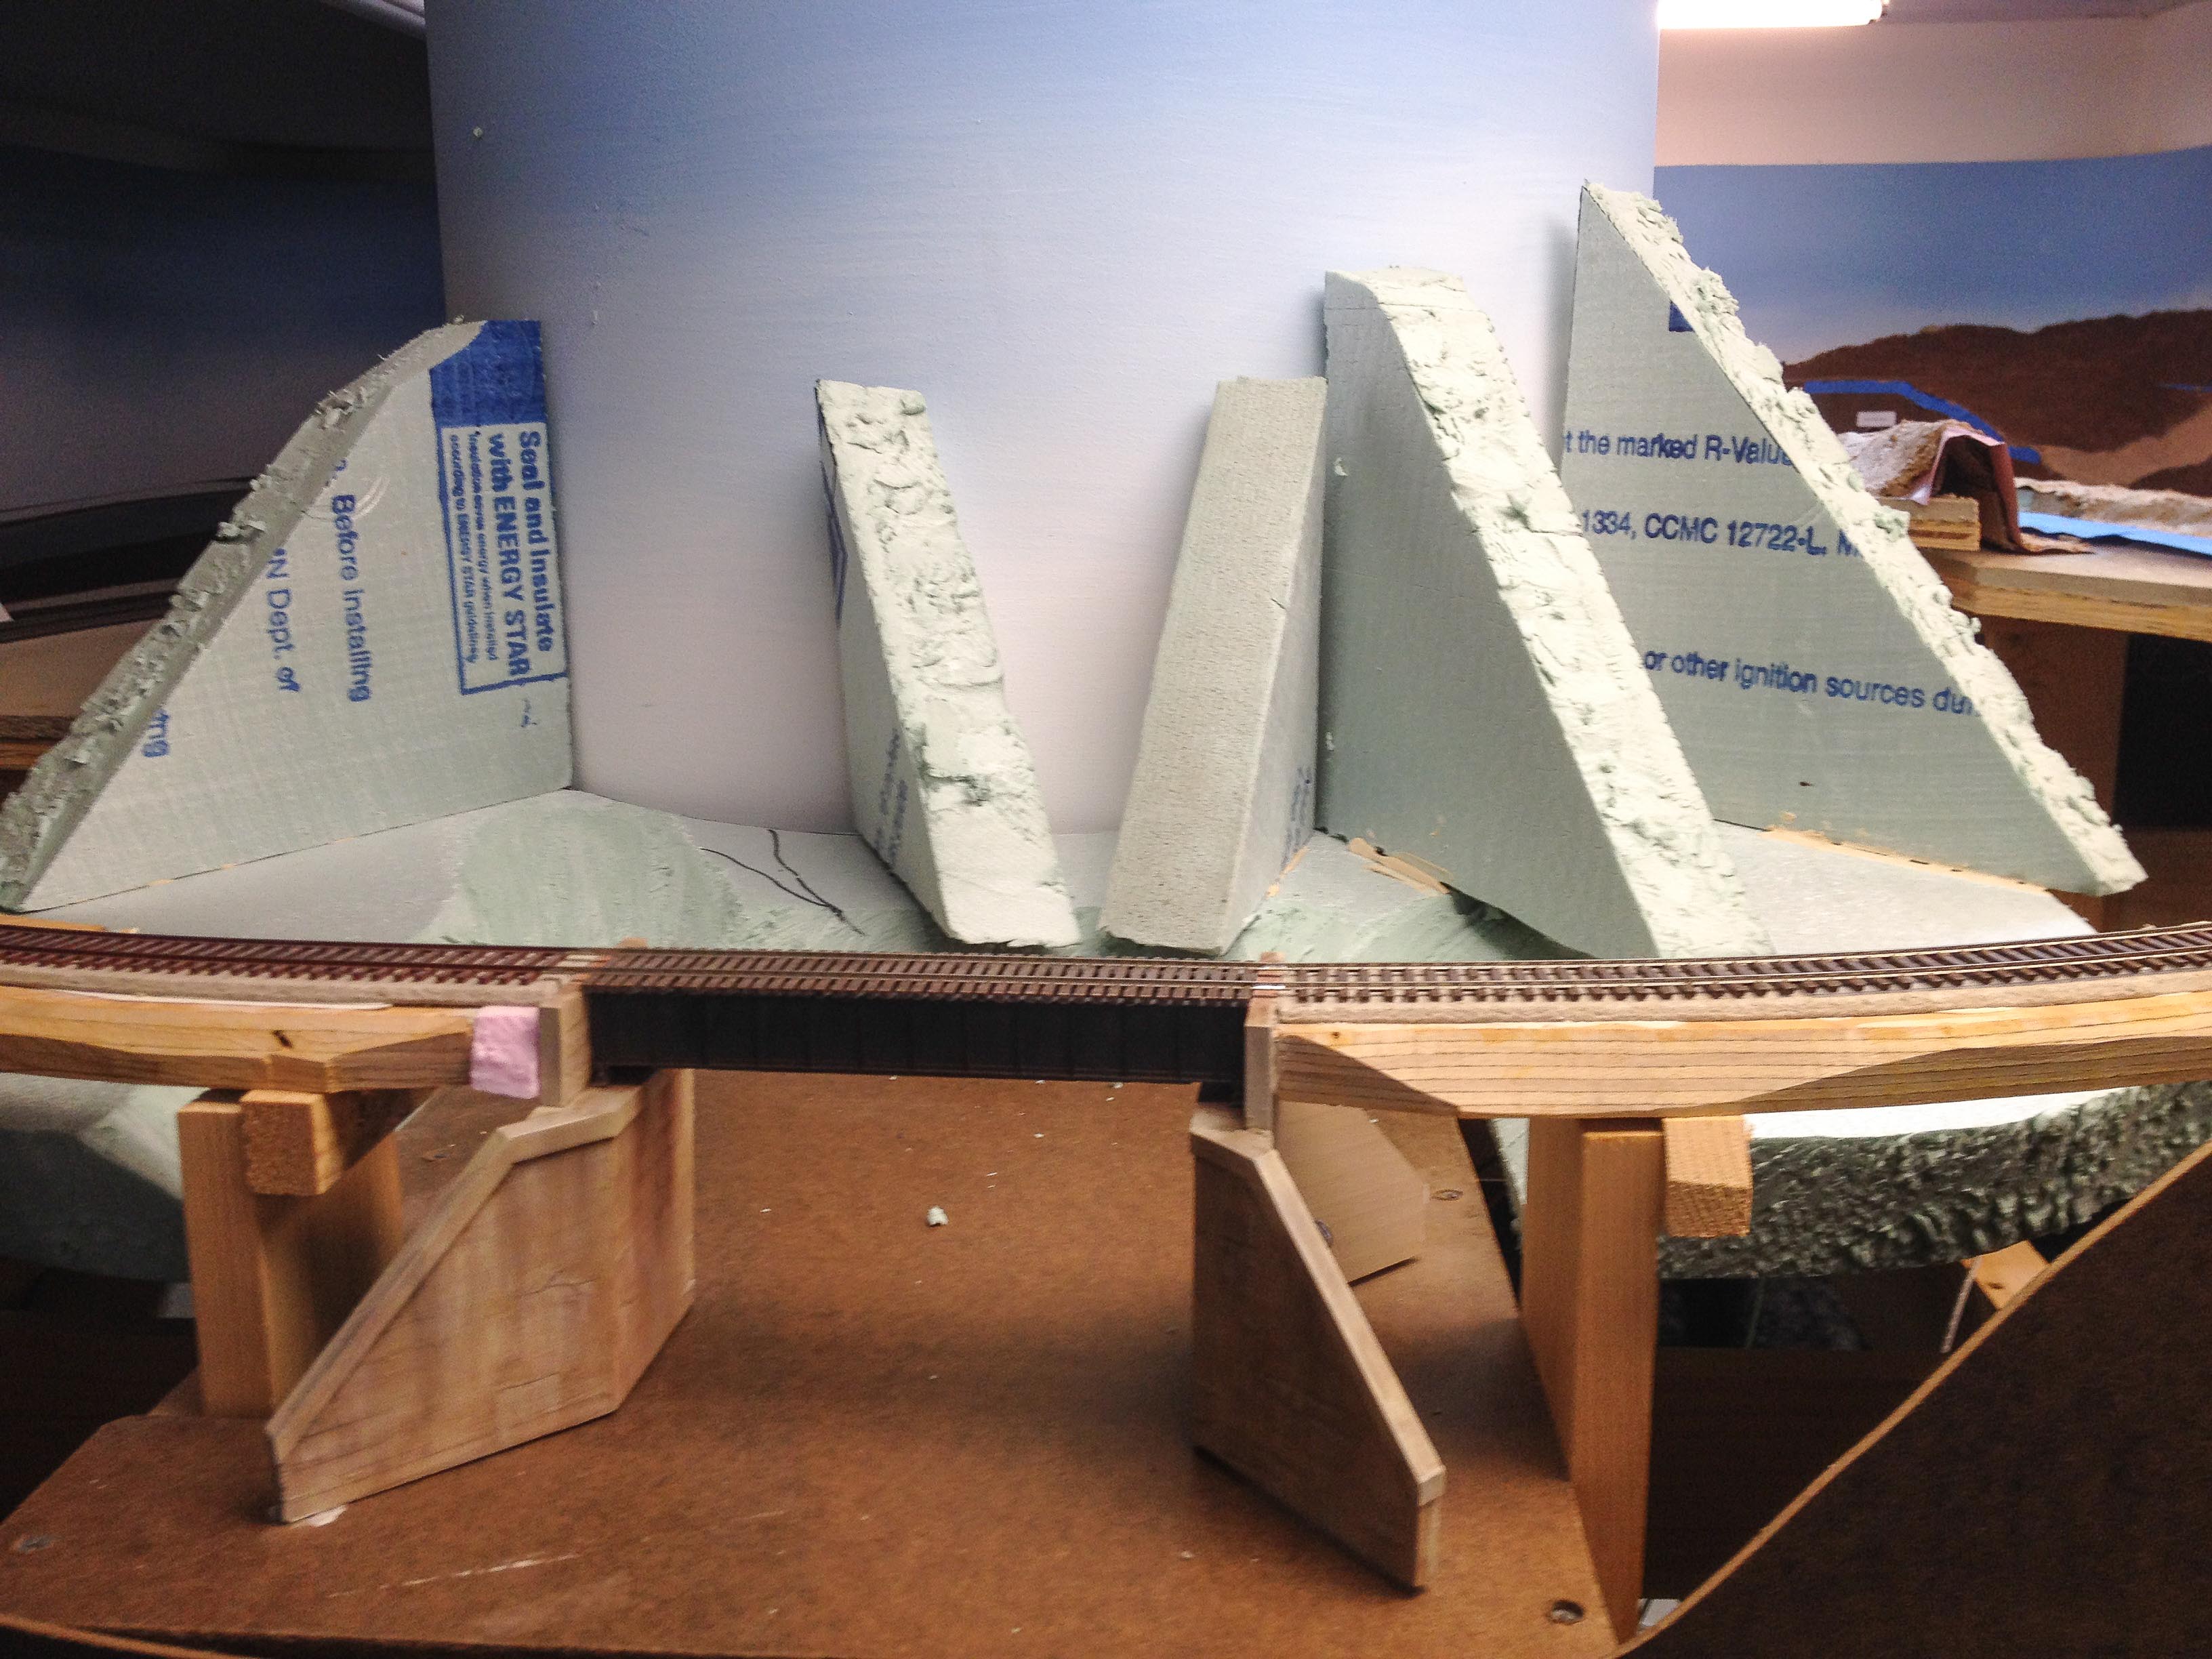
Slow progress is being made at extending the small scenicked portion of the railroad. The most recent project is at the model version of the “Masten Loop”. This is a signature scene on the railroad, and is essentially a “layout design element” in itself.
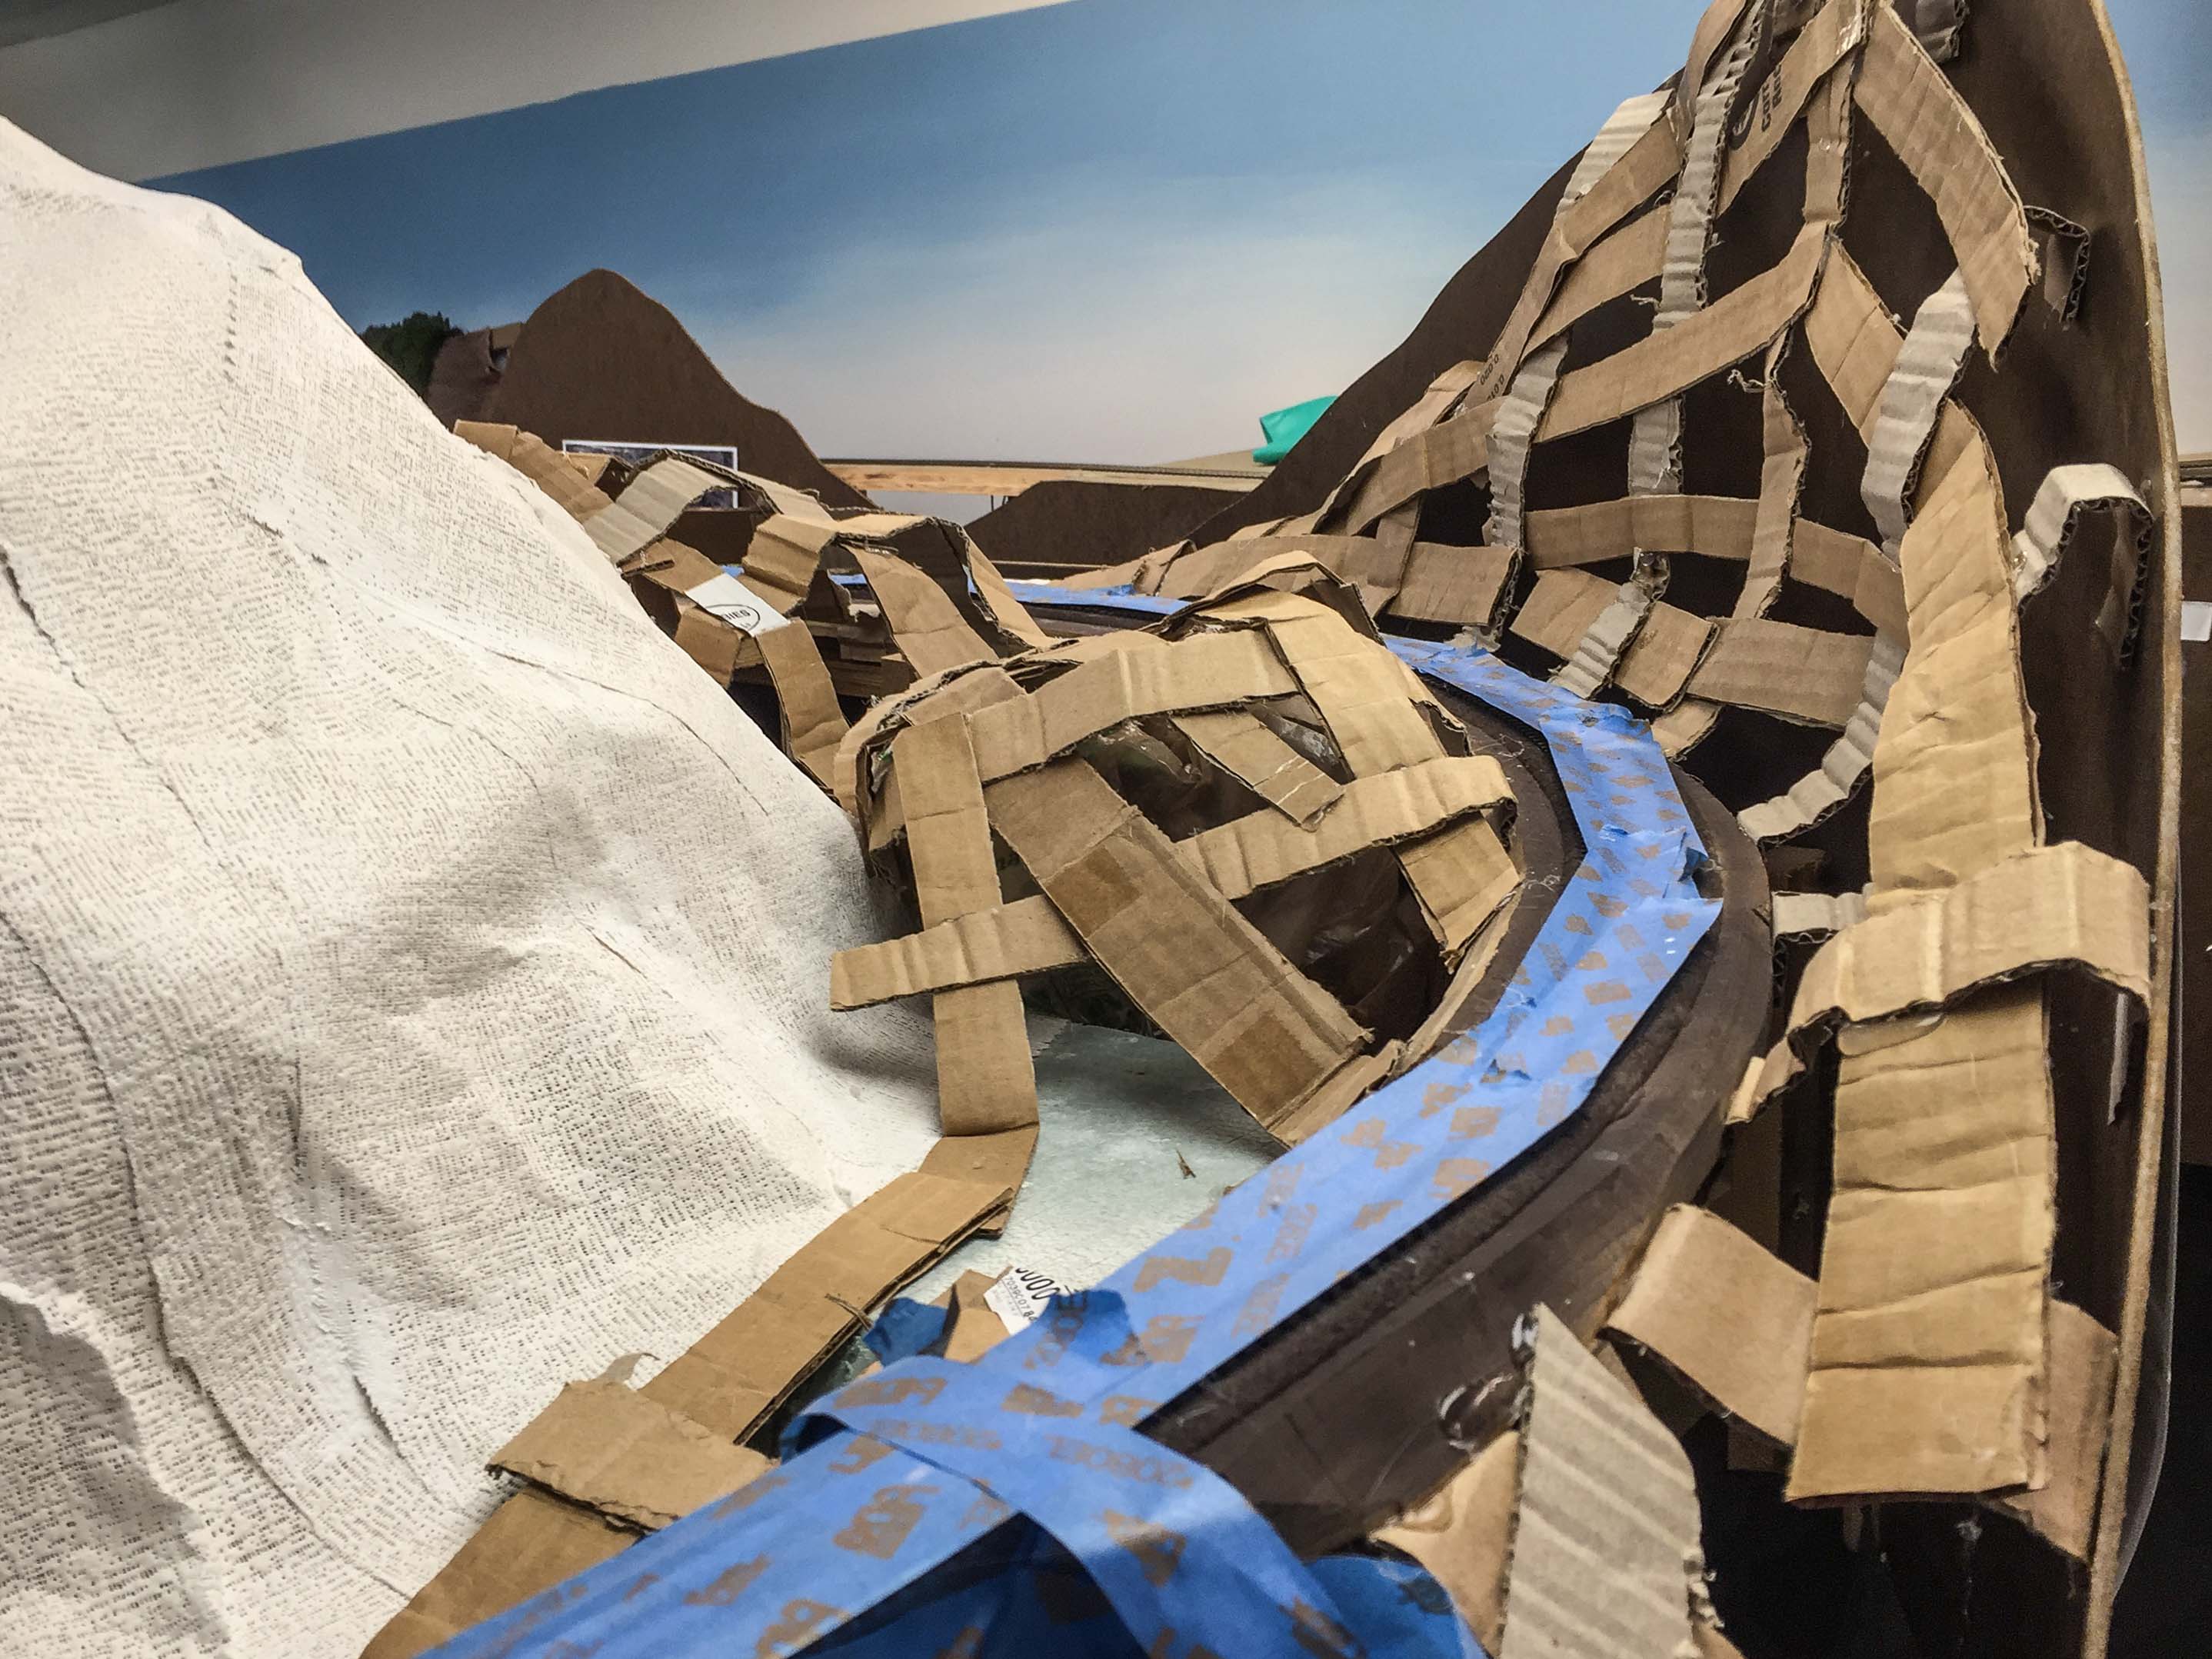
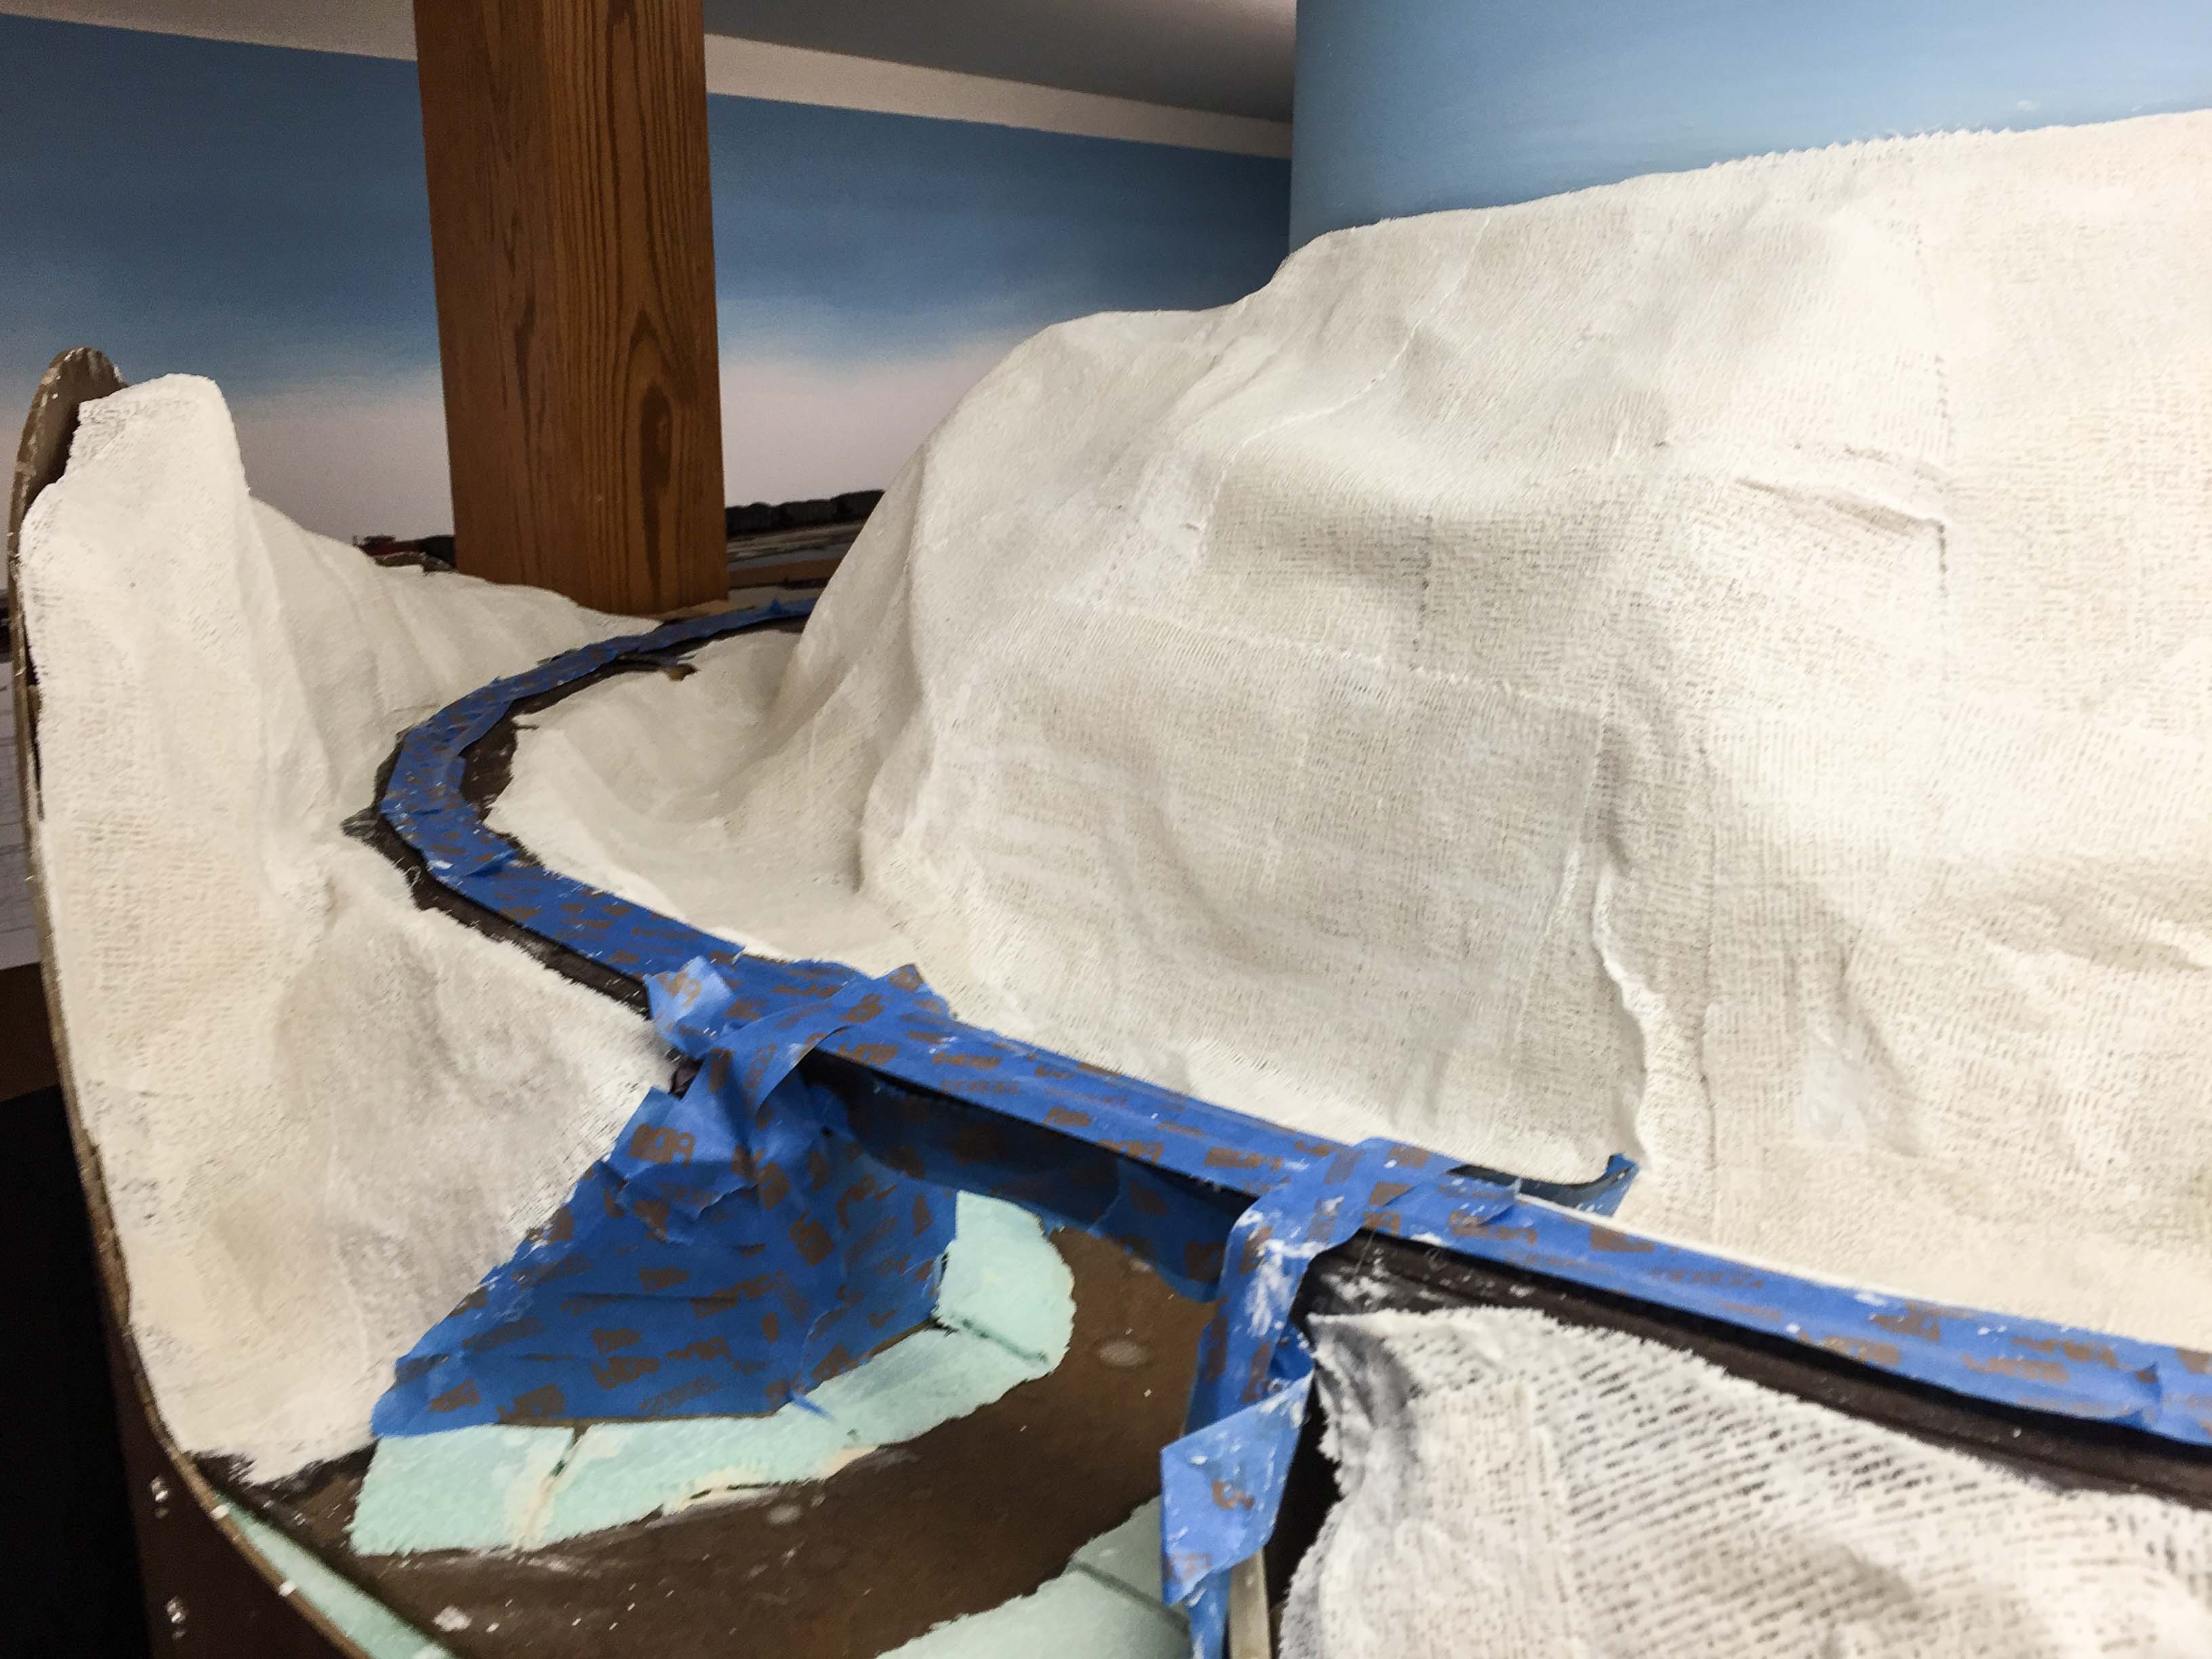
The background mountainside was formed of rough scrap foam supports covered by nylon screen left over from one of the kid’s old school projects. The other basic landforms were roughed in using the usual cardboard lattice technique. I had a bag full of expired plaster bandages I got for free from a hospital were I had worked some years prior, and since the first scenery section was done with rosin paper and white glue, I wanted to try using the plaster gauze both to use up what I had on hand, and to see how this technique compared with the rosin paper.
Overall, I thought the plaster gauze technique went quite a bit faster and was actually easier to use than the rosin paper technique, although potentially messier. The rosin paper method has the significant advantage of being significantly cheaper on the other hand. I did run into a slight unforeseen problem with the gauze. Some of the paper wrappers had degraded and torn over the past 10 years, and the rolls were exposed to the air. As a consequence, the plaster in these rolls was “punky”, and instead of setting up hard turned dry and crumbly. This was not a show-stopper though, and the punky plaster was easily covered and fixed in place later by a layer of paint and/or ground goop.
The stream banks were carved out of scrap construction foam and glued in place with Liquid Nails. This actually was one of the more tedious parts of the project. The background mountainside was painted flat black, since it will be entirely covered by puffball trees and no ground detail would be visible.
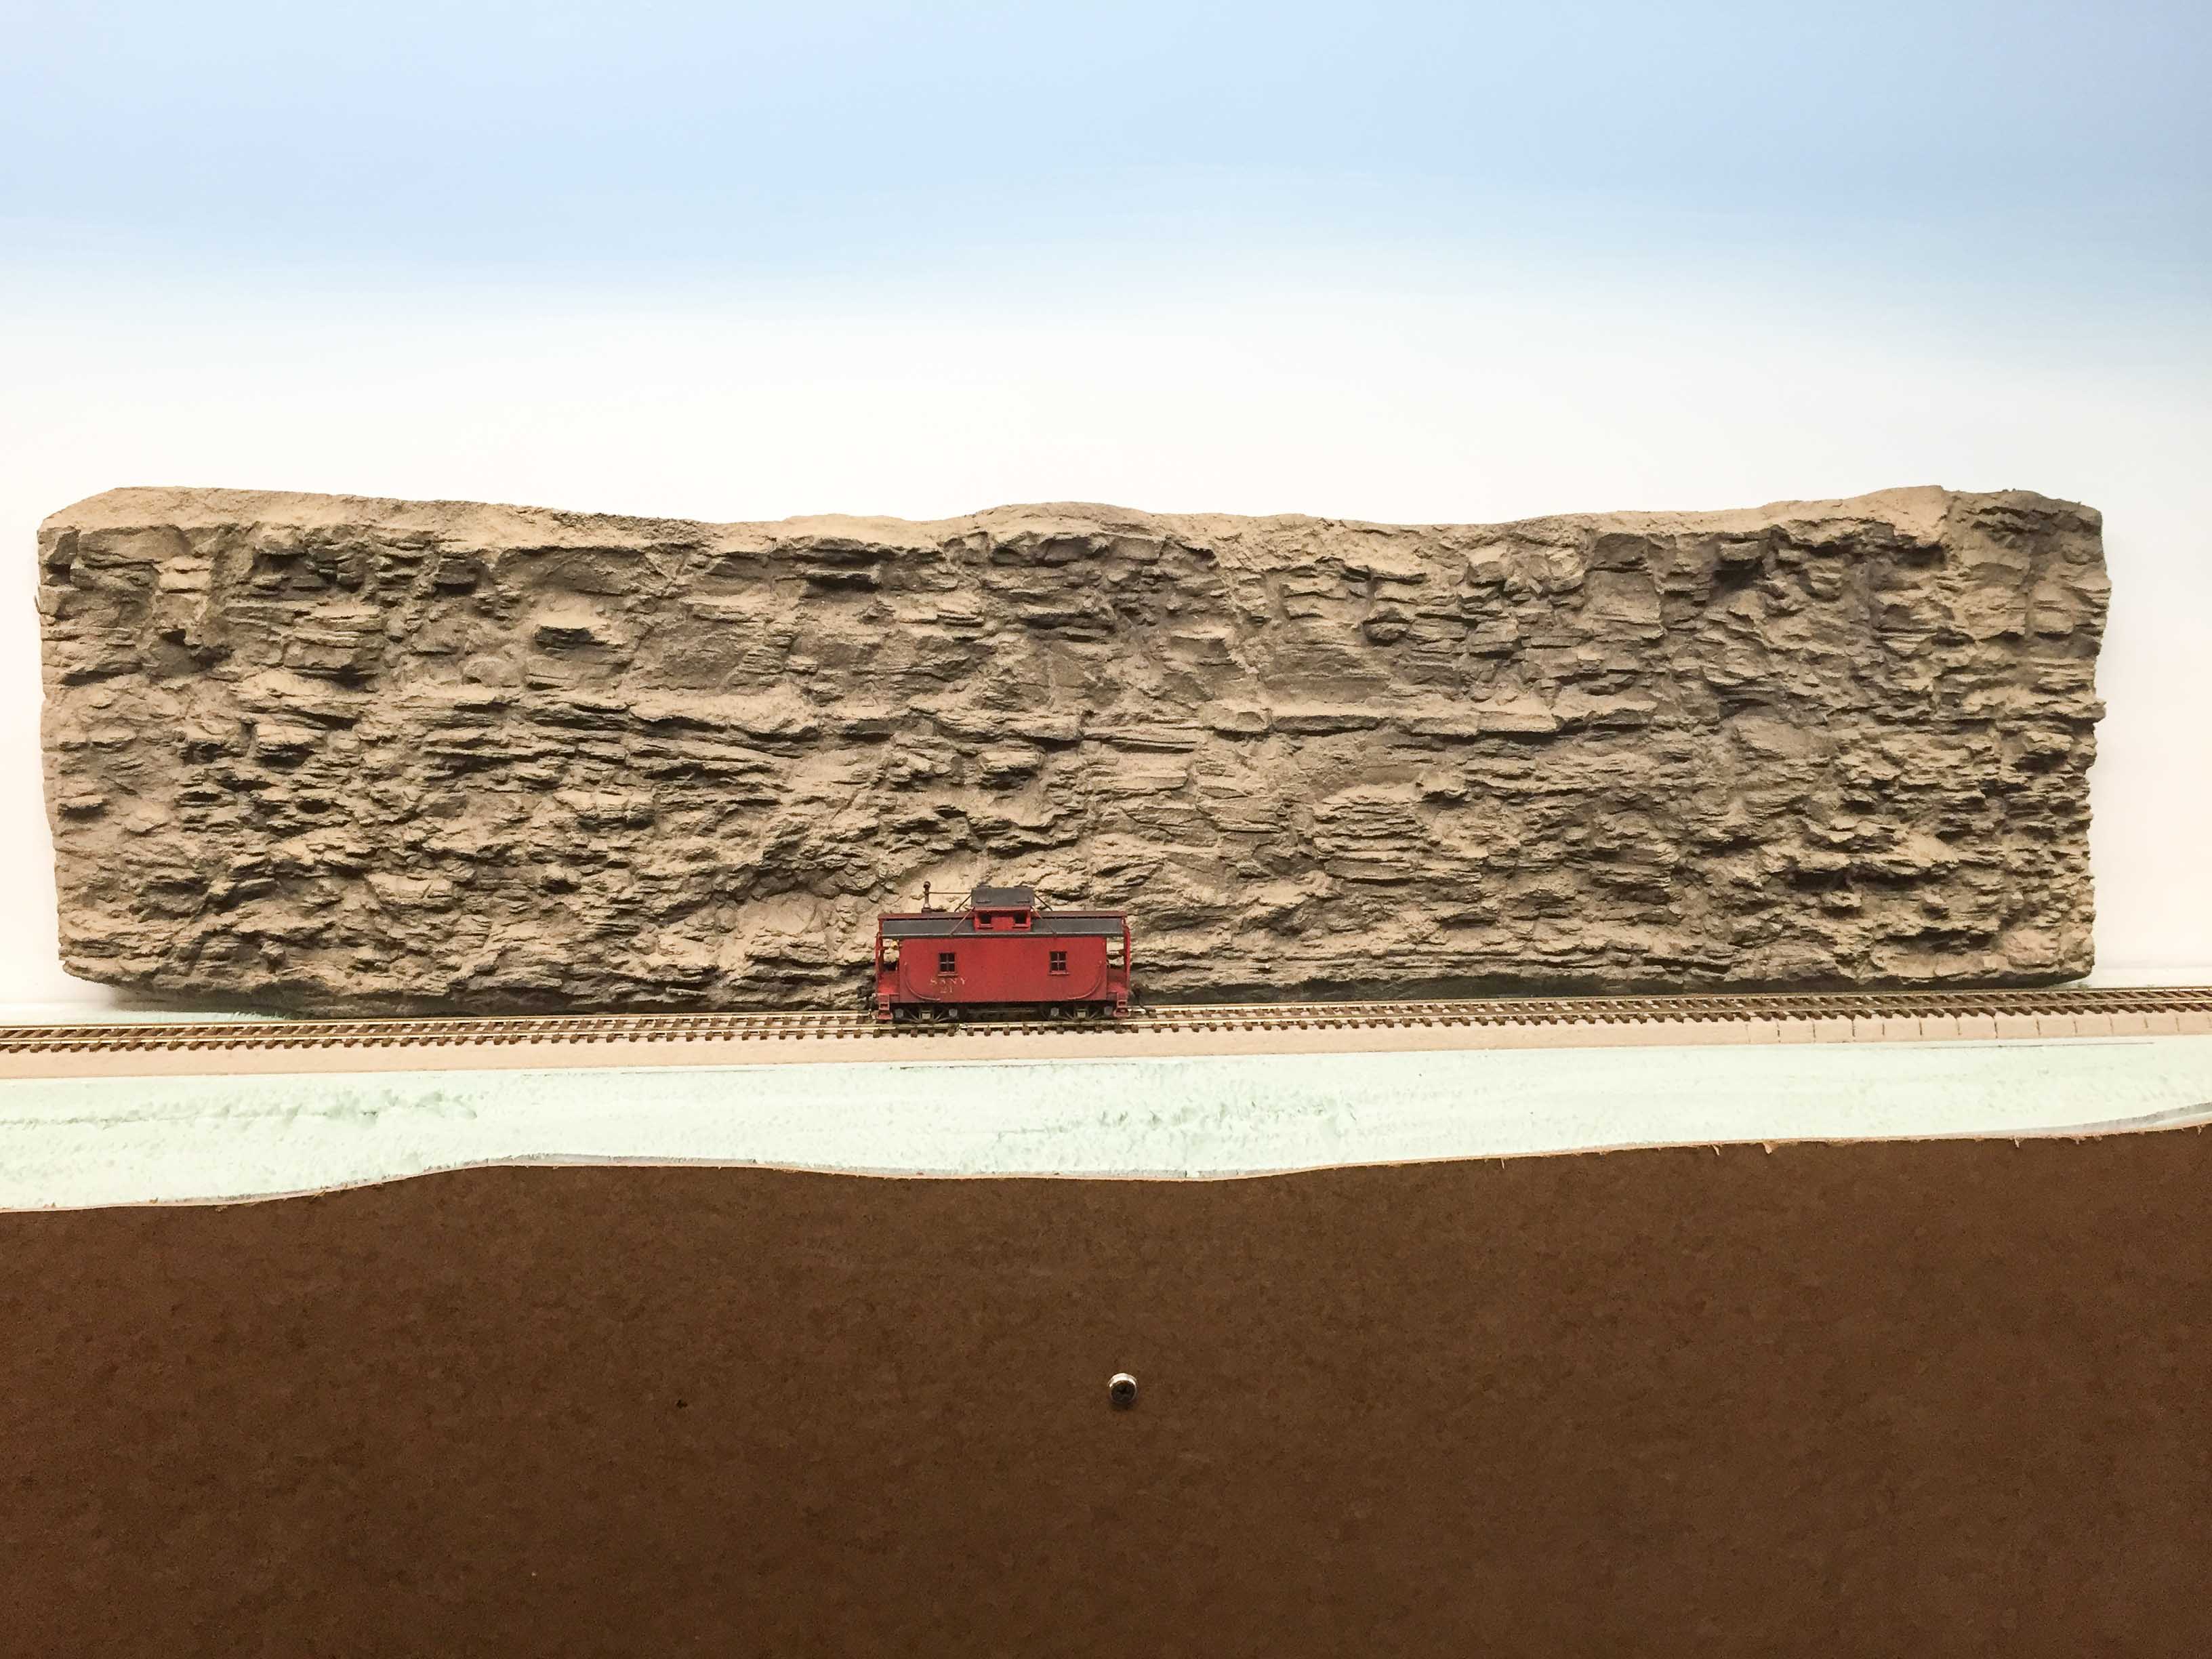
For the rock cuts I decided to experiment with “rubber rocks” from Cripplebush Valley Models for several reasons.
First, there was only about 3 inches of clearance from the track to the fascia board. The Woodland Scenics rock molds I have on hand are easy to use, but I worried that the thickness of the castings could cause problems.
Second, the track curves through the cuts, and it would be difficult to get rock castings in a curved shape of the proper radius.
Third, given the height and length of the biggest cut, I would have to use multiple rock castings and blend them together.
Last, none of the Woodland Scenics molds look quite like a large shale cut typical of the Eastern U.S., in my opinion.
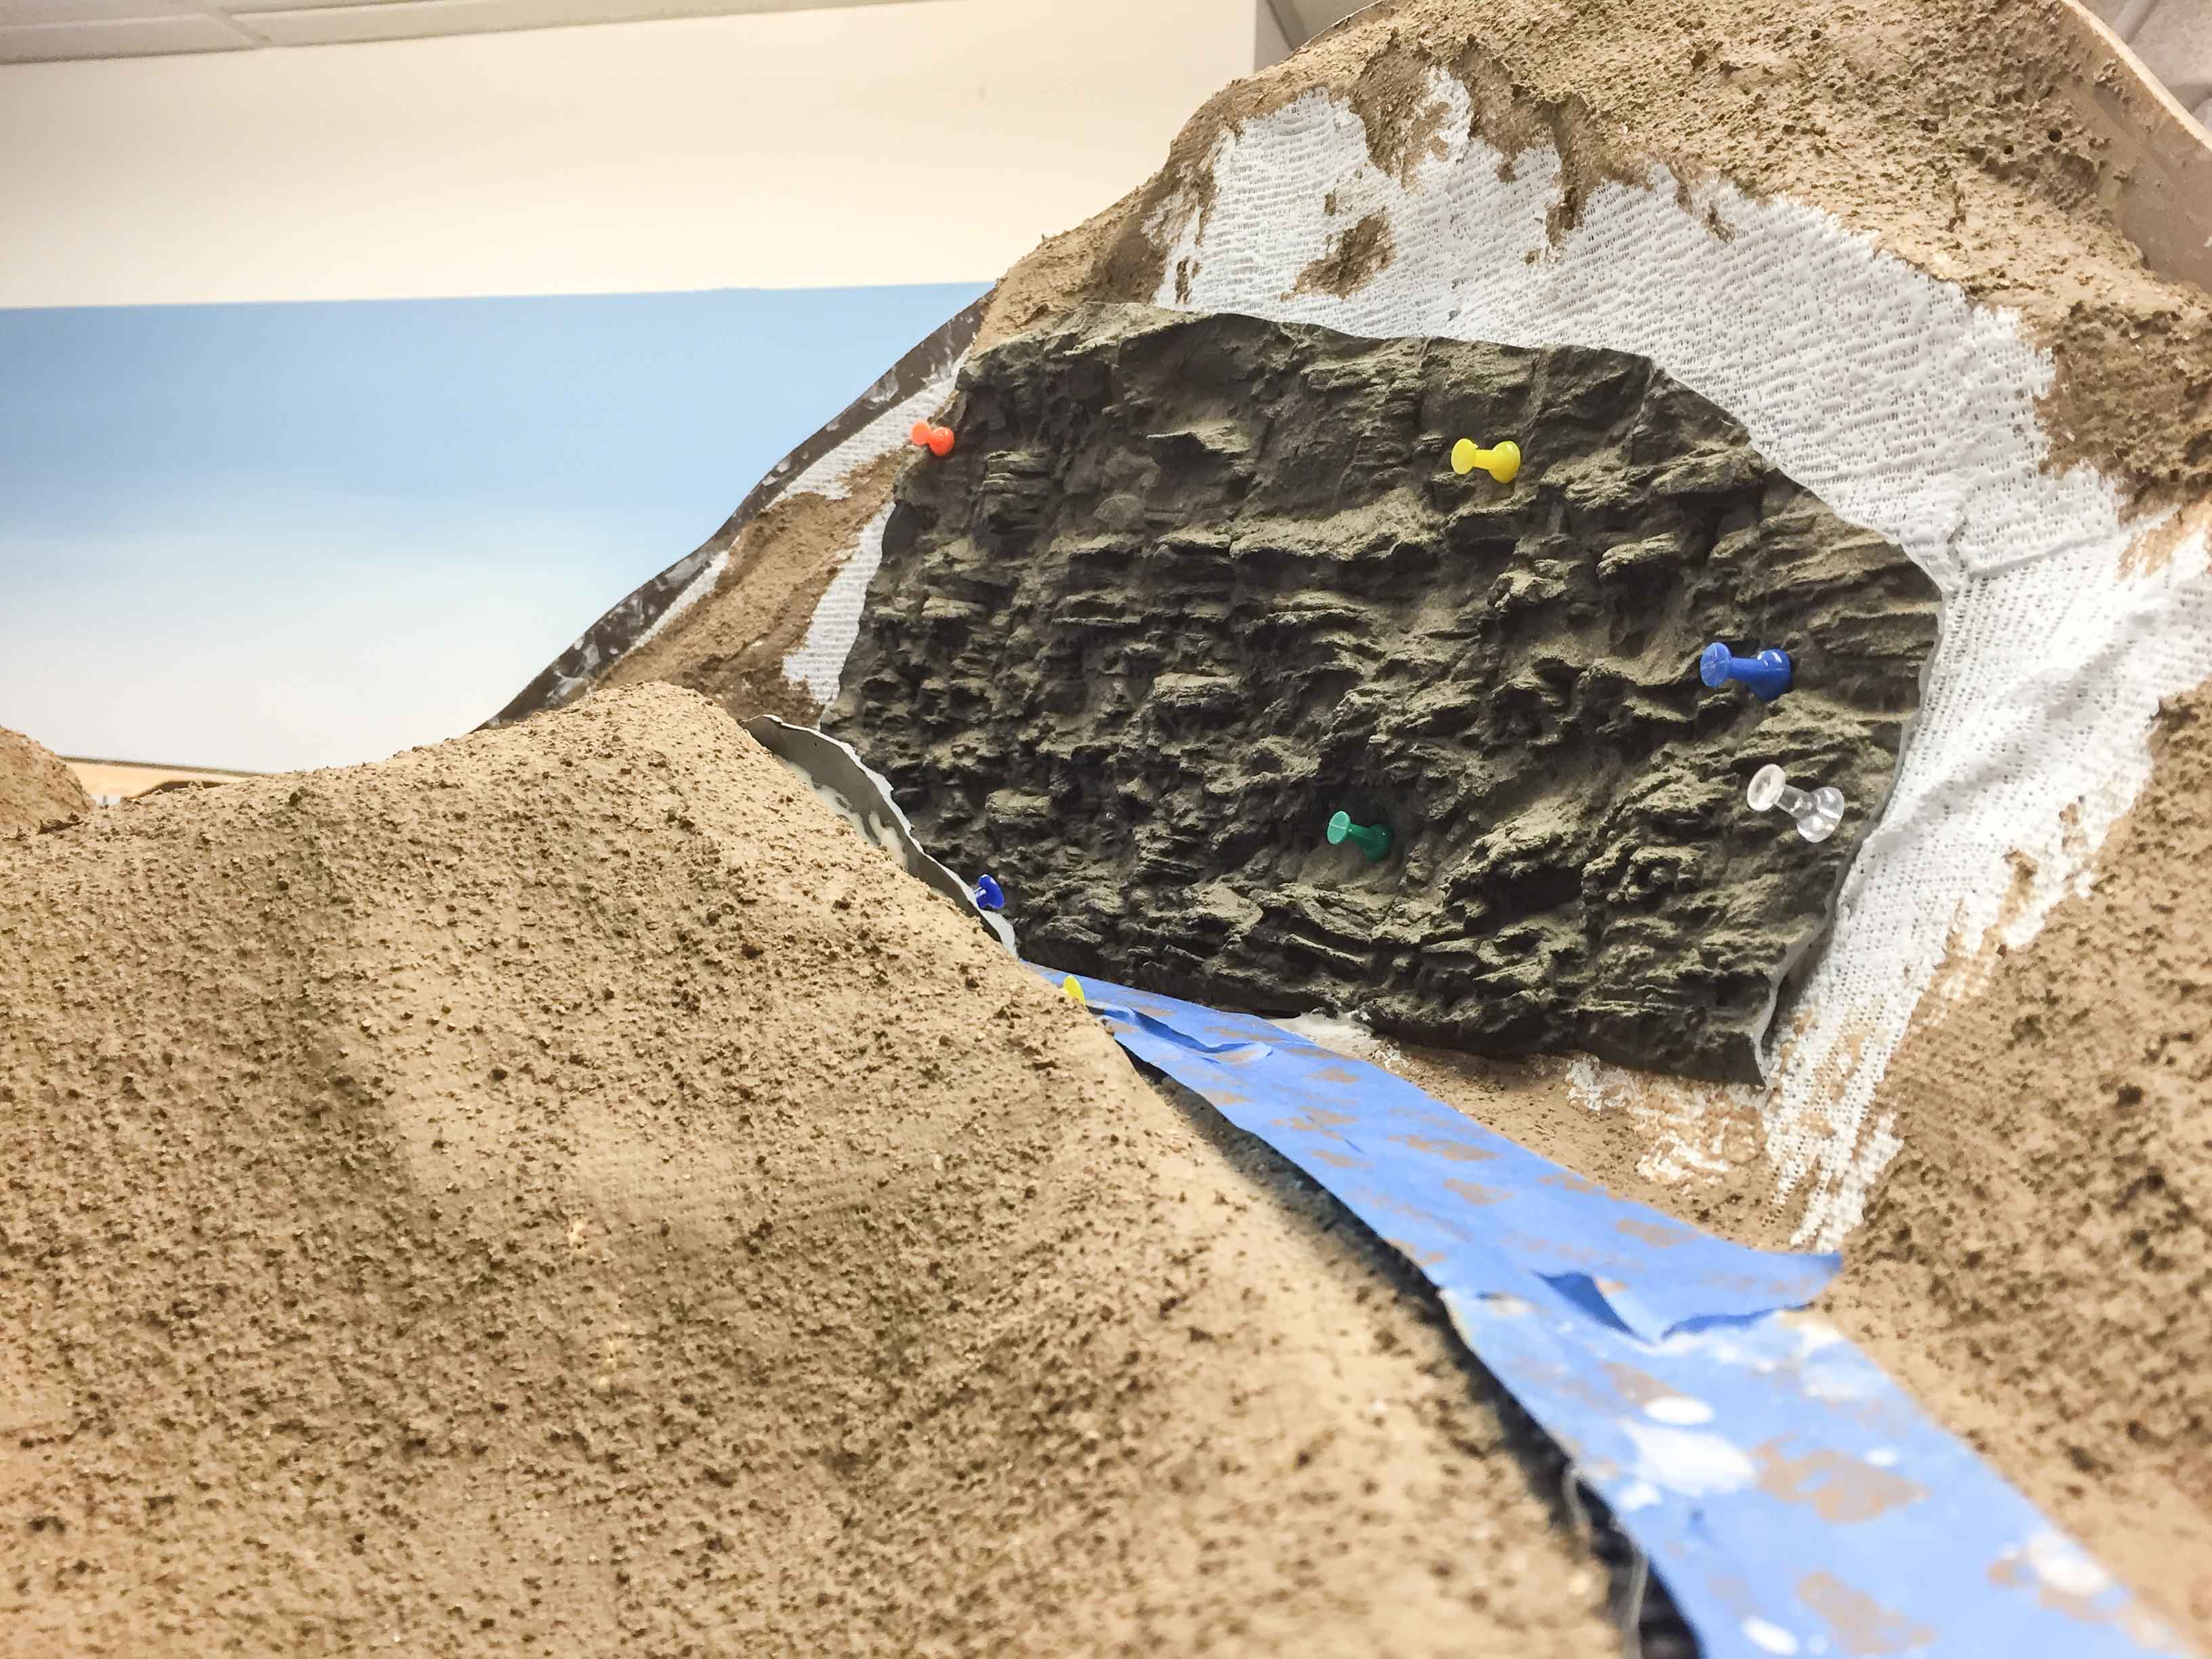
The CVM products seemed to solve all these problems. I chose “Shale 18” both for the look and the overall size. While a bit on the expensive side (Shale 18 is $50, plus $15 shipping), for this specific application I believe it was worth the expense. I actually was able to cut out 4 large one-piece walls from the single piece seen above, plus I was able to use some of the rest to form the stream bank under the bridge.
I used Liquid Nails to glue the pieces to the plaster. The product comes from CVM with a nice two-tone brownish coloration, but as the project progresses I will use some heavy dry-brushing to add more depth and color variety.
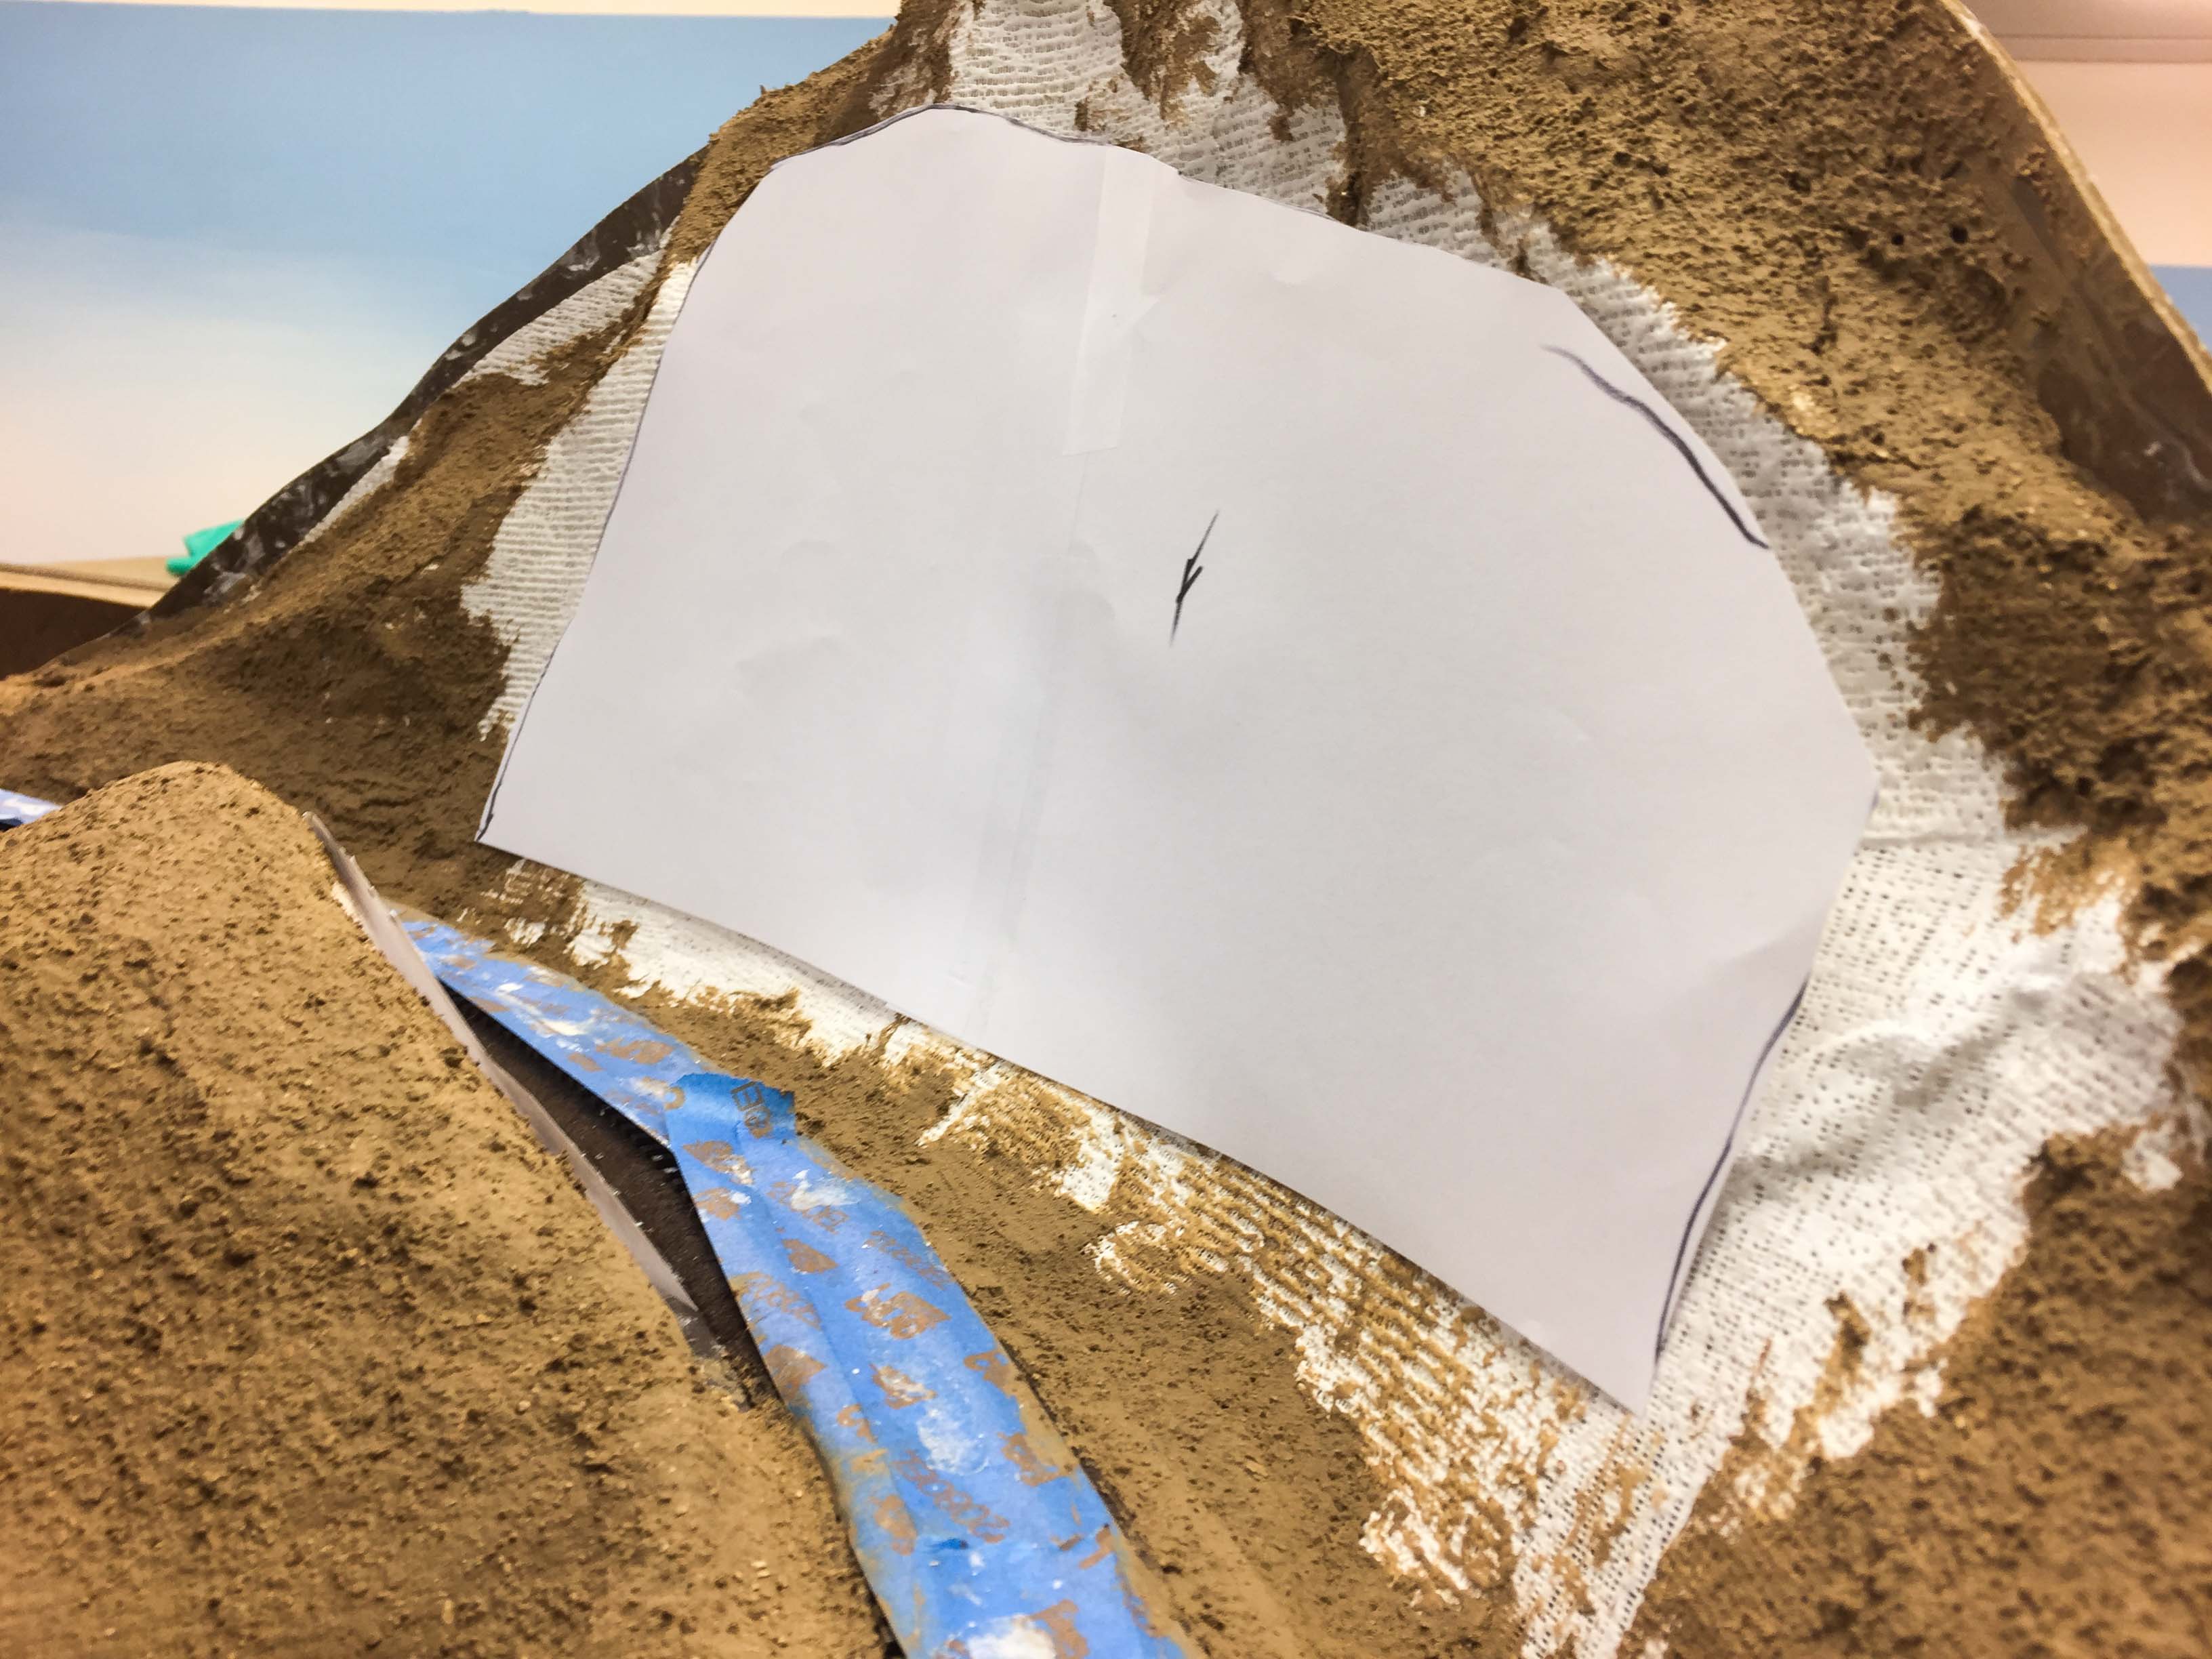
I was a little reluctant to just start cutting up the large piece, given the cost, so I made a couple of rough templates out of paper as a guide.
I then glued them in place, using some pins to help hold them while the Liquid Nails set.
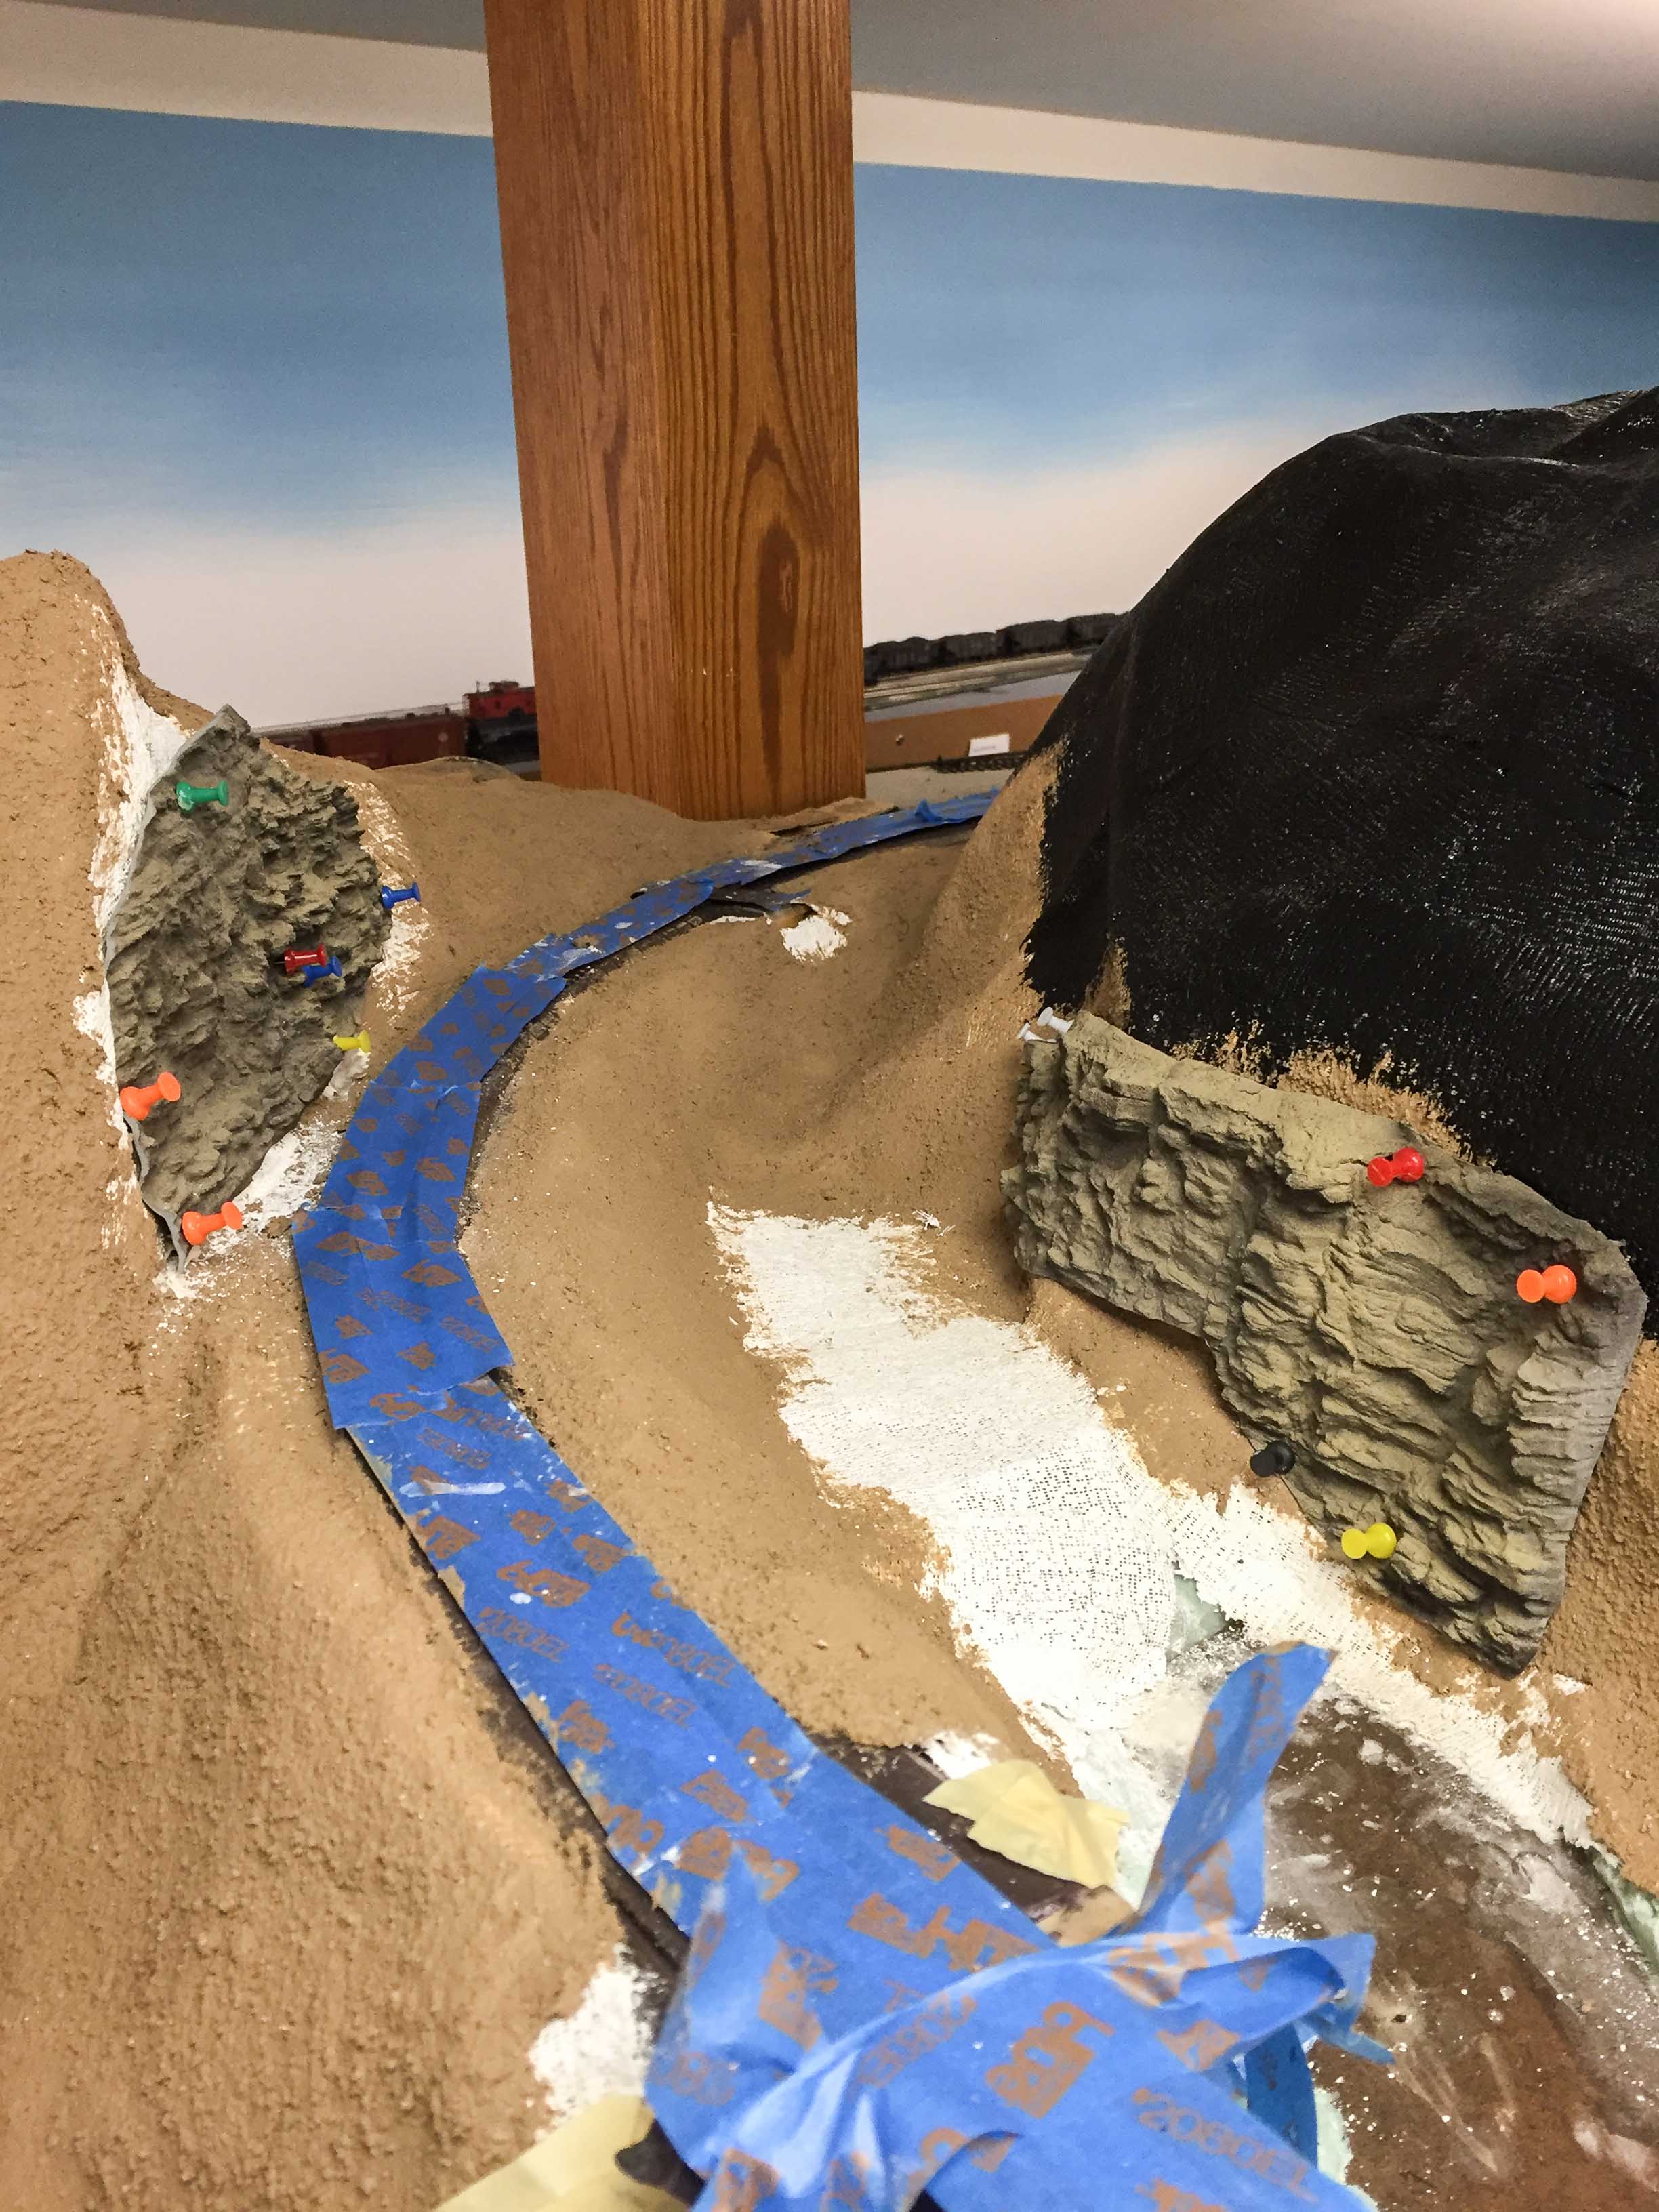
I filled in around the edges with ground goop and Sculptamold, which was then painted my “dirt” color.
To be continued….
Recent Comments