Author’s Collection
Author’s Collection
Author’s Collection
Author’s Collection
I won’t insult anyone’s intelligence with maudlin nonsense about recent events, except to say I’ve been working more or less as usual, but concomitant changes in various plans such as the cancellation of the PRRT&HS and NMRA MCR conventions has left me with some extra time to make progress on the model S&NY.
A major project I had been putting off is a re-work of the short PRR section of the layout, including a bridge over Lycoming Creek. I had several goals for this corner of the railroad:
There were also several obstacles to be overcome:
This section was one of the very first on place when I began the layout, and the bridge carried the mainline. Pulling out the bridge would prevent any op sessions until the project was essentially complete. With op sessions off the table for the foreseeable future, I figured this was as good a time as any to bite the bullet and begin.
This was the prototype scene. S&NY Marsh Hill station in the background with the junction track curving off to the right from the PRR Elmira Branch into the S&NY Marsh Hill yard:

Photo Courtesy Jim Anderson
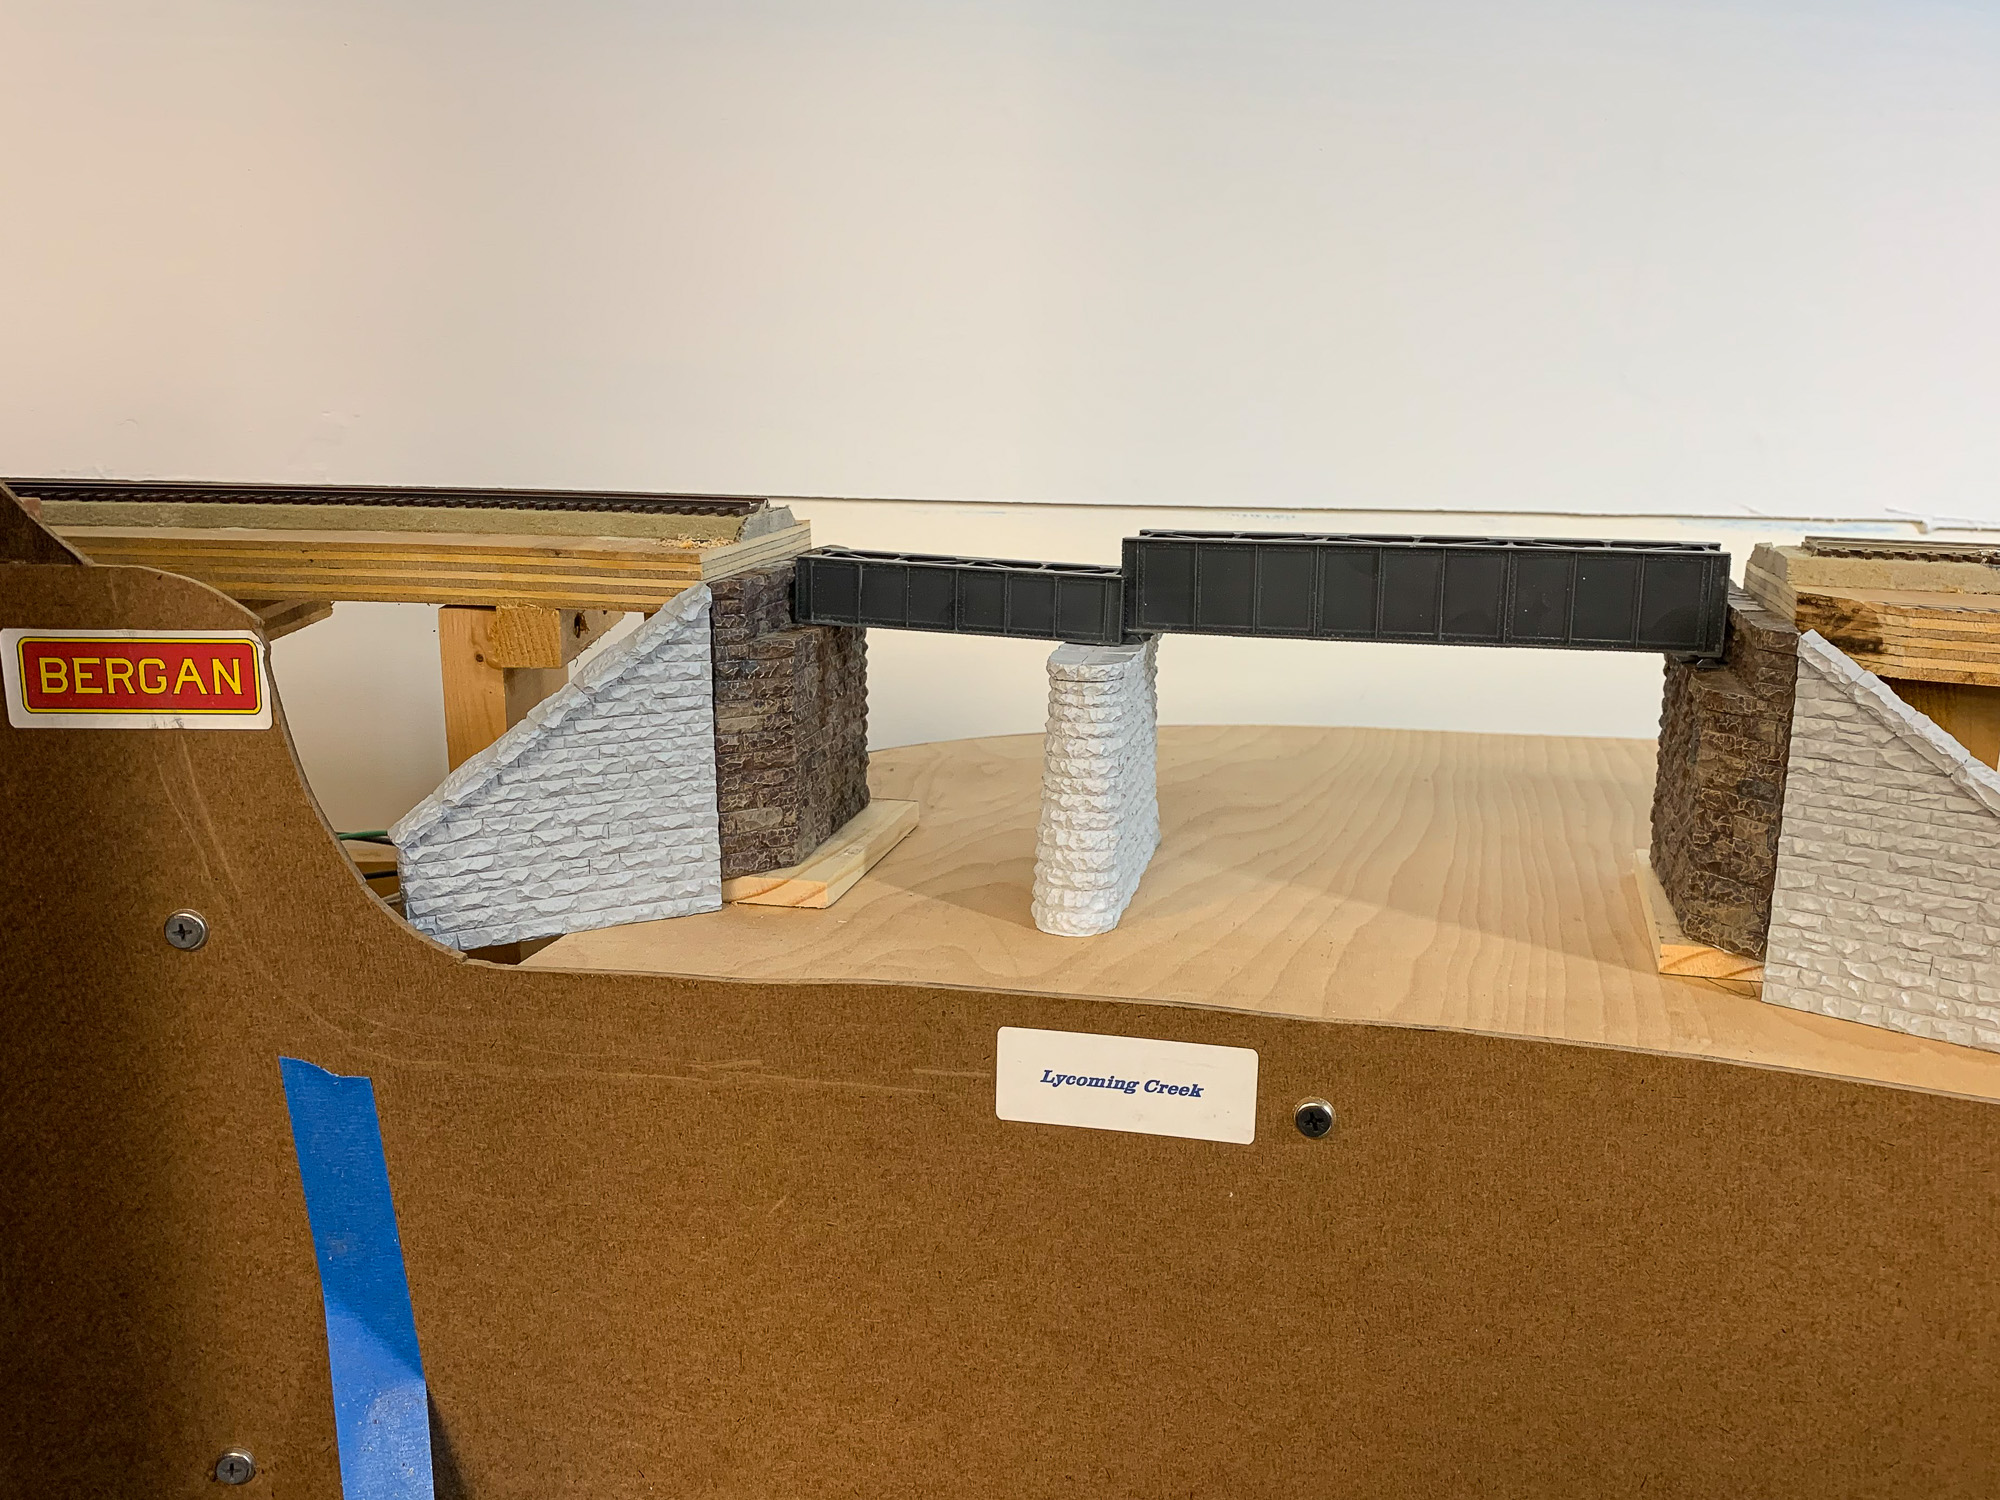
A through truss bridge was not going to fit in this area. A Central Valley through truss is 21 inches long. Not only would that not fit, it would overwhelm the scene. Instead, I decided to go with Walthers deck girder bridges. They are bigger in depth than the Micro Engineering bridges elsewhere on the layout, and I hoped that would be enough of a difference to set off the PRR bridges from the S&NY ones. The cut-stone abutments and pier would also show a bit of a difference. With that in mind, I got started.
This was the only photo of the area showing how it looked originally that I could find in my files:
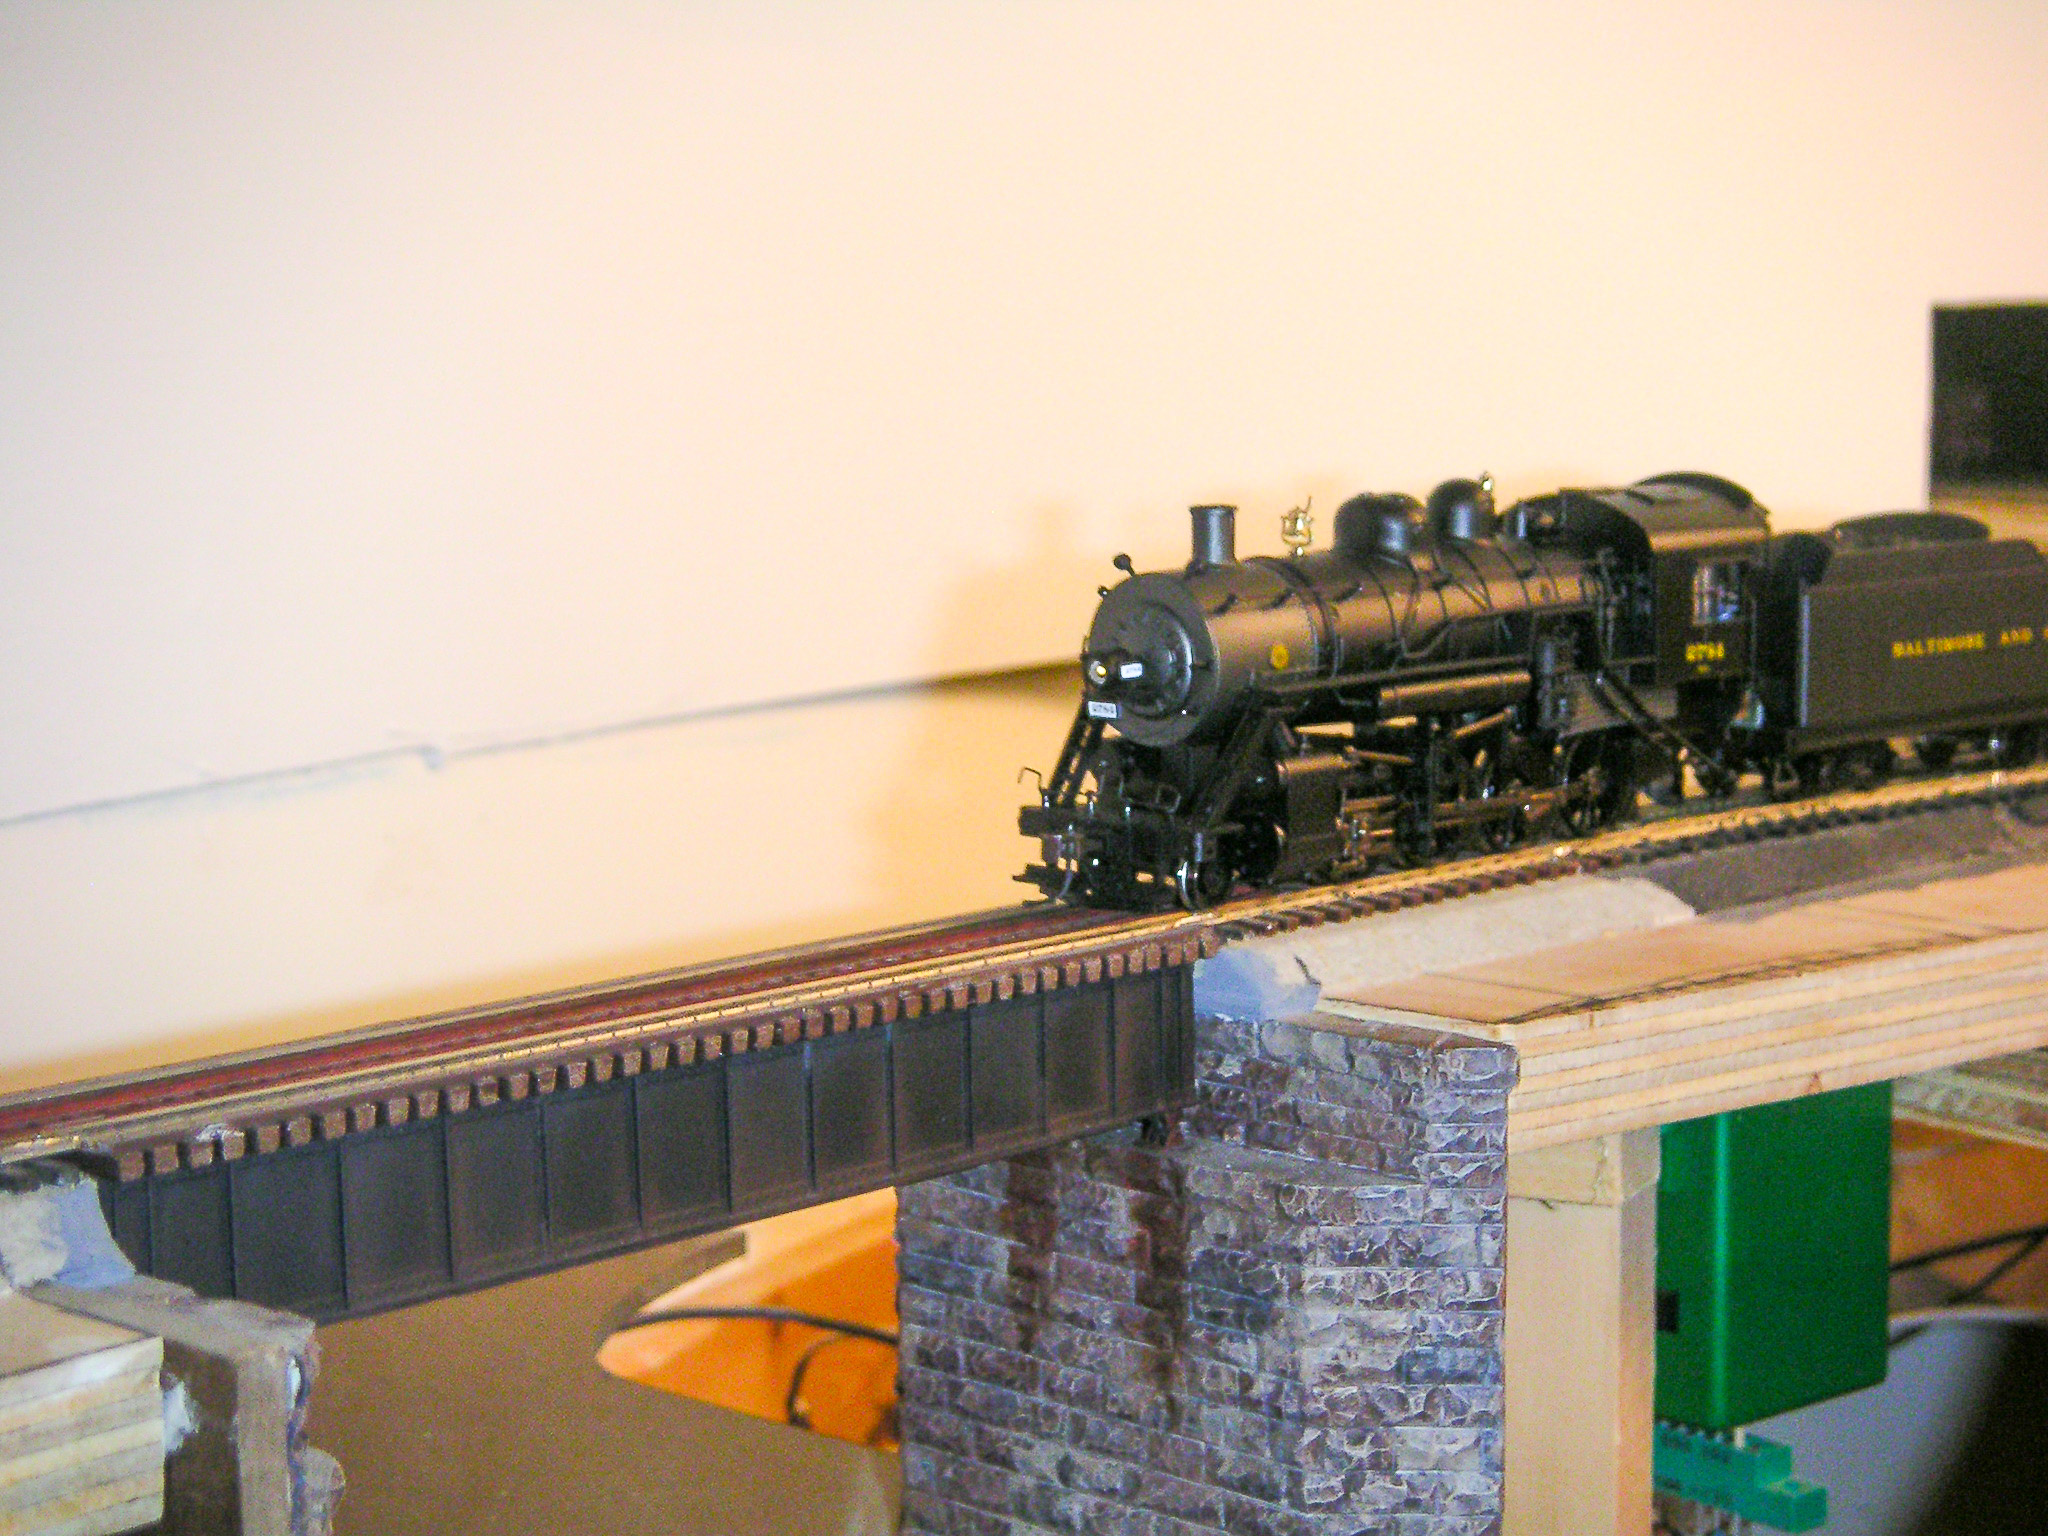
Photo by John Webster
Next was puzzling out what would fit. The problem was the very end of an easemented curve at one end of the bridge, and the turnout into Marsh Hill yard at the other.
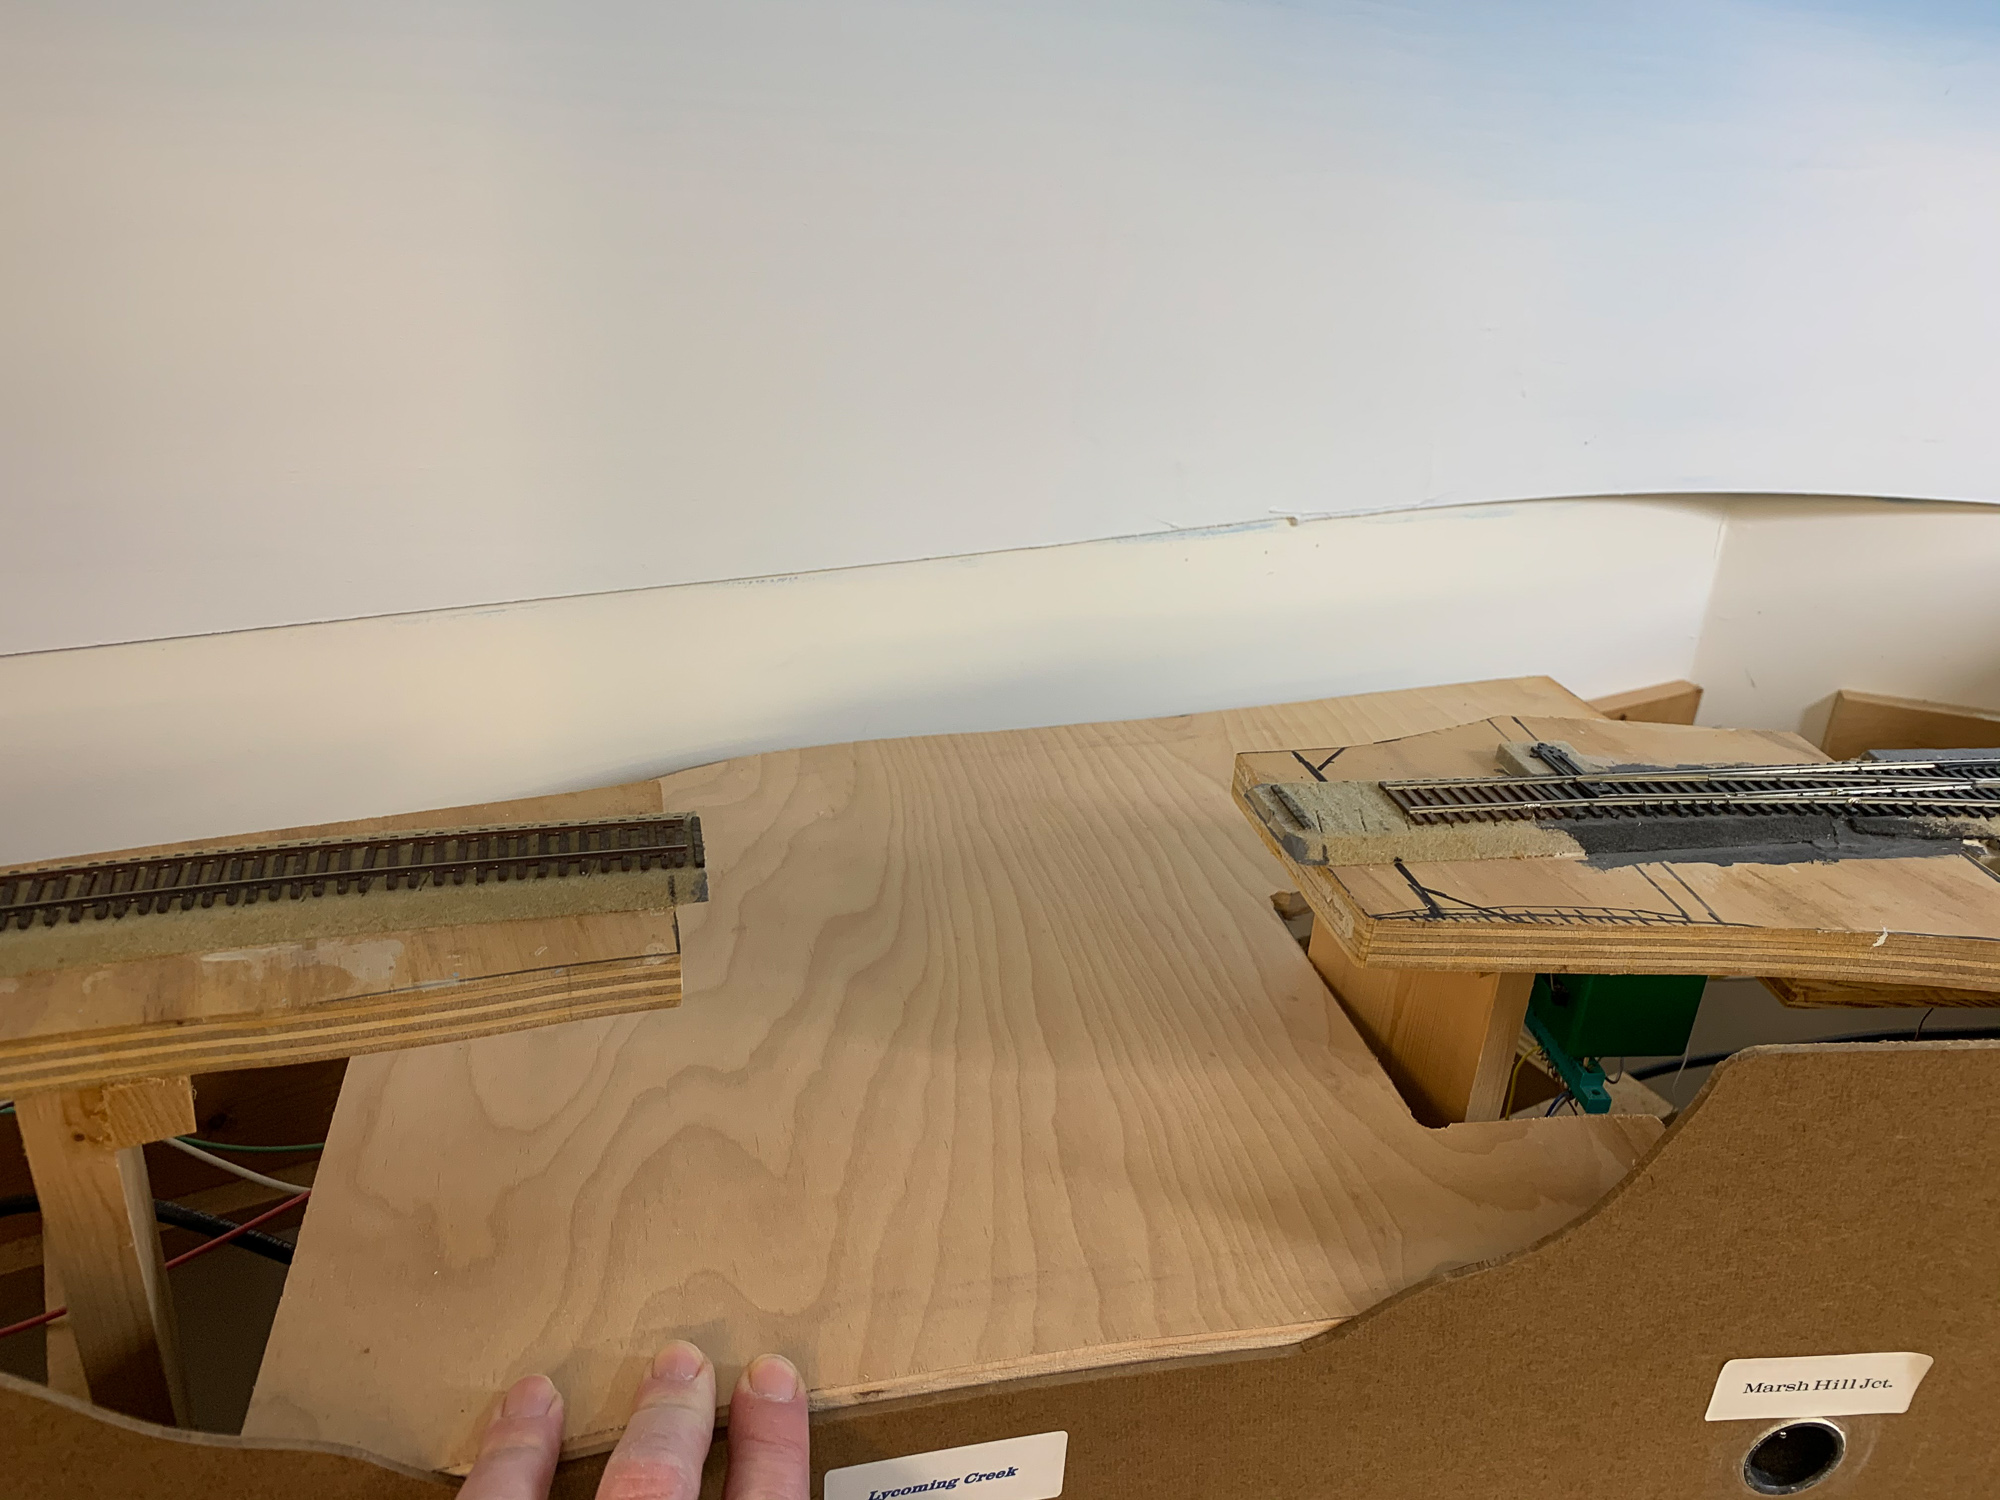
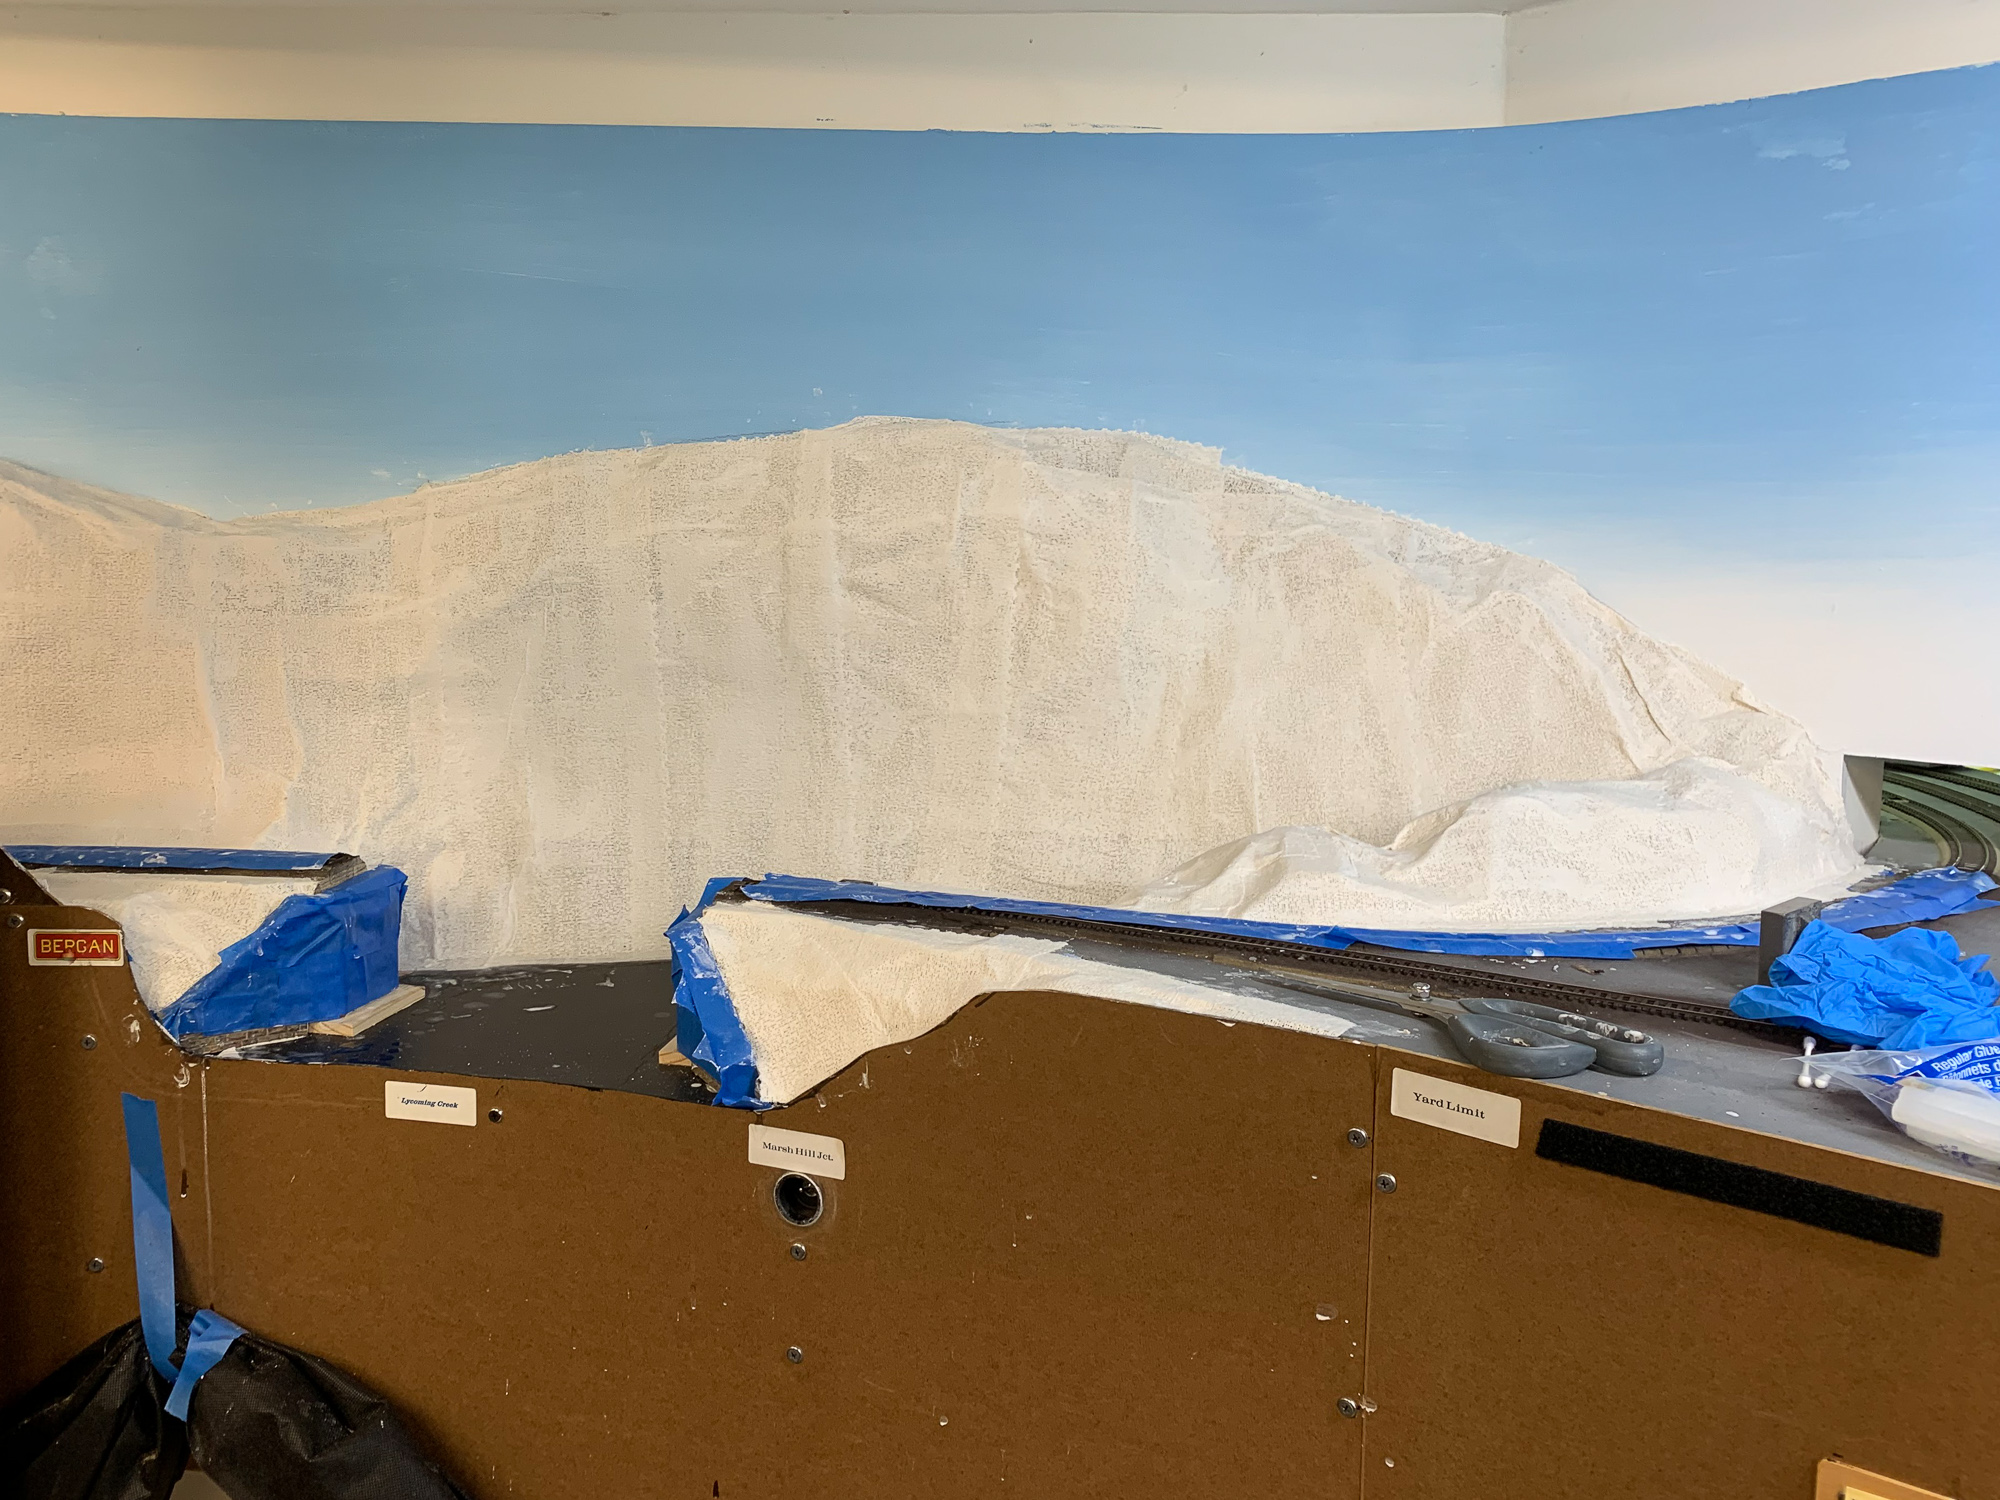
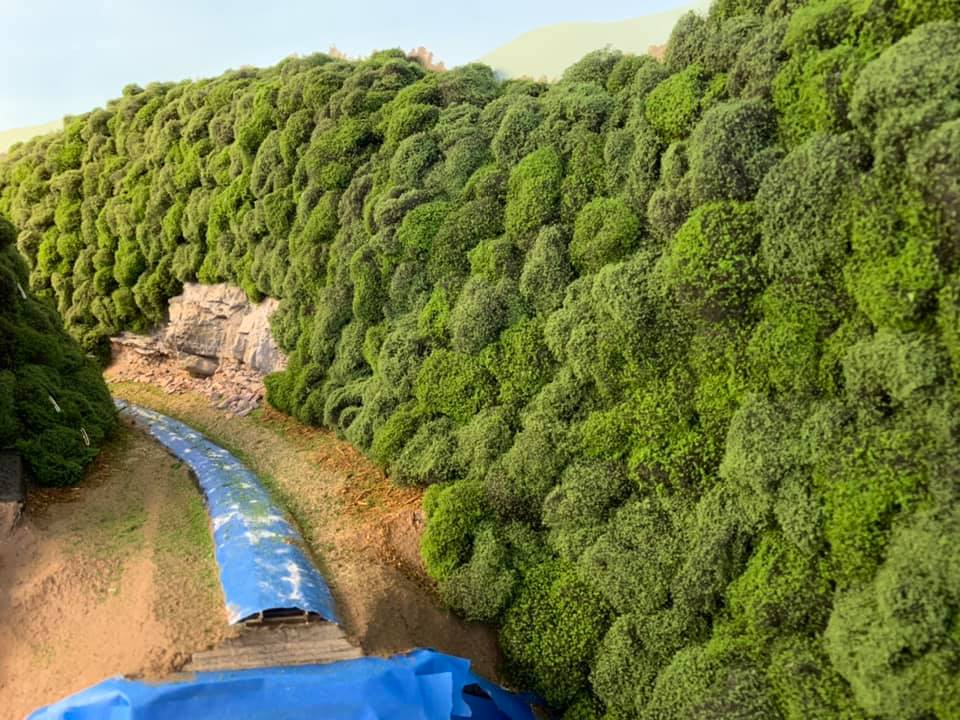
Original gap with new plywood streambed.
I traced the track alignment to match the easement.
Lots of puzzling and head scratching to get everything to line up.
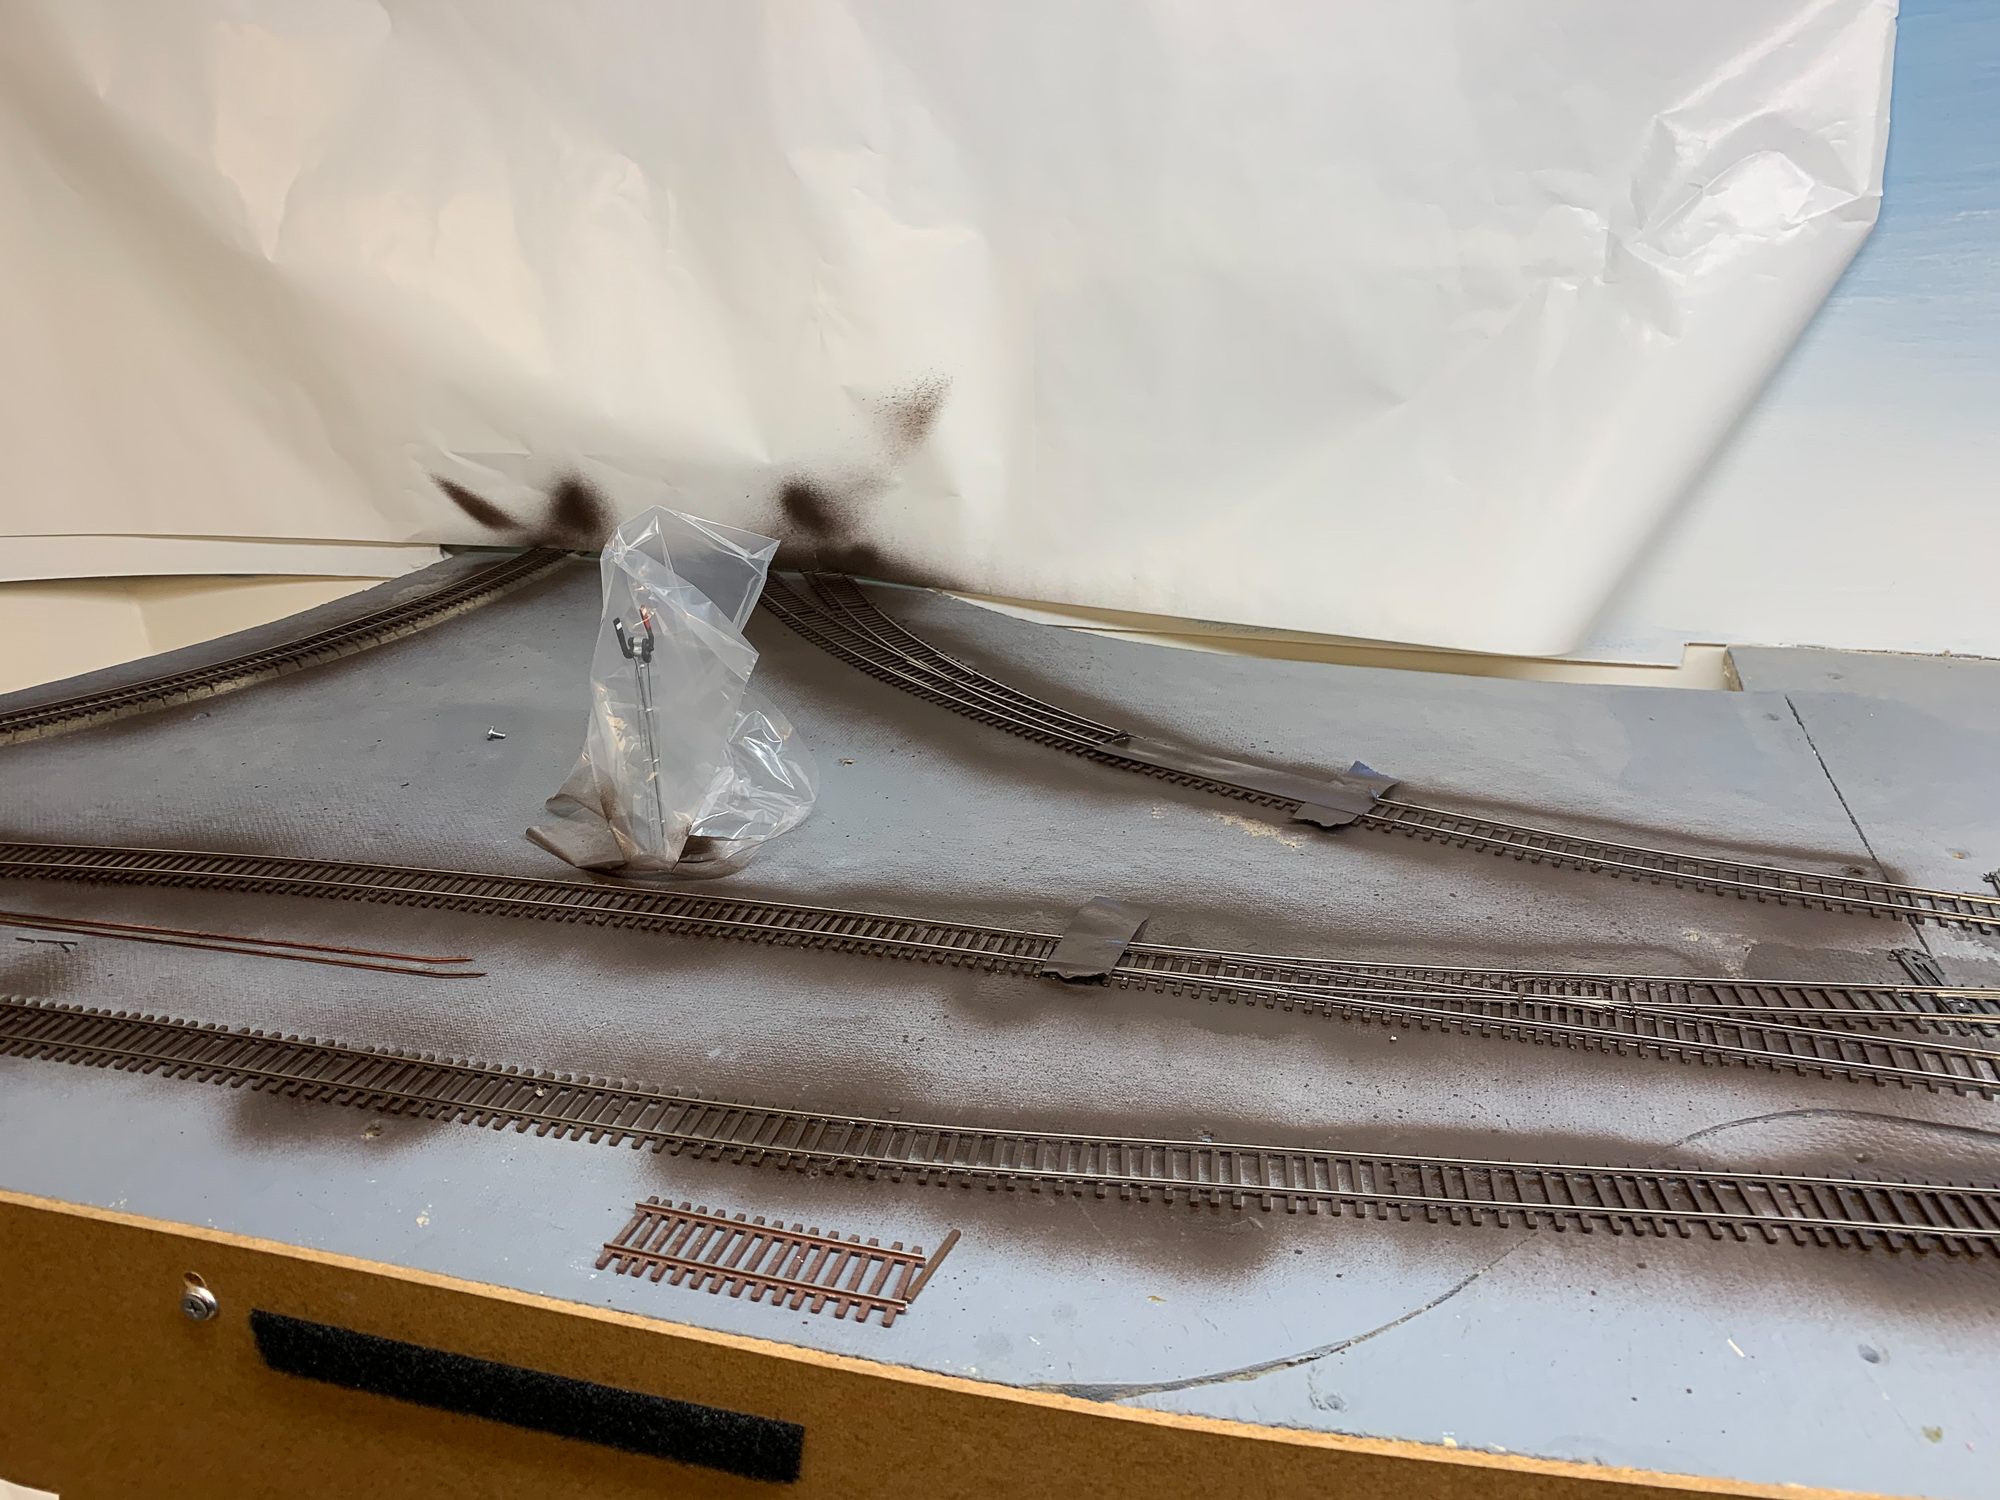
Always paint your track!
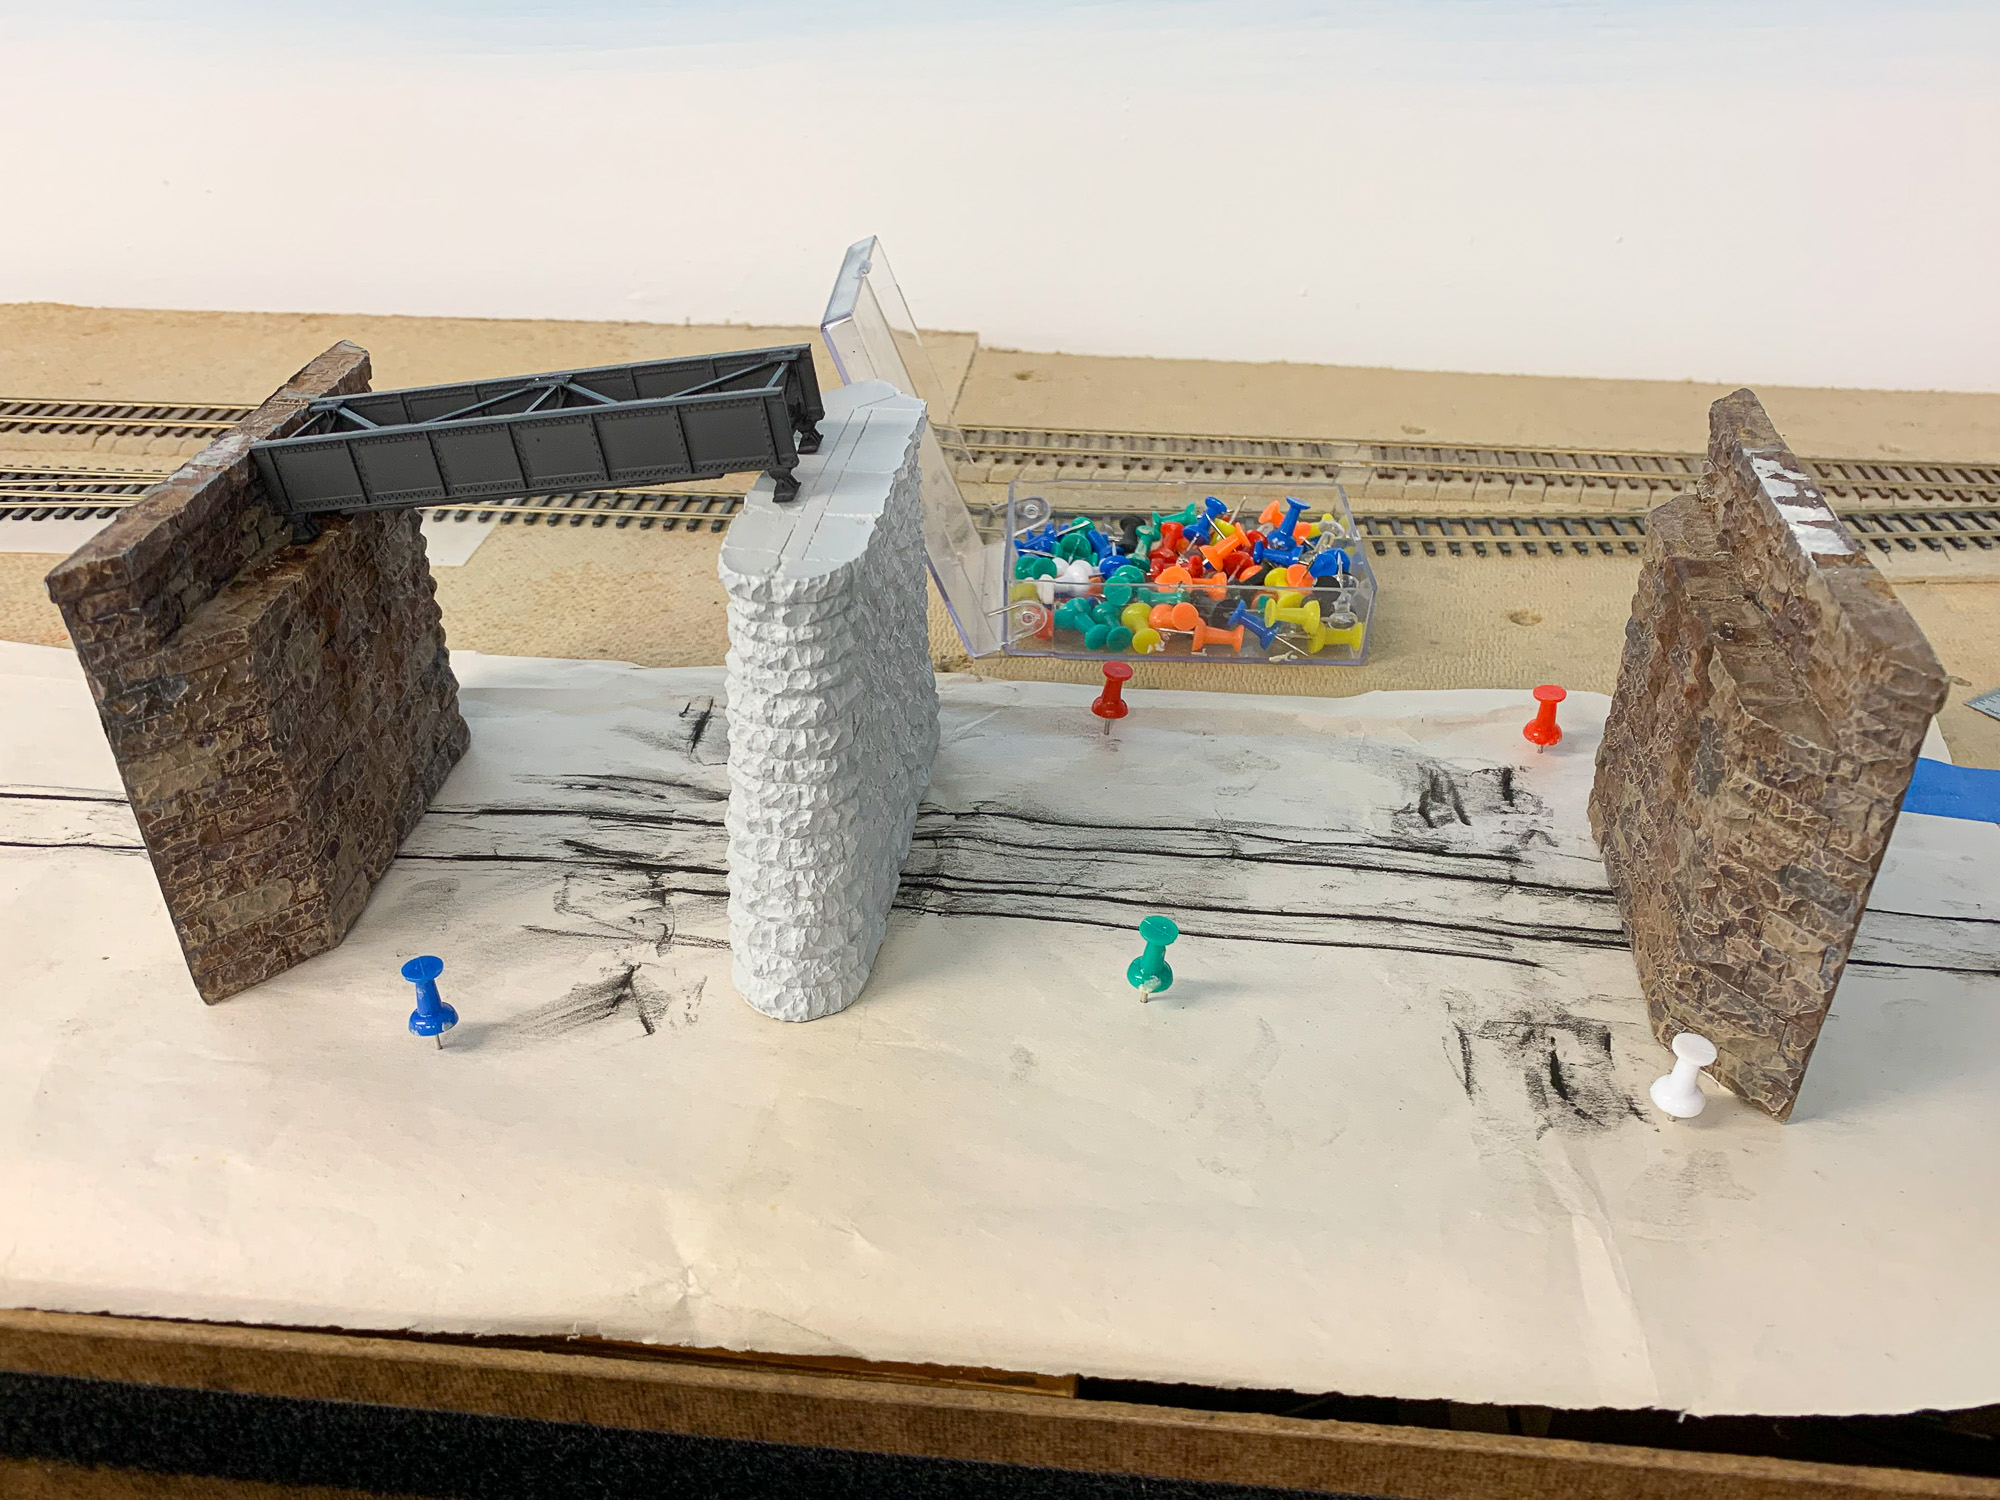
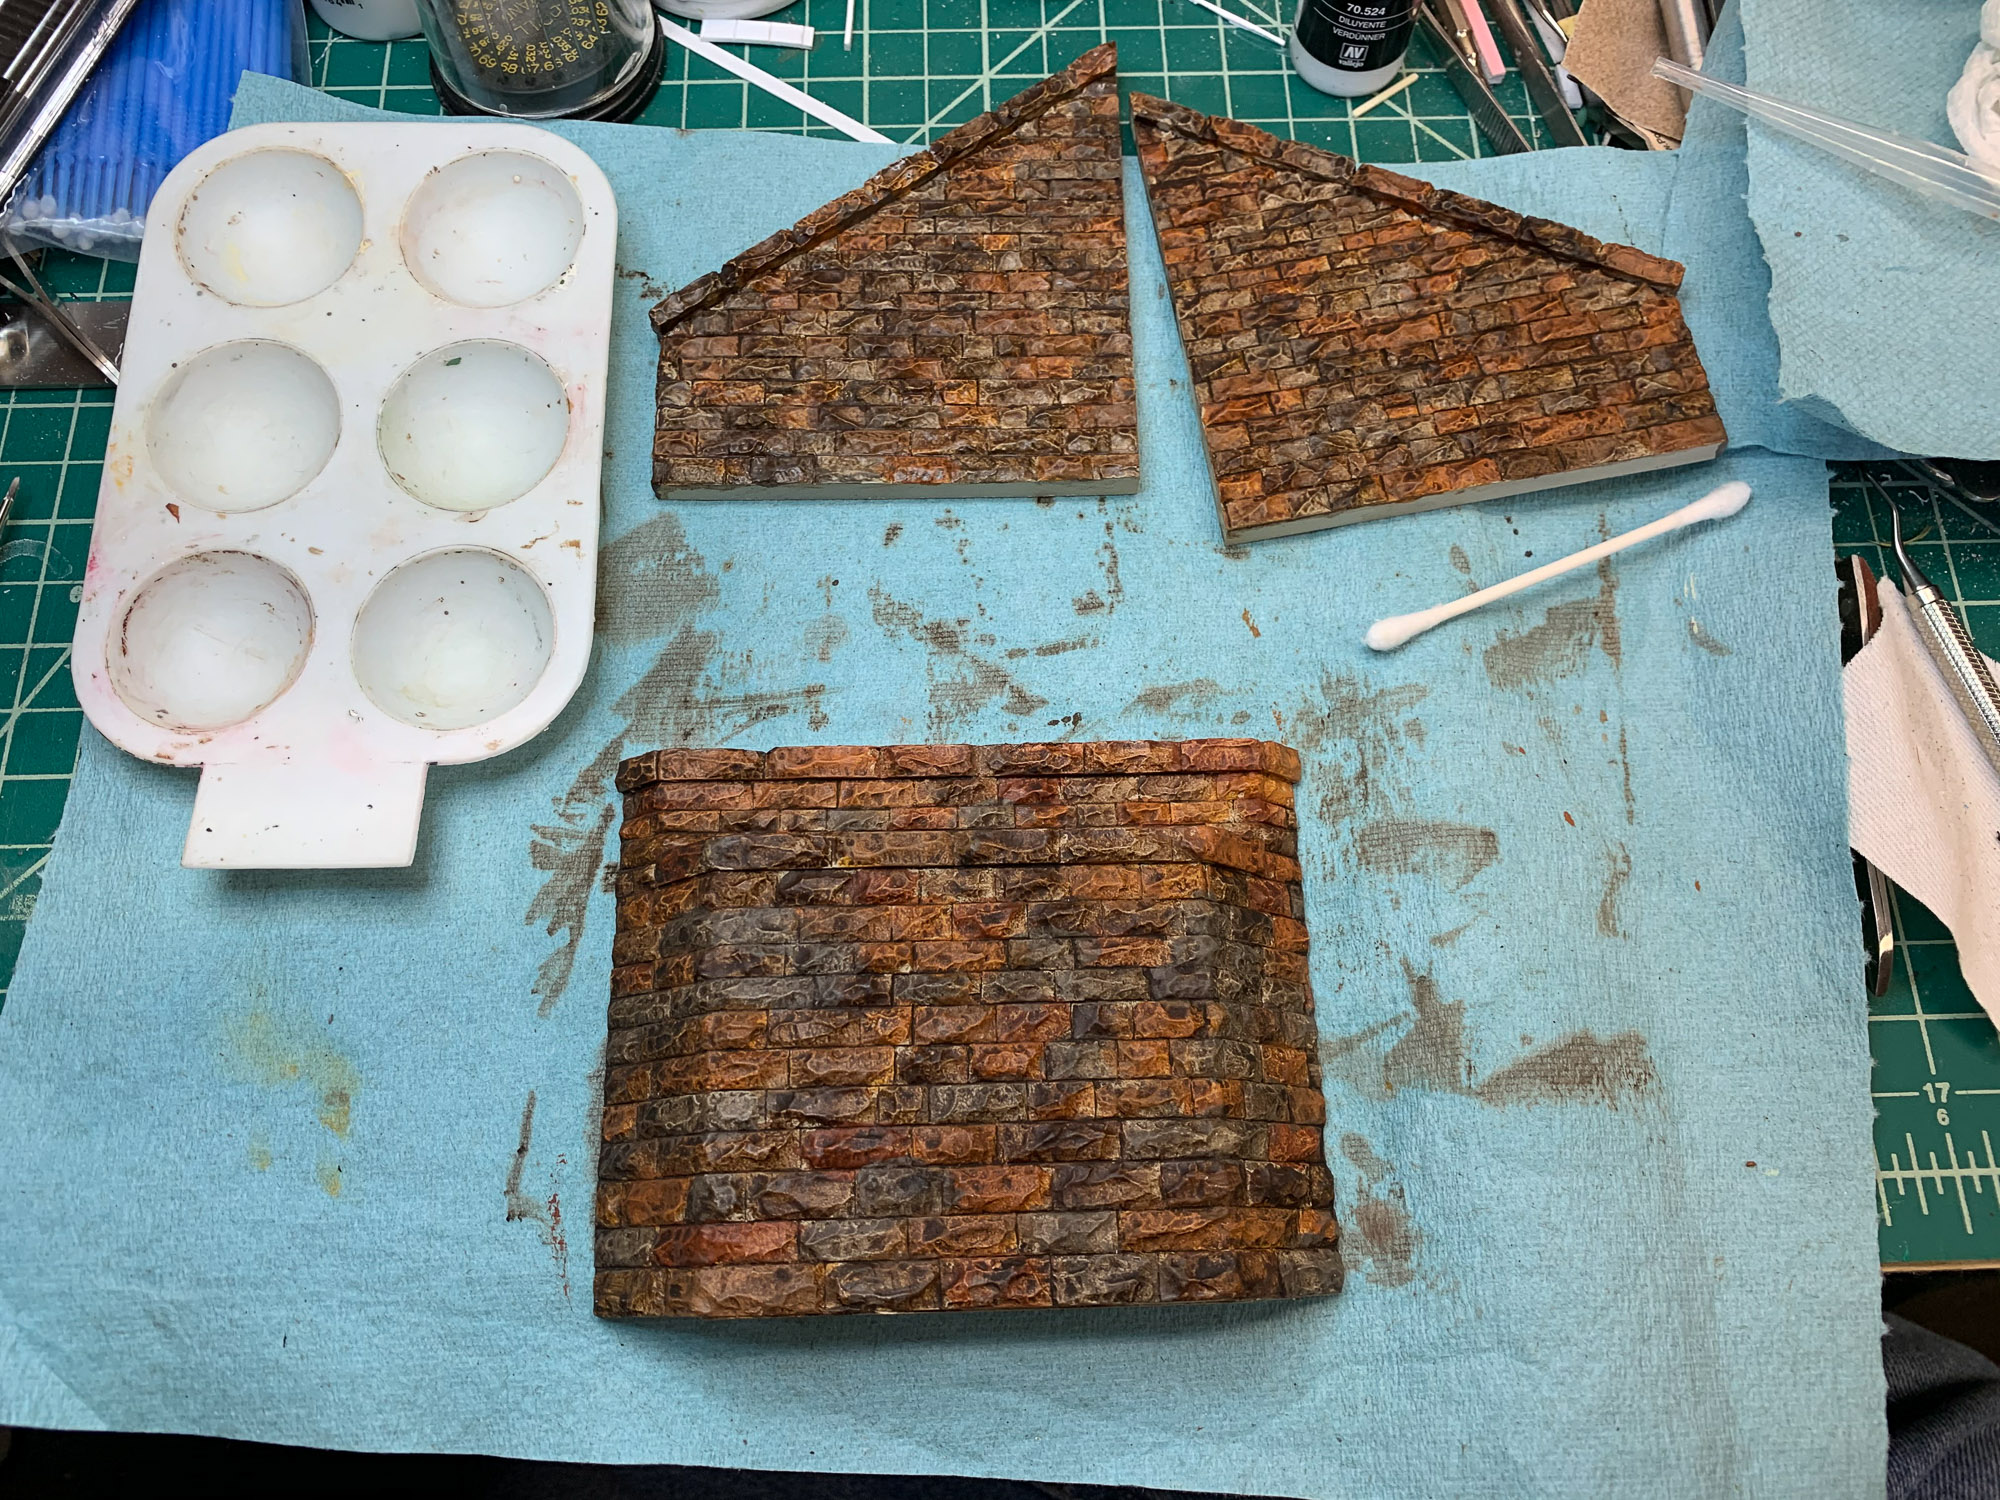
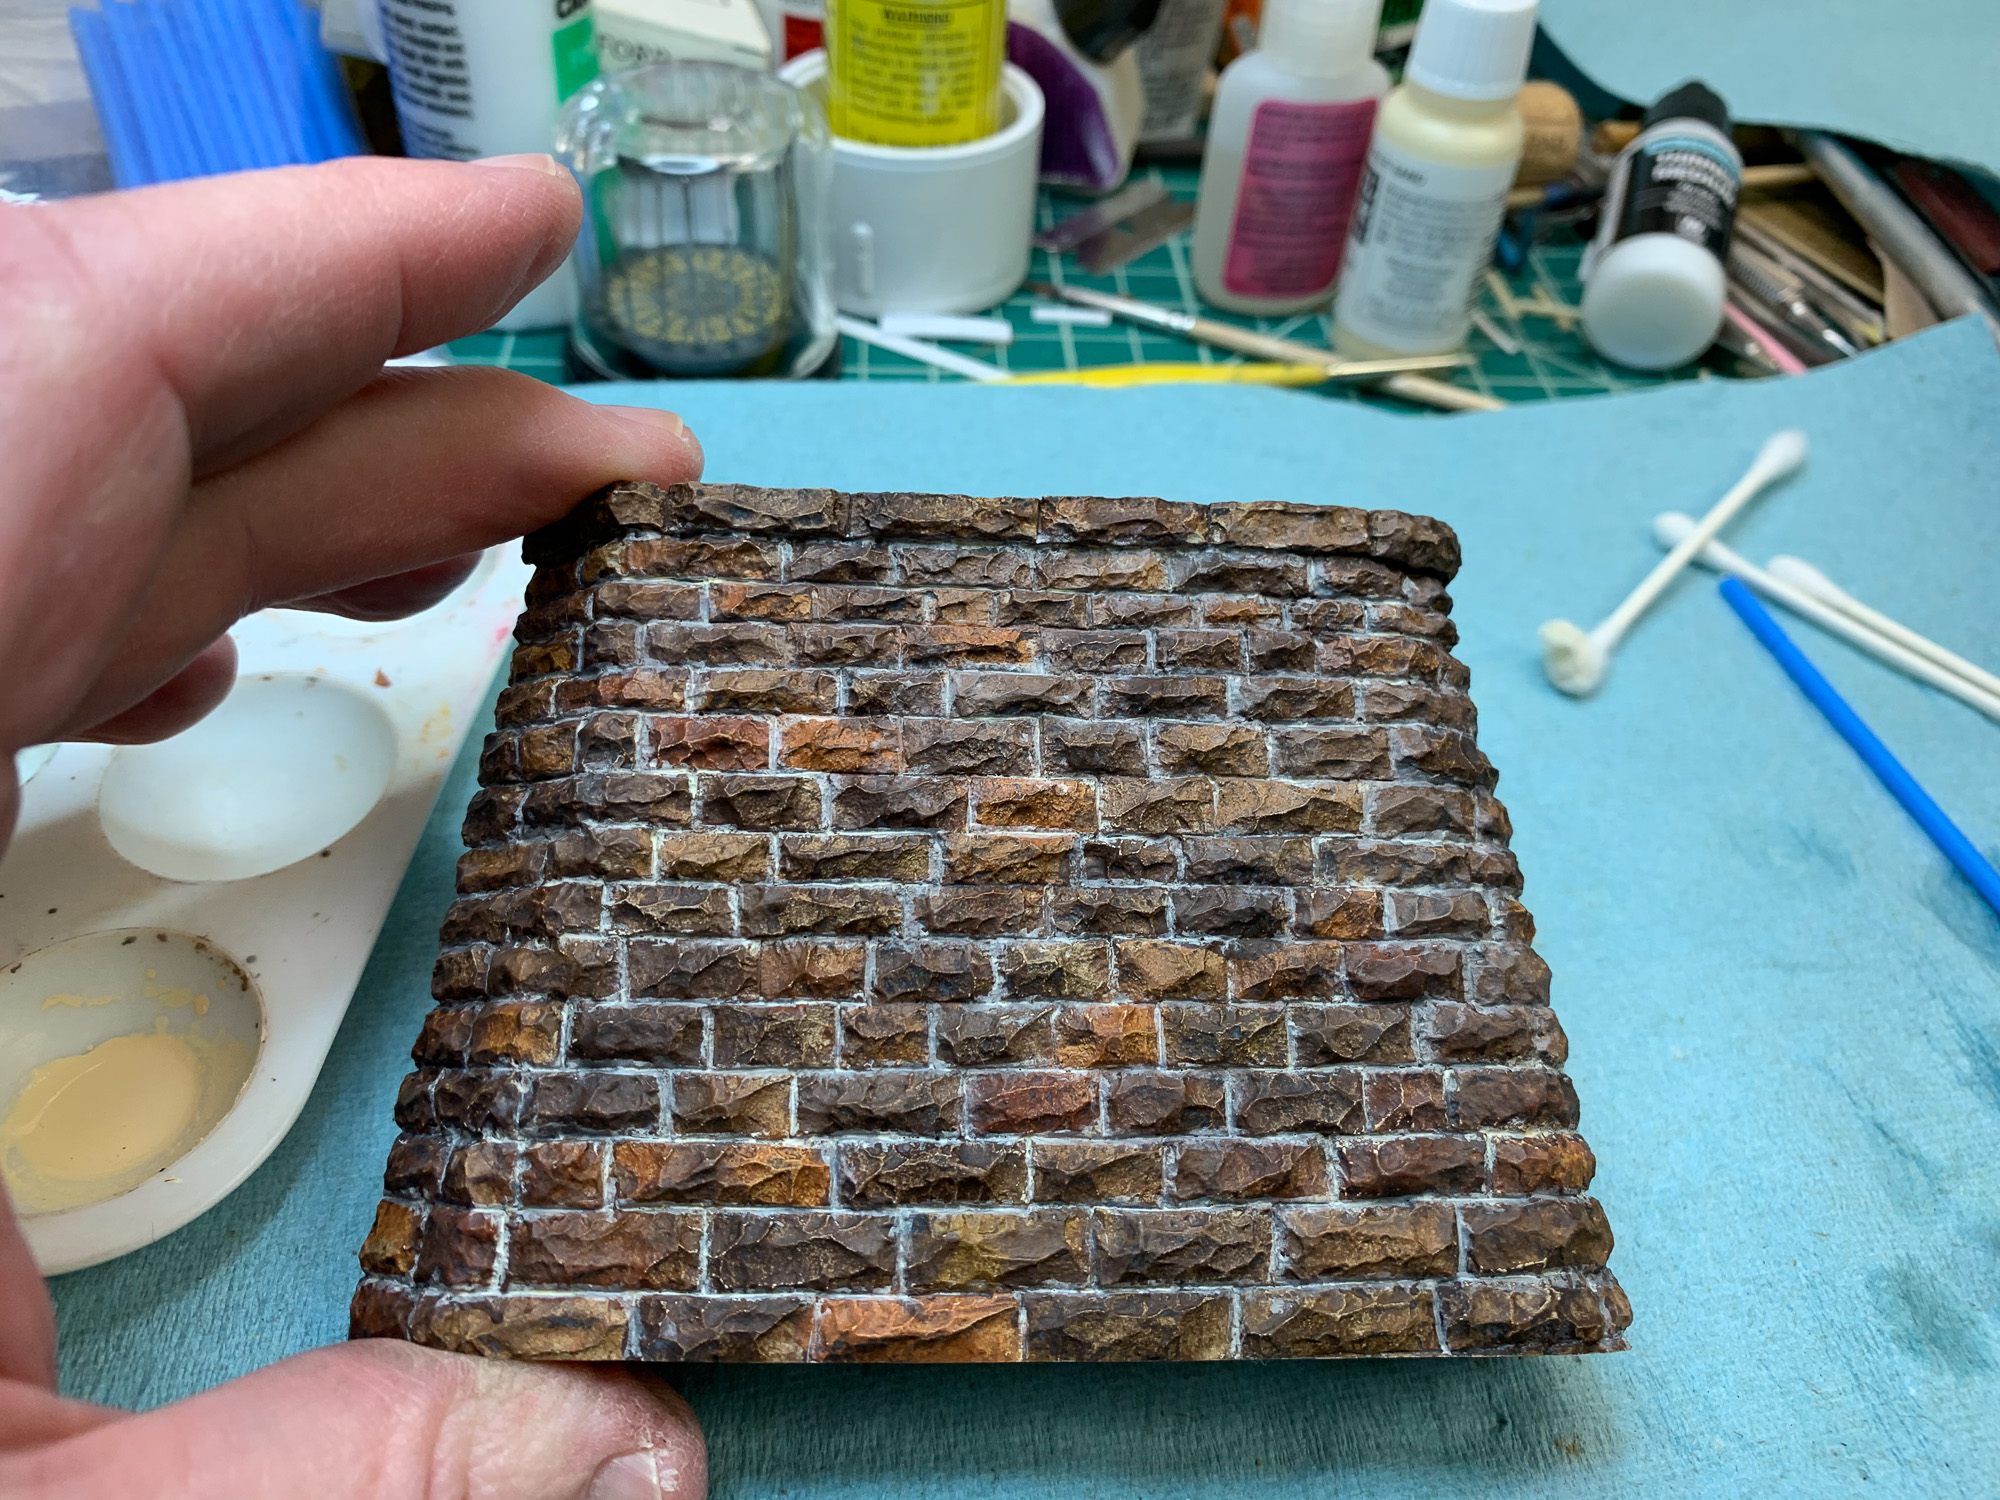
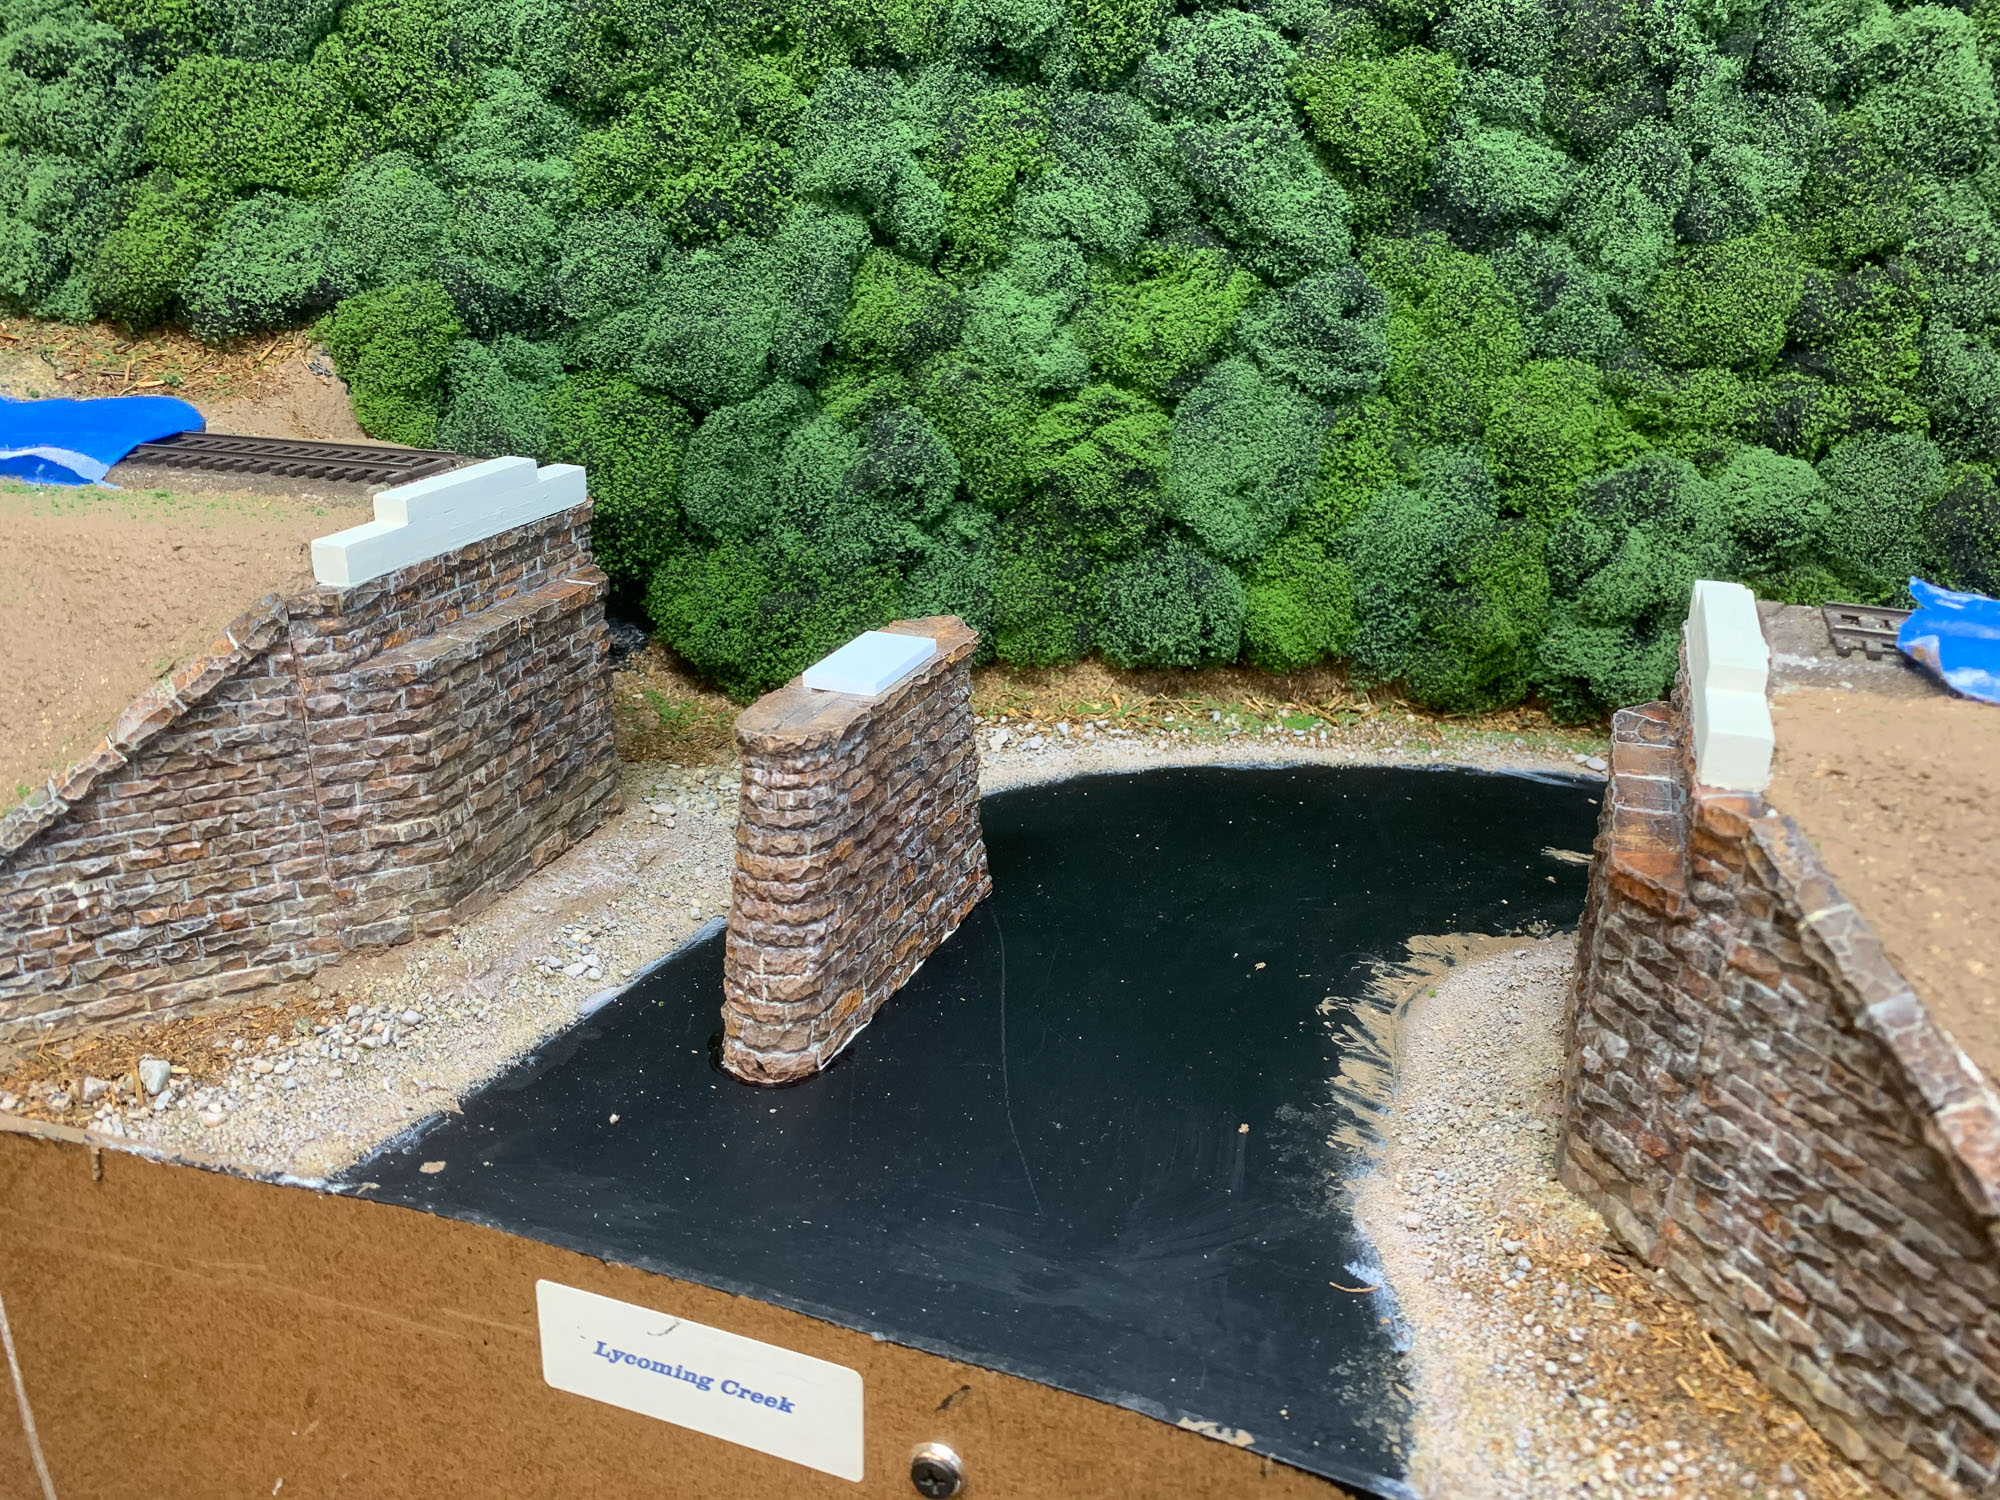
After sealing and painting the new streambed, I got the abutments and pier in place. These were also painted to look like Pennsy-style cut stone.
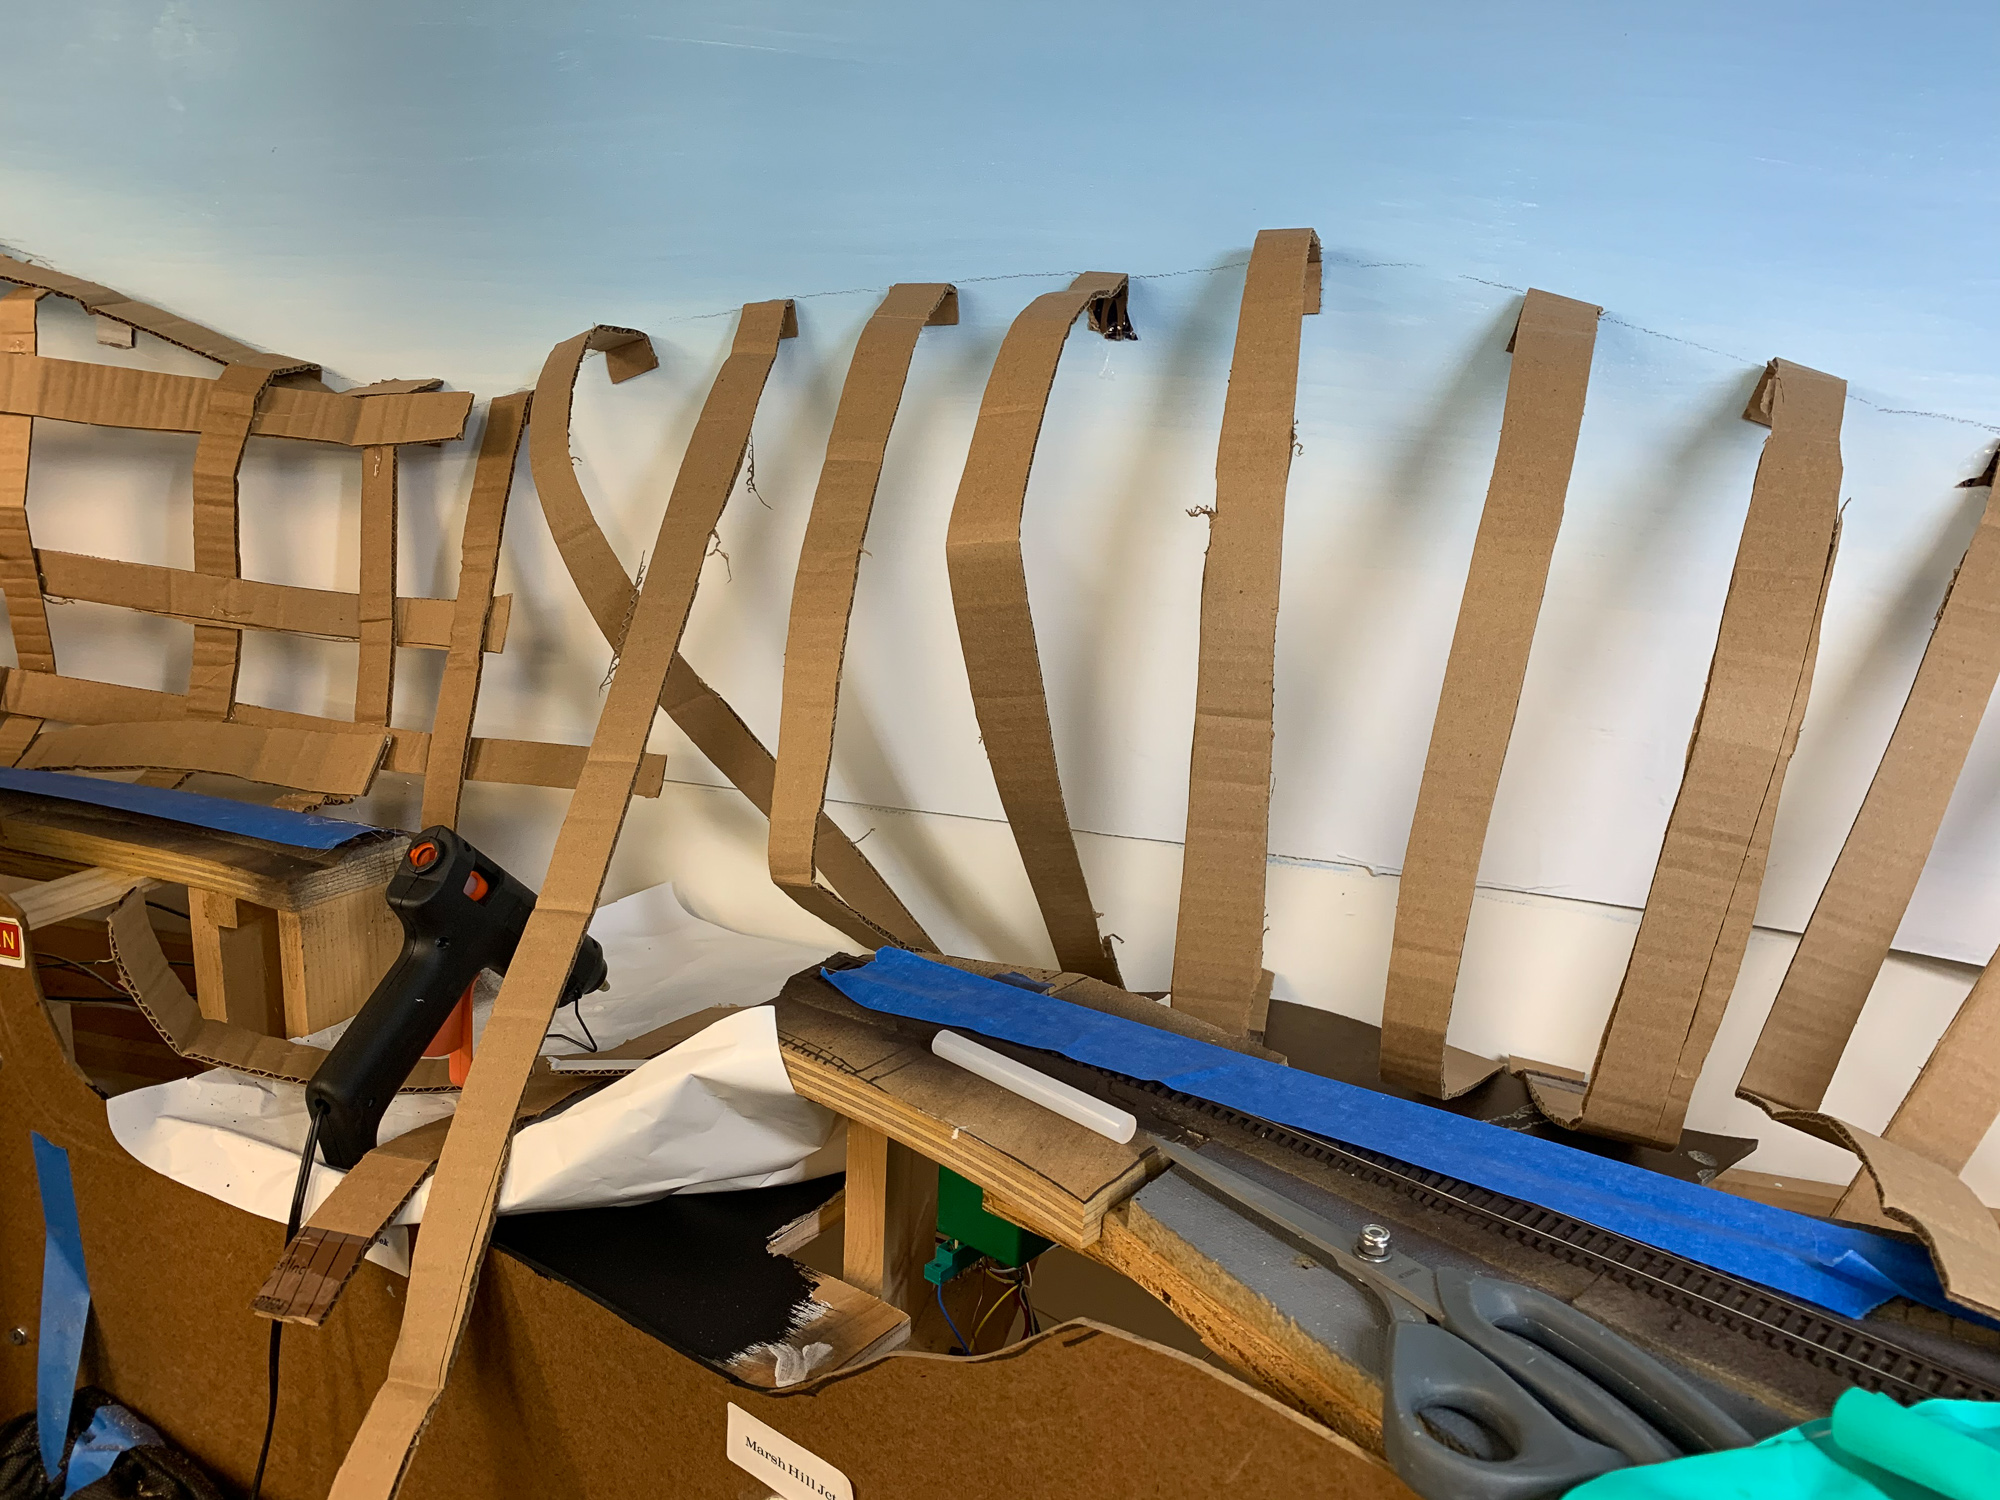
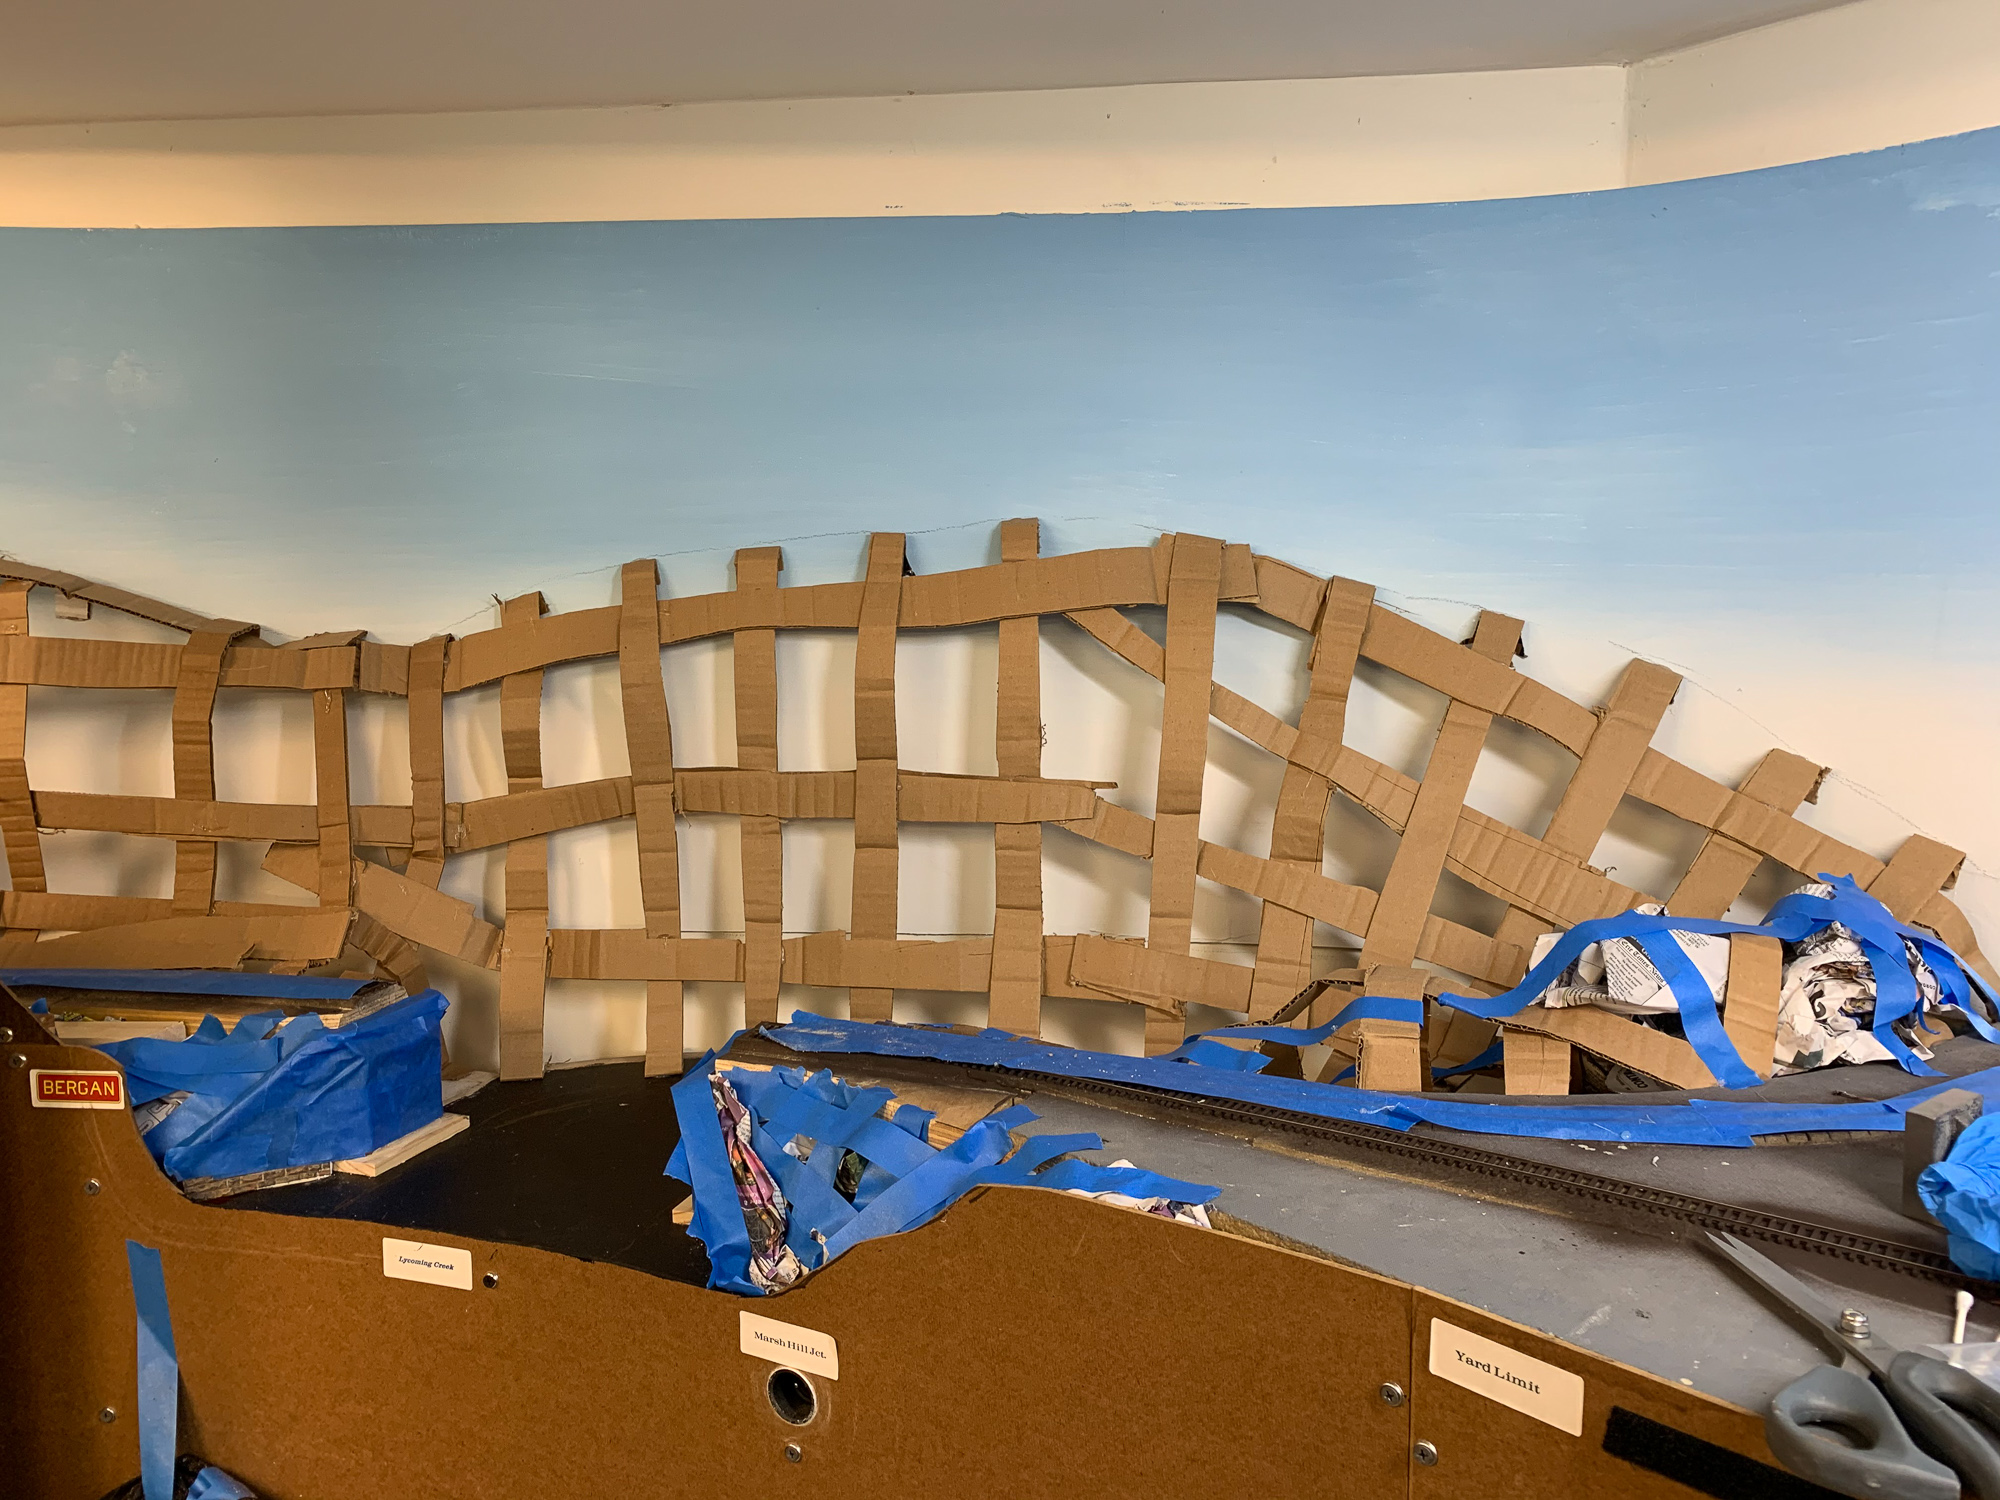
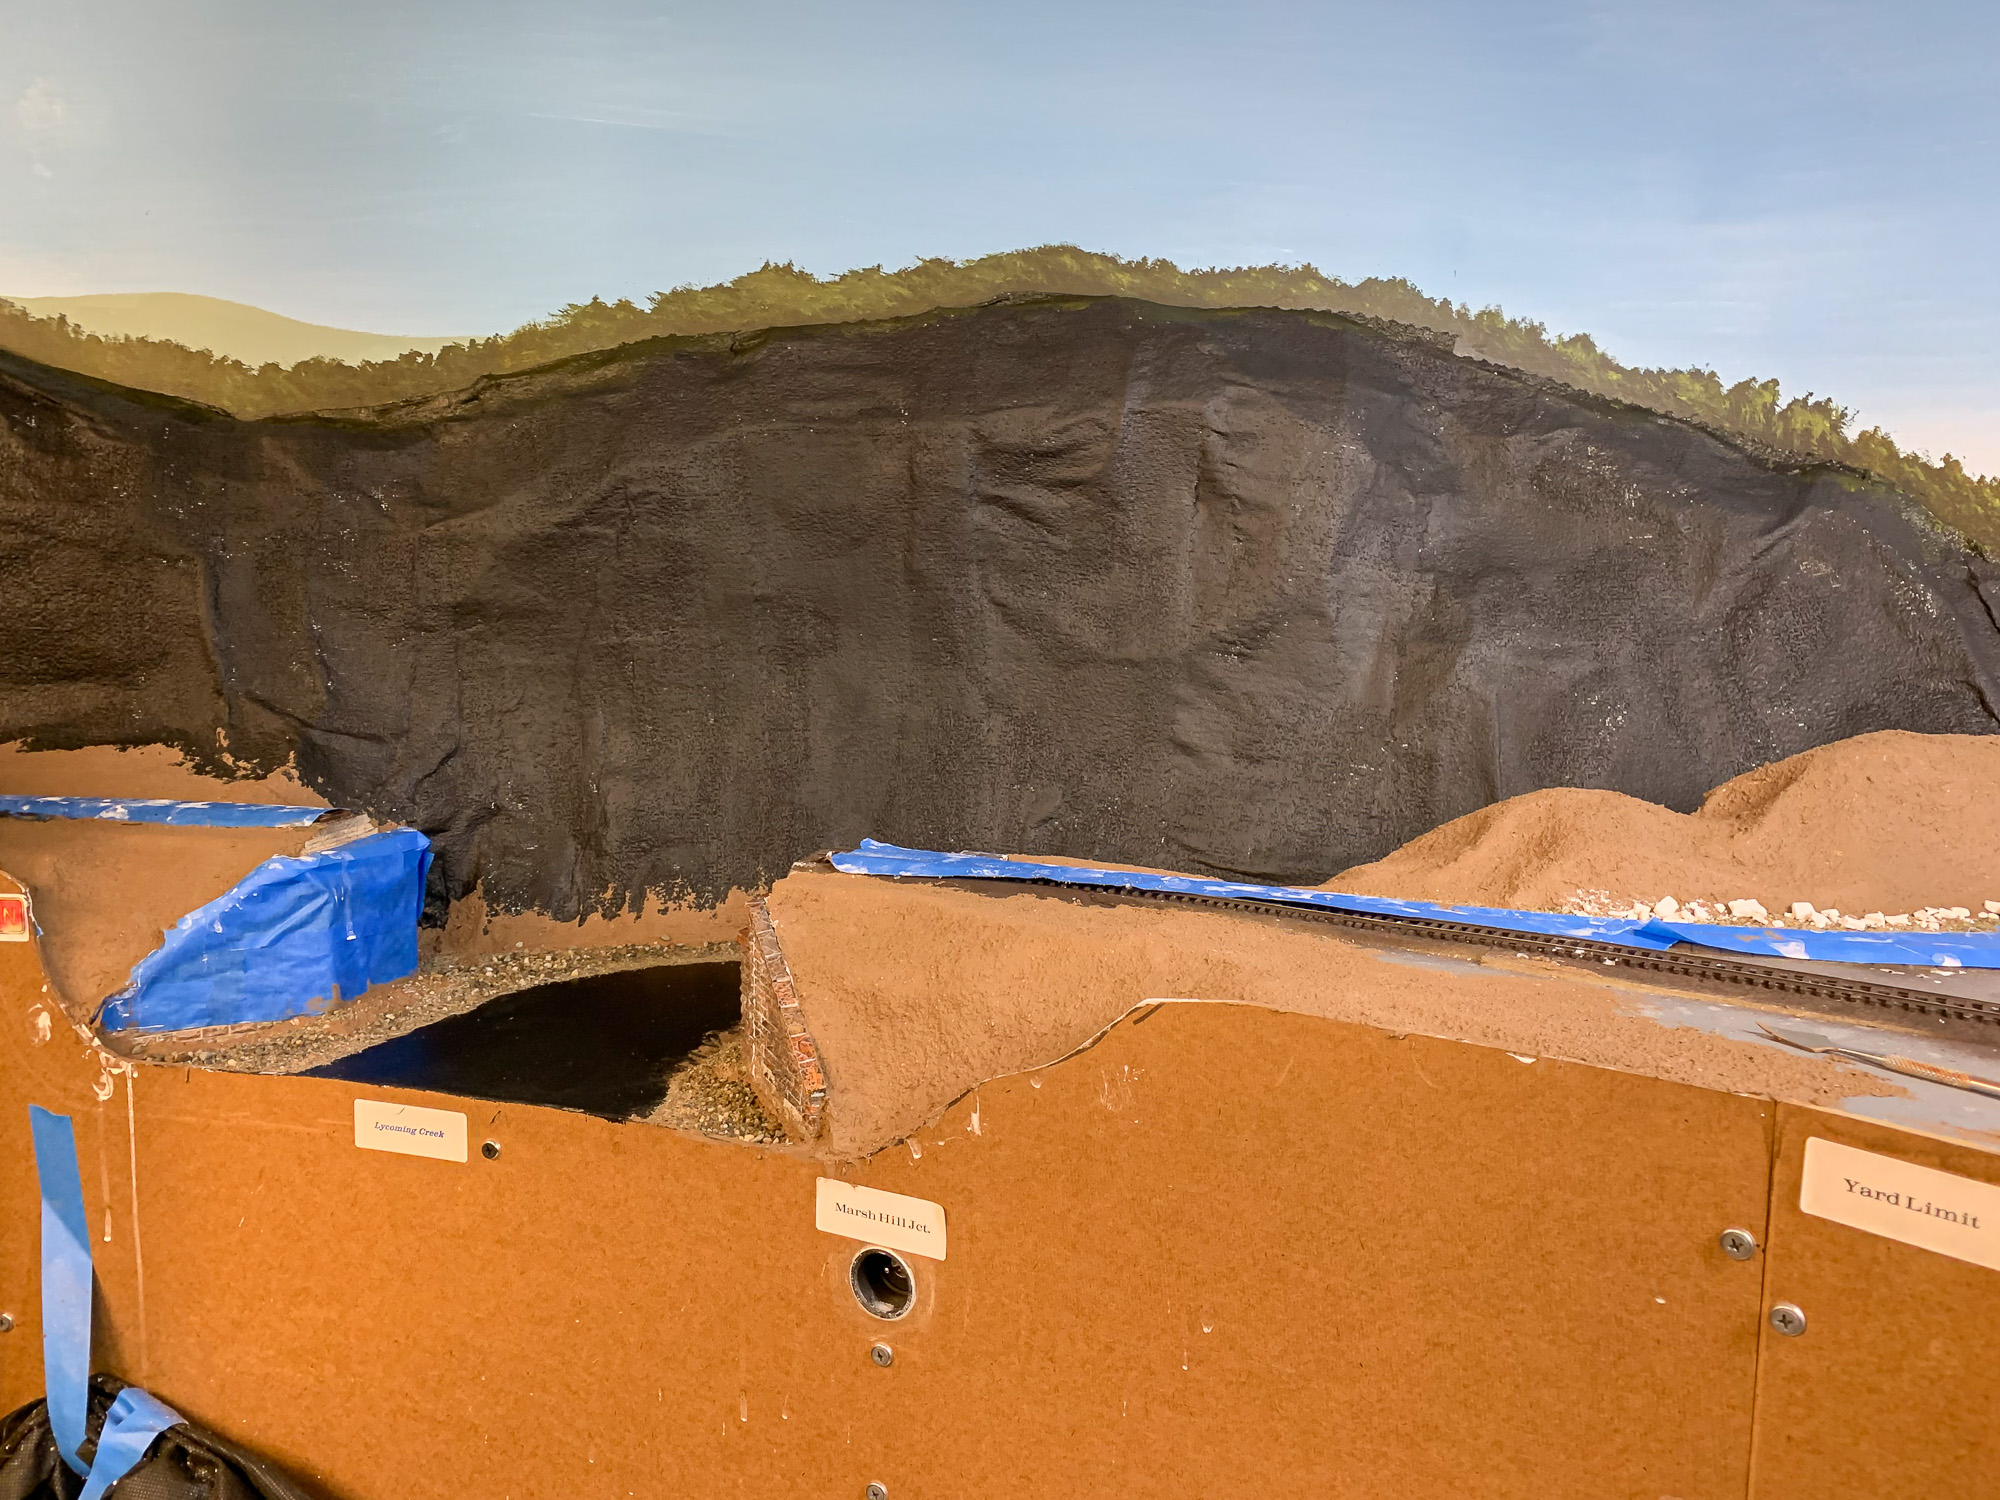
Then, cardboard lattice and plaster gauze for the scenery base.
The white plaster was painted flat black where the trees would go, and the rest got a layer of “ground goop”.
Then, several acres of puffball trees.
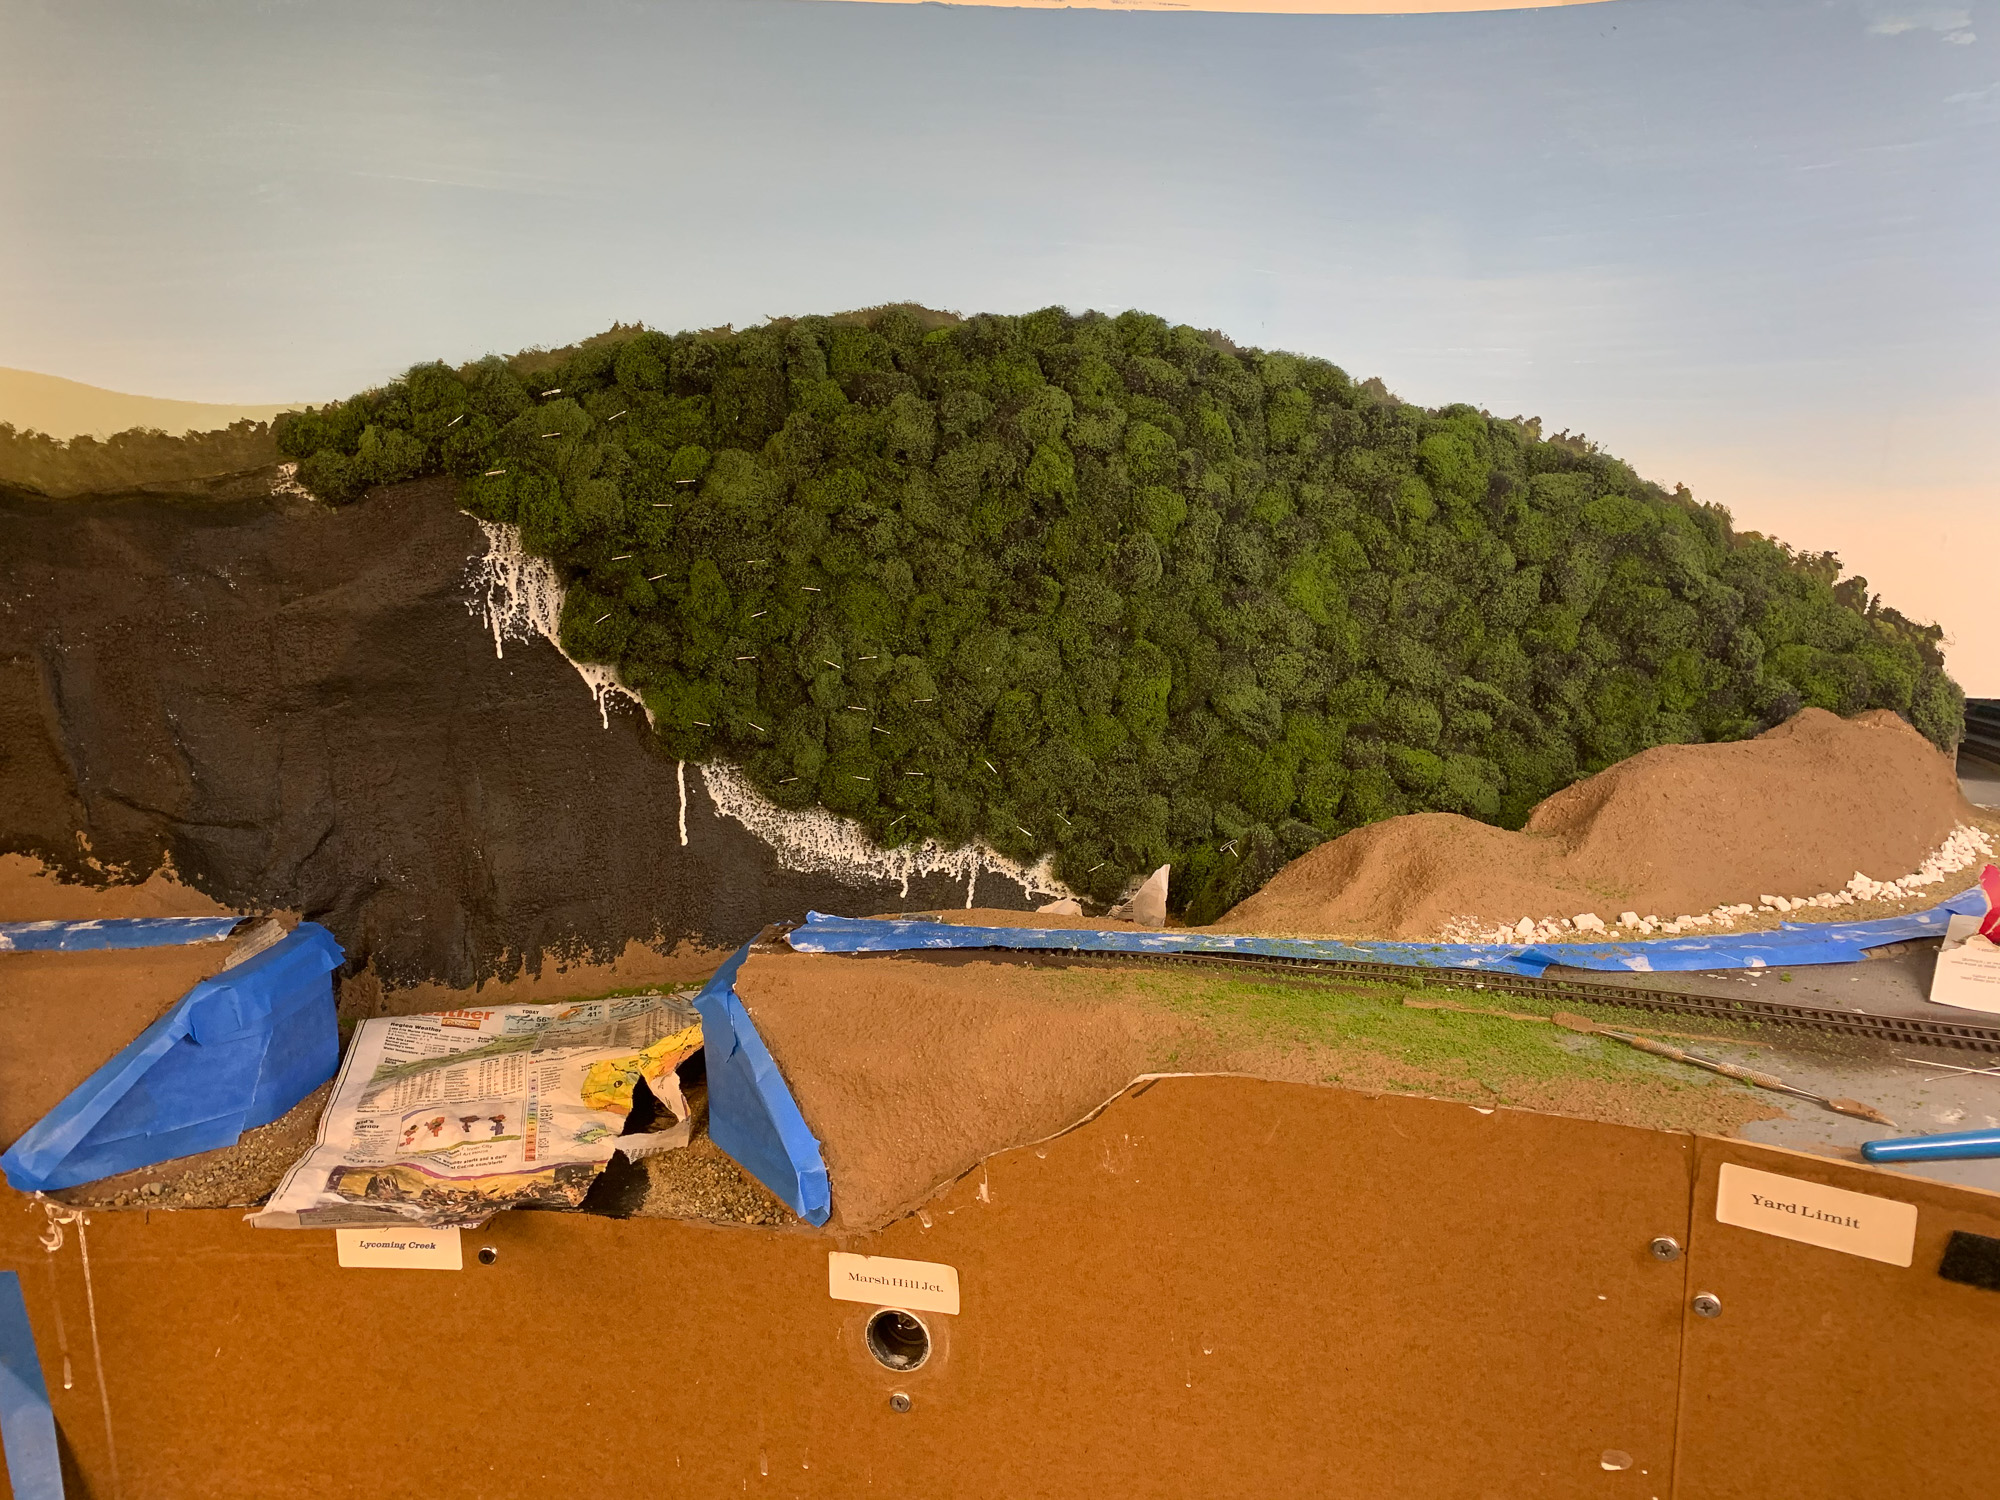
It’s a BIG mountainside…
I added a rock cut in the “valley” in case anyone looked in there. I thought it would add some interest for any potential photos as well:
Also added material to form the stream banks while this was going on:
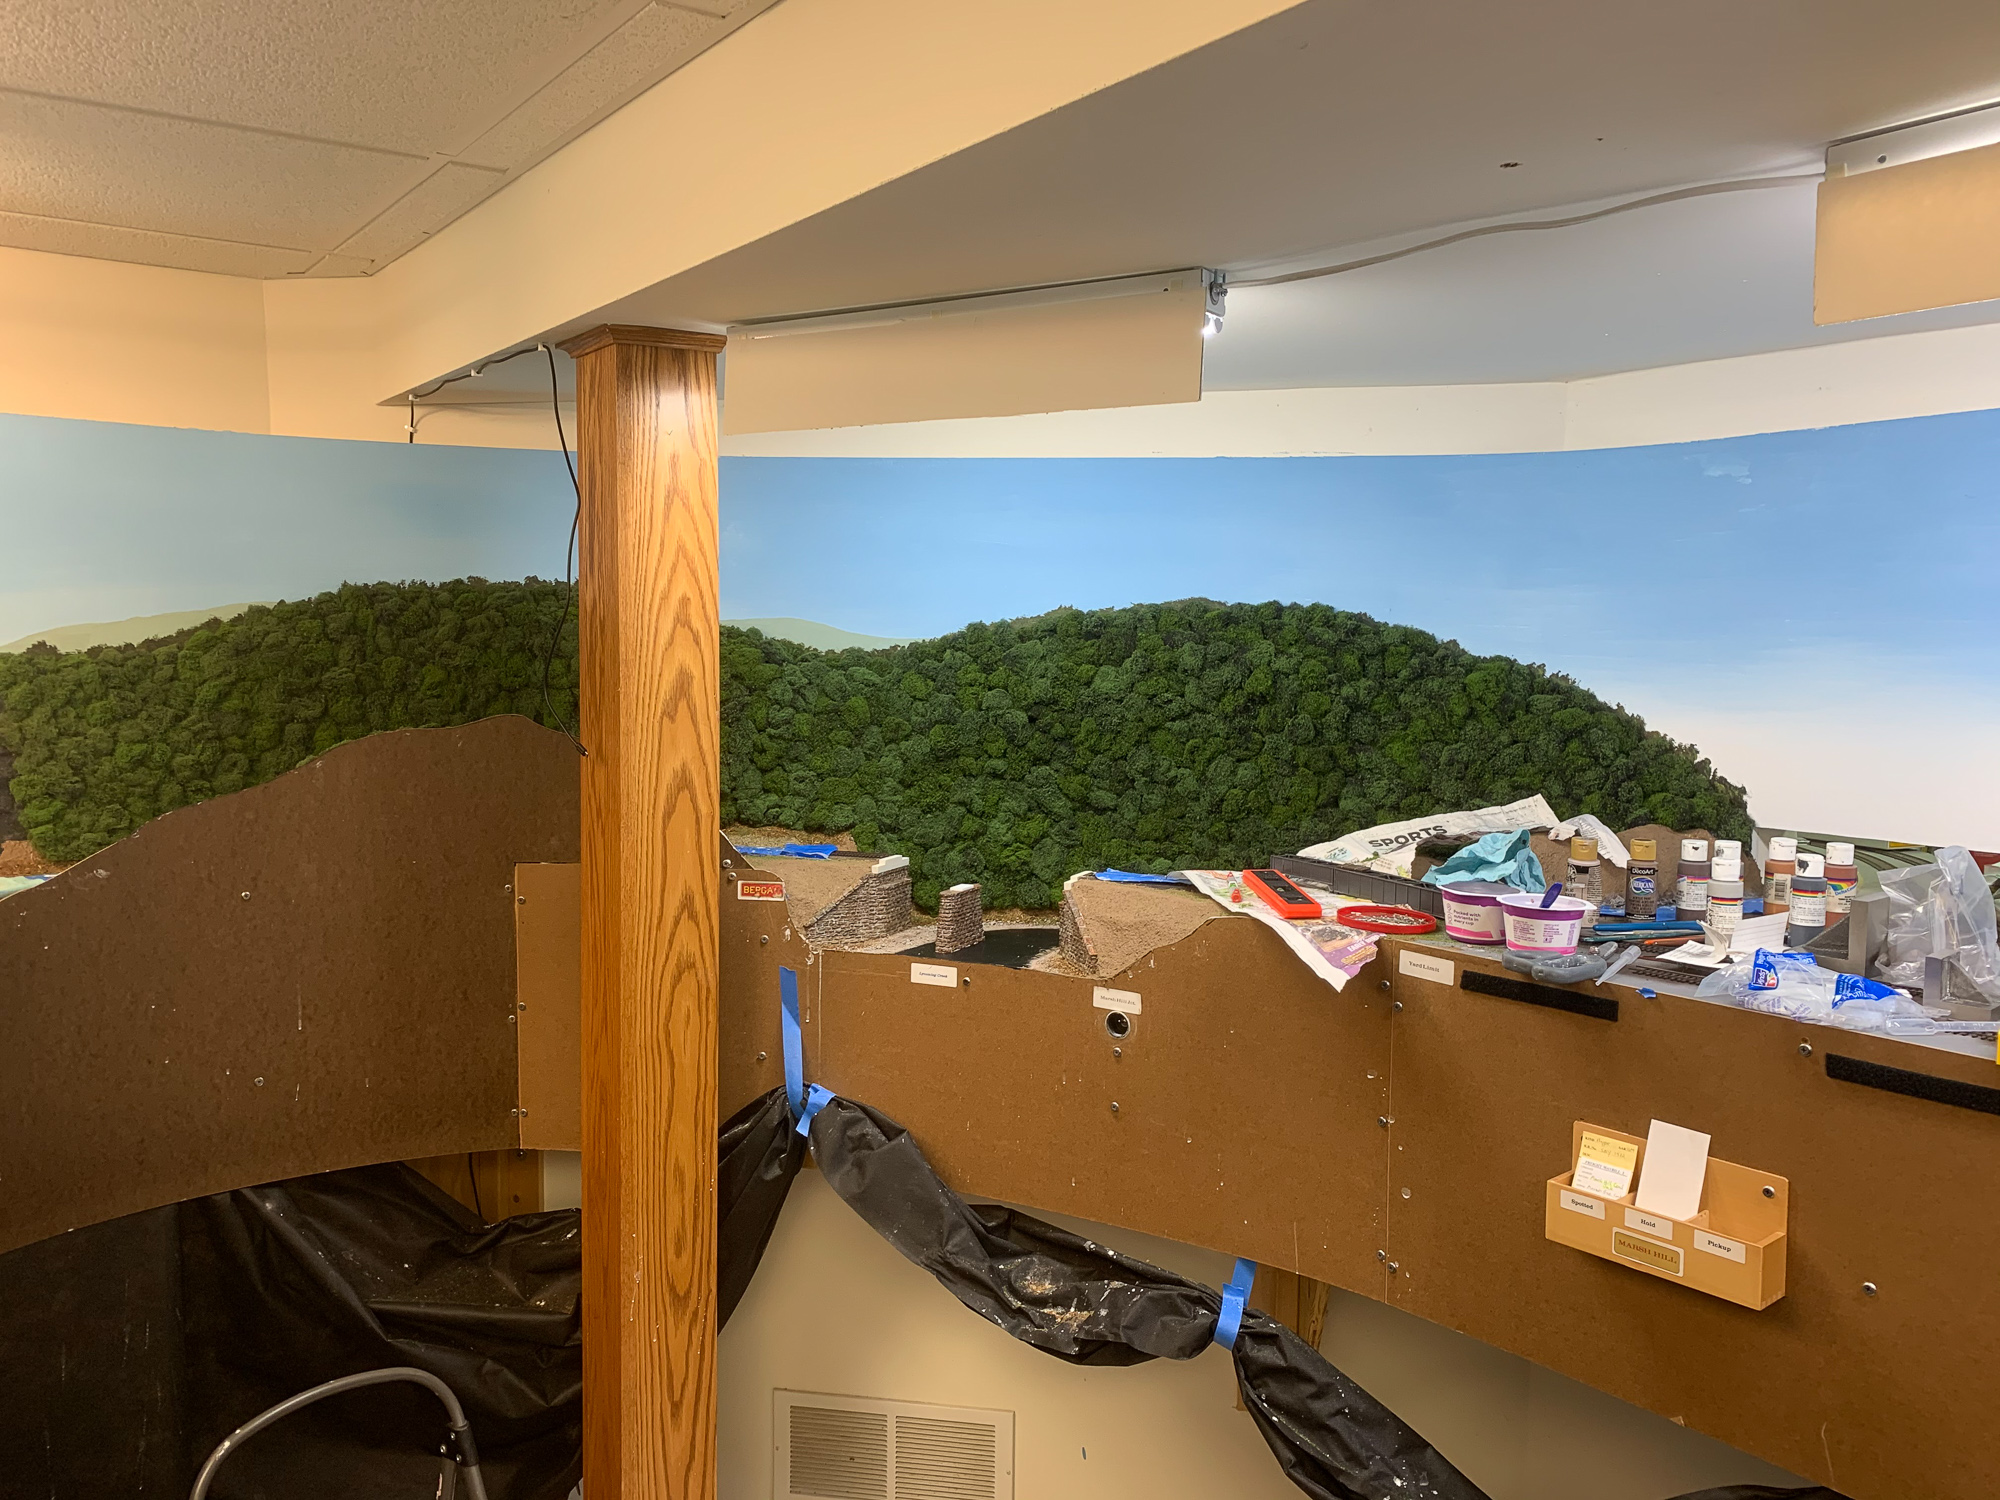
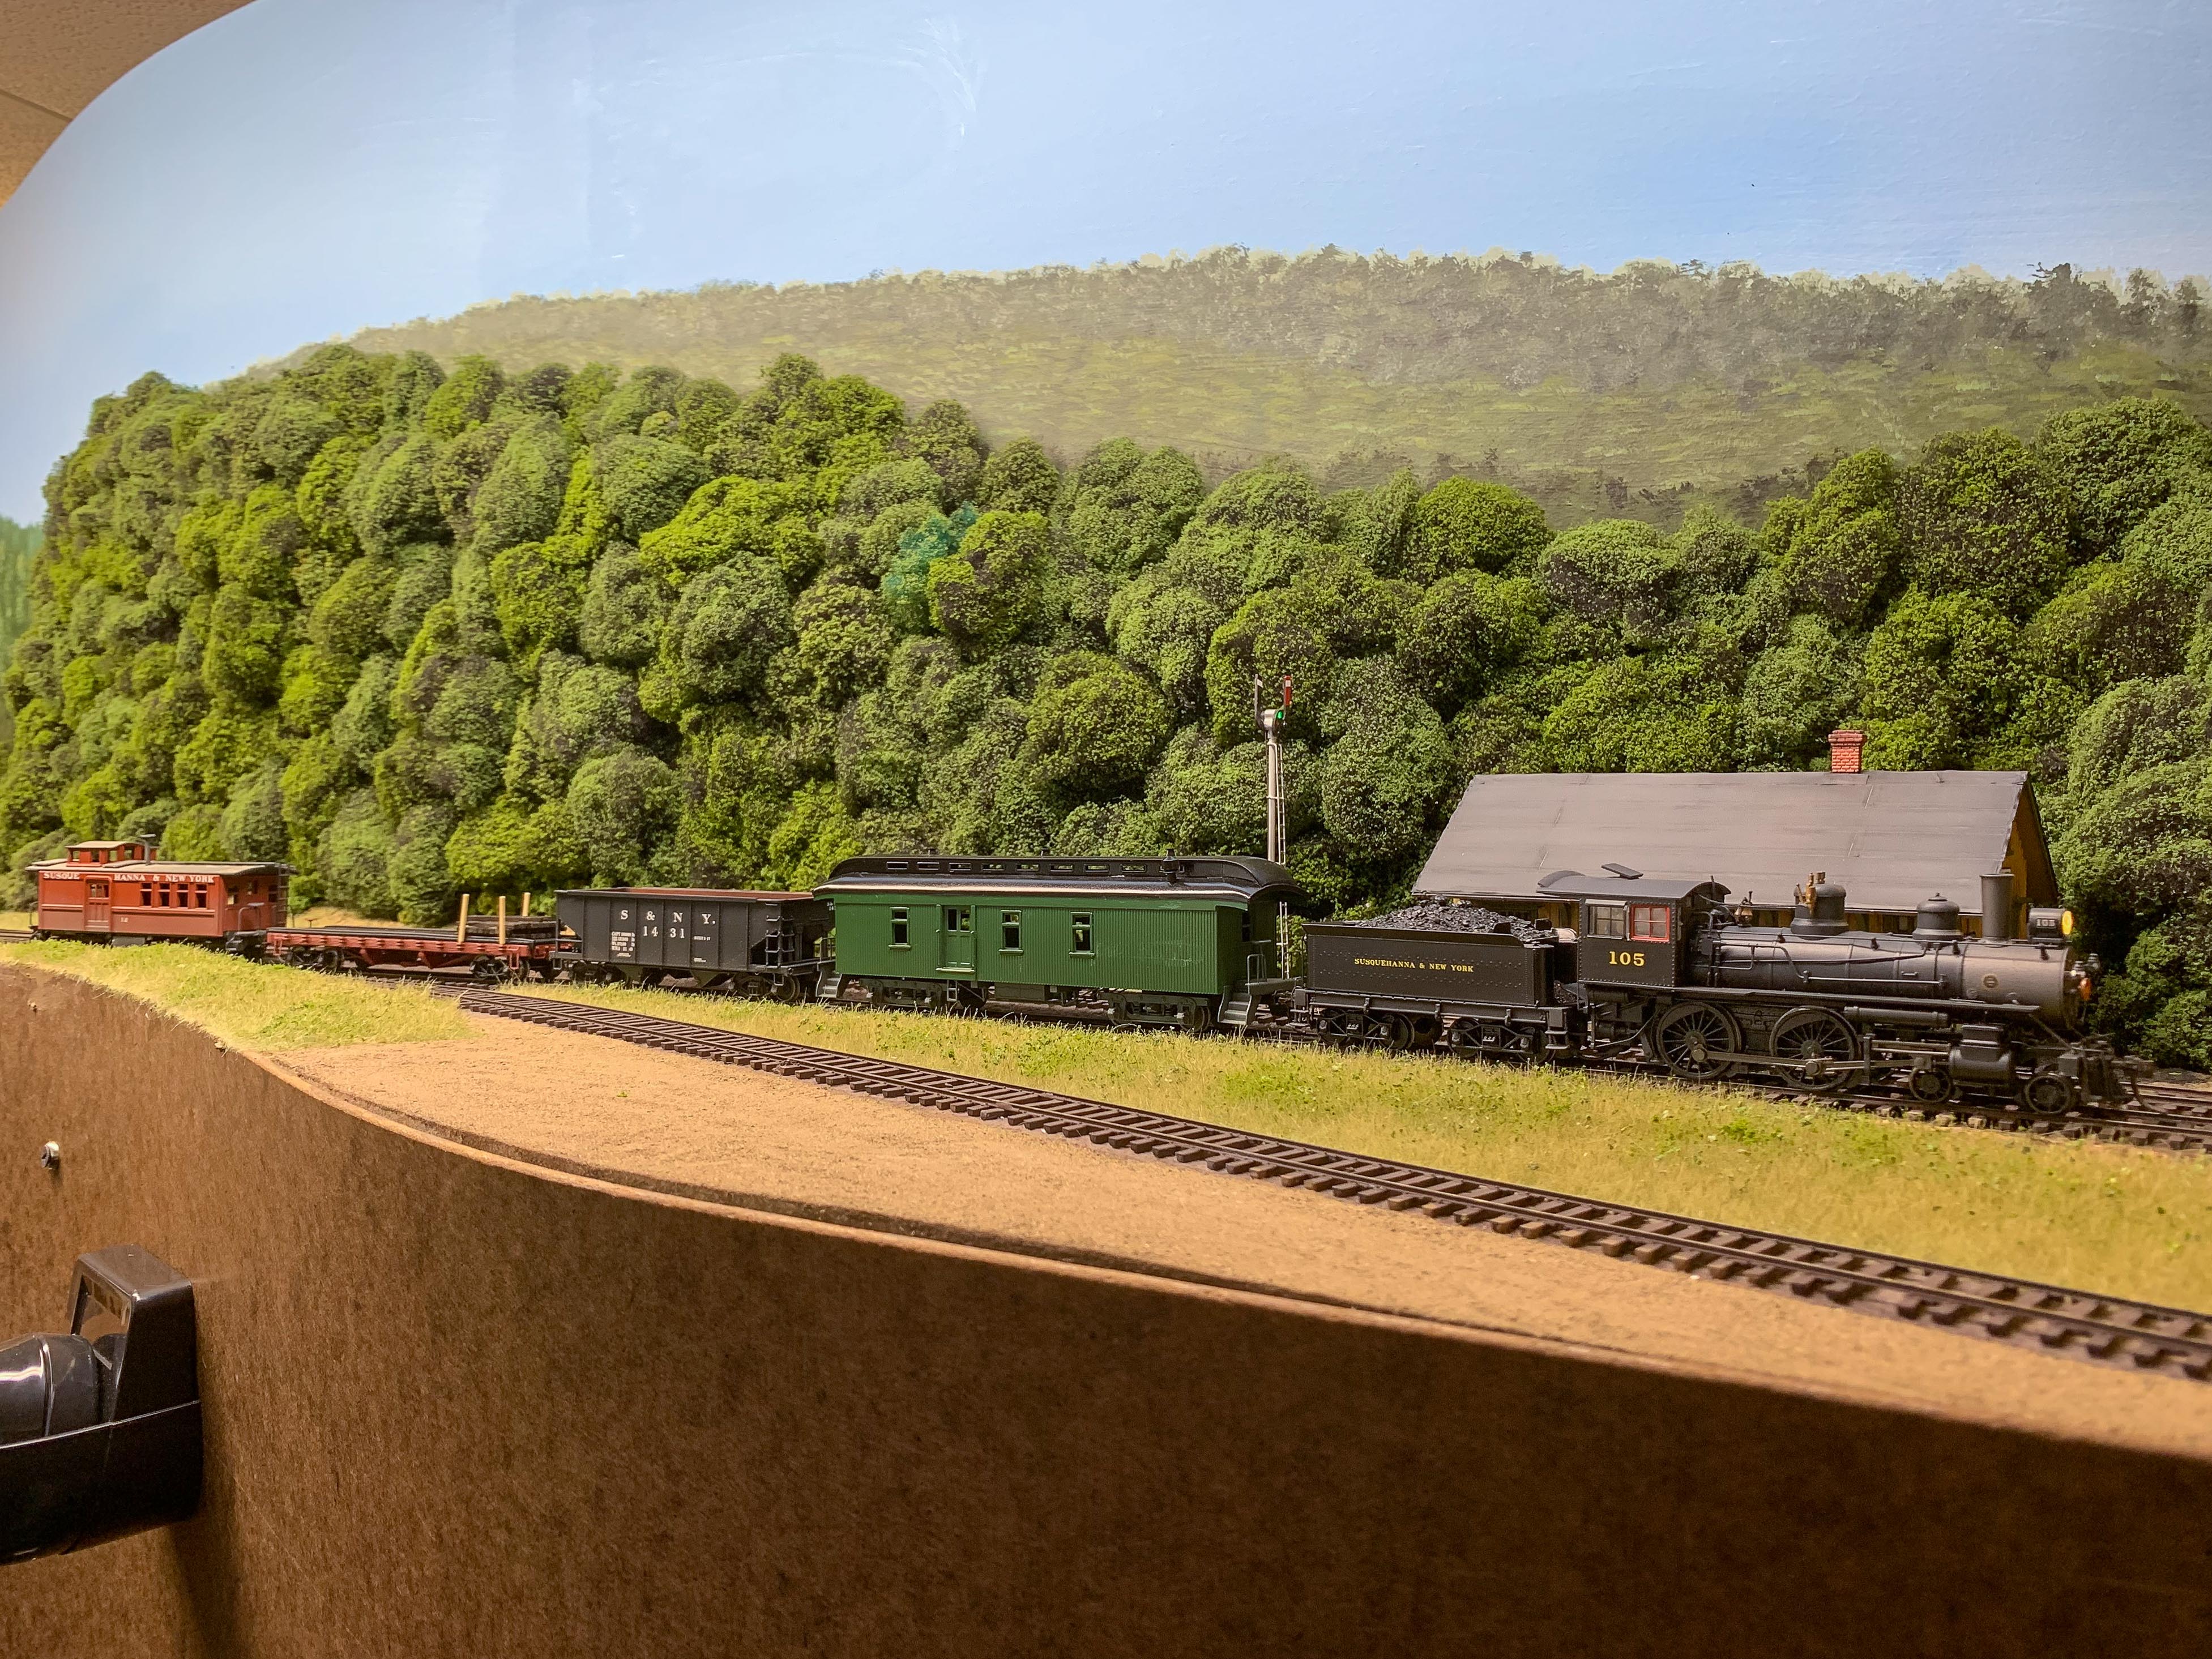
And that’s about where it stands right now. Green trees suck up a LOT of light, and I ended up hanging another 2′ LED fixture in this corner. It was just too dark without it.
To be continued…
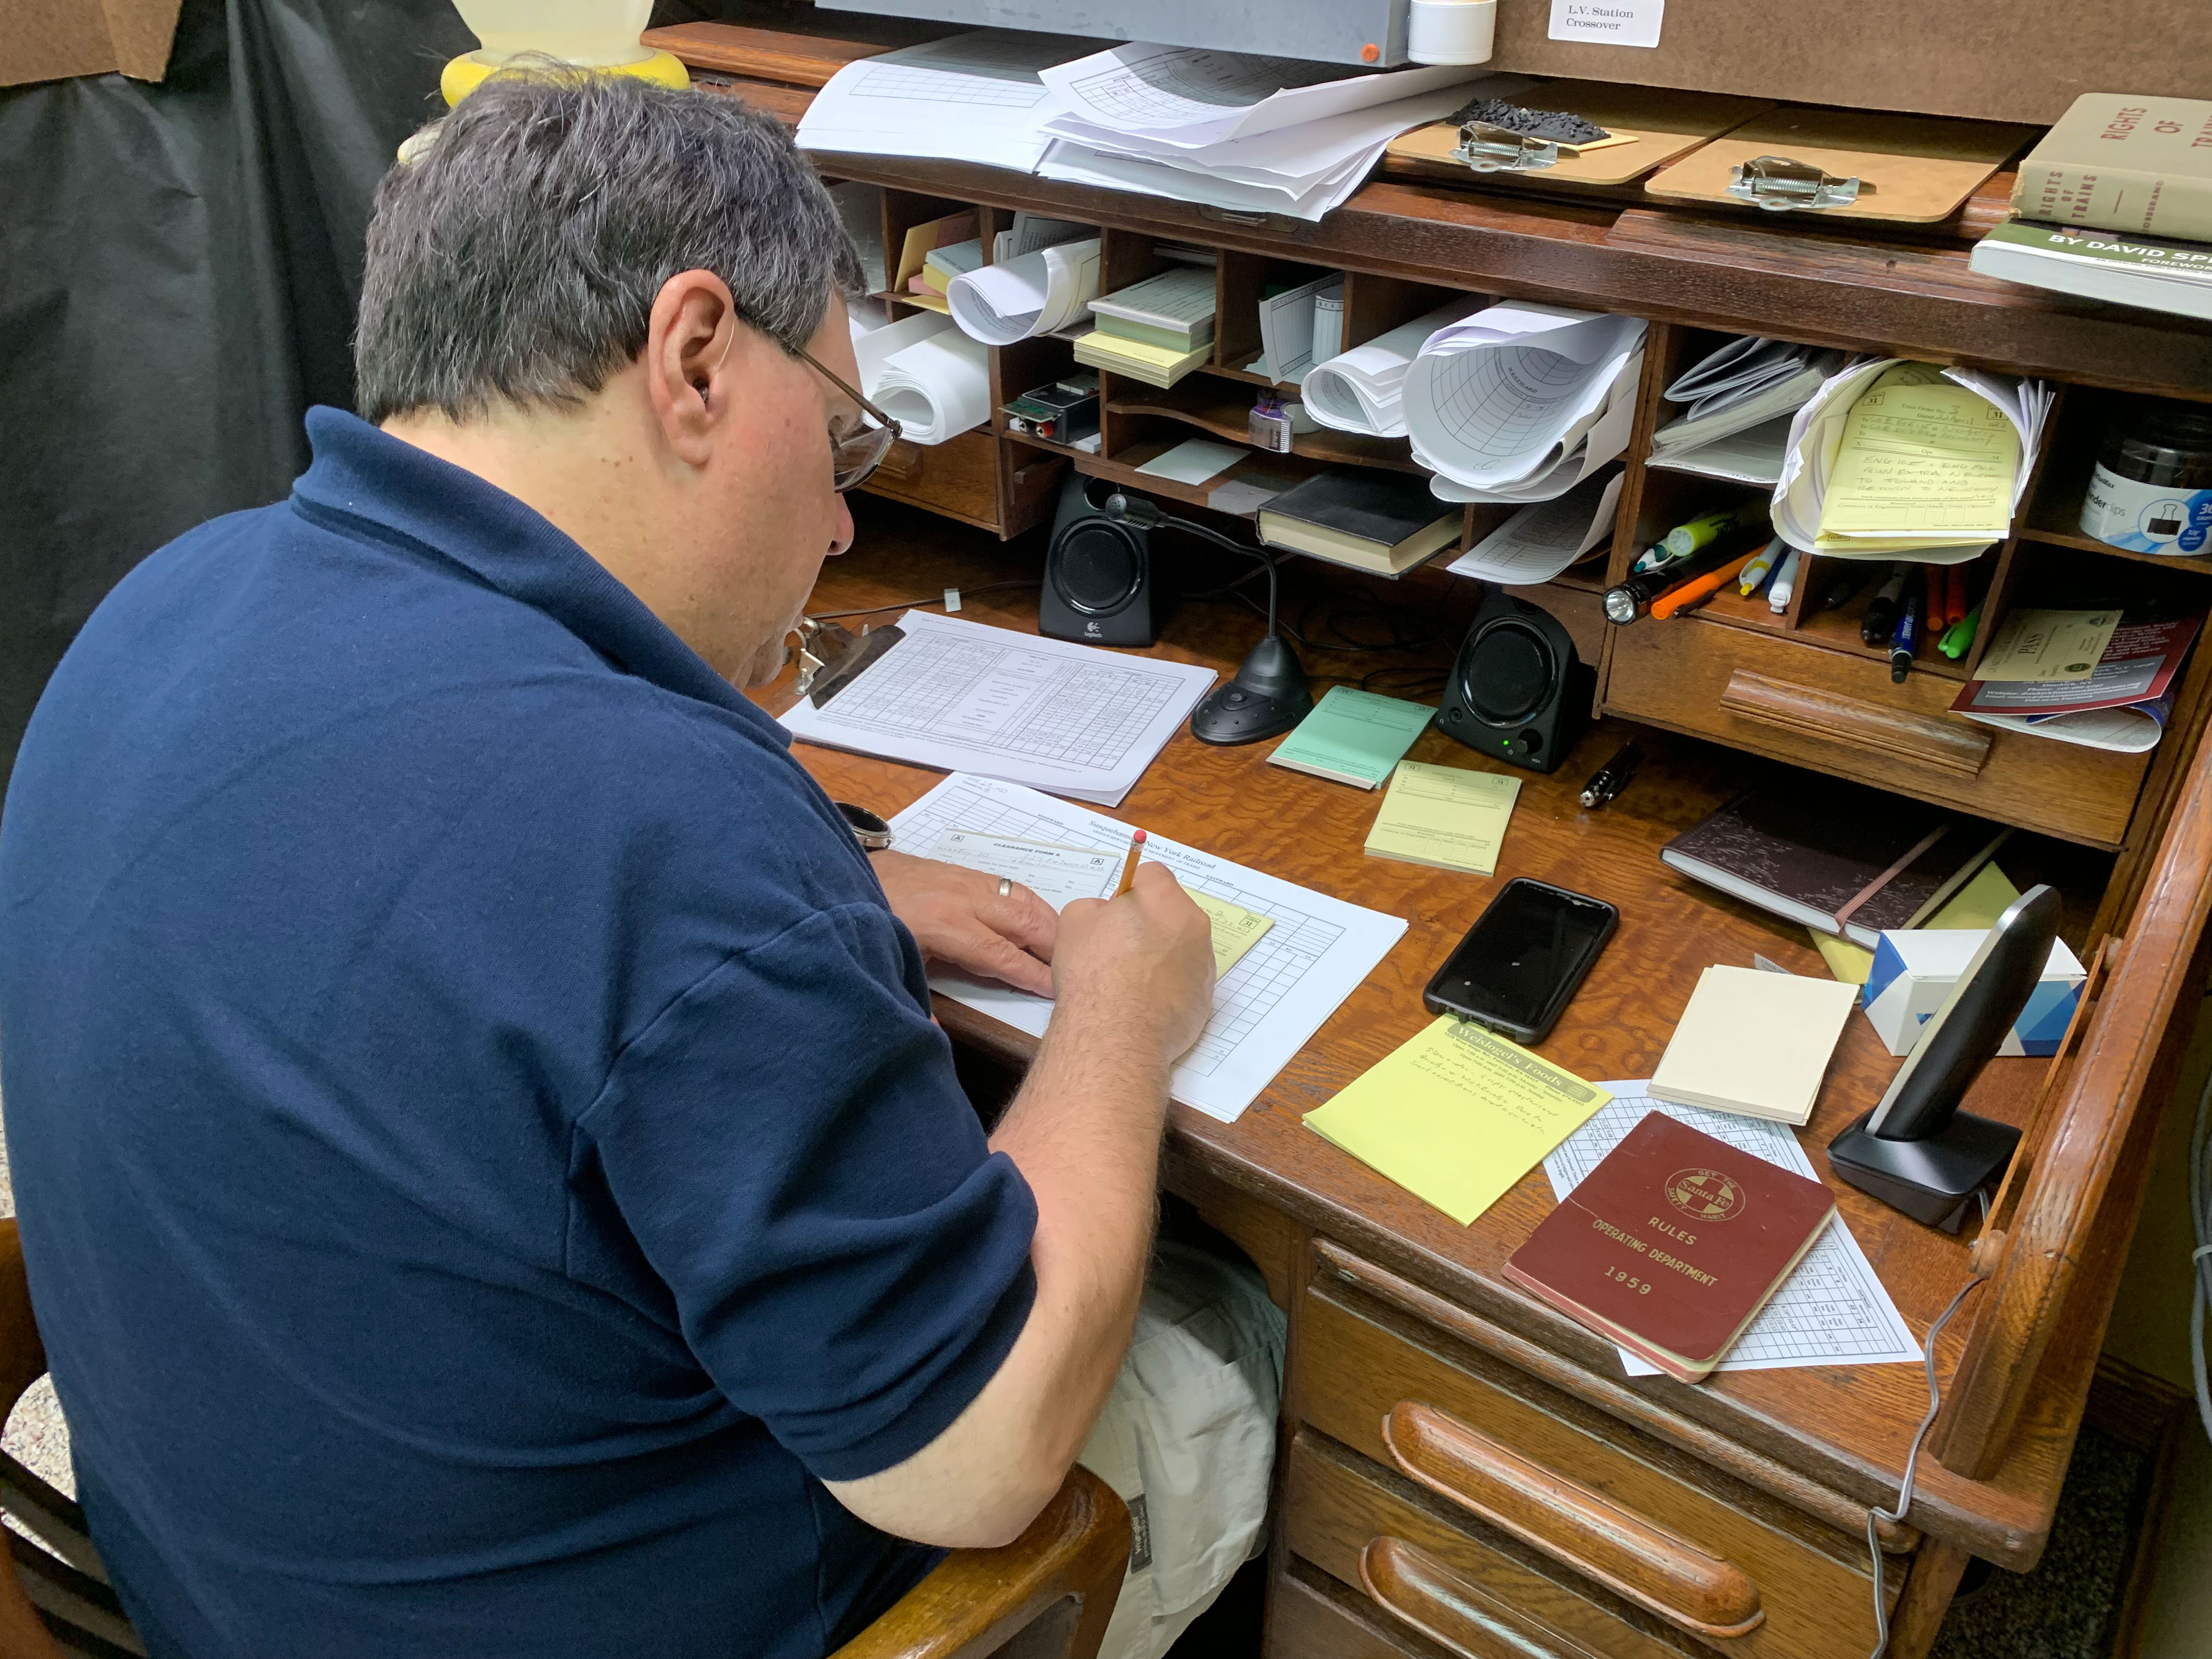
Ran the 23rd operating session on the model S&NY back in June. been quite busy with family travel this summer, so I’m behind in posting new stuff to the site. Anyway, for a little variety I put out slow orders over the bridges on the railroad until they could be inspected by a work extra “On account high water”. This added a little challenge for the dispatcher, who had to get the work train out, and route the regular trains around it. The slow orders were just an added complication!
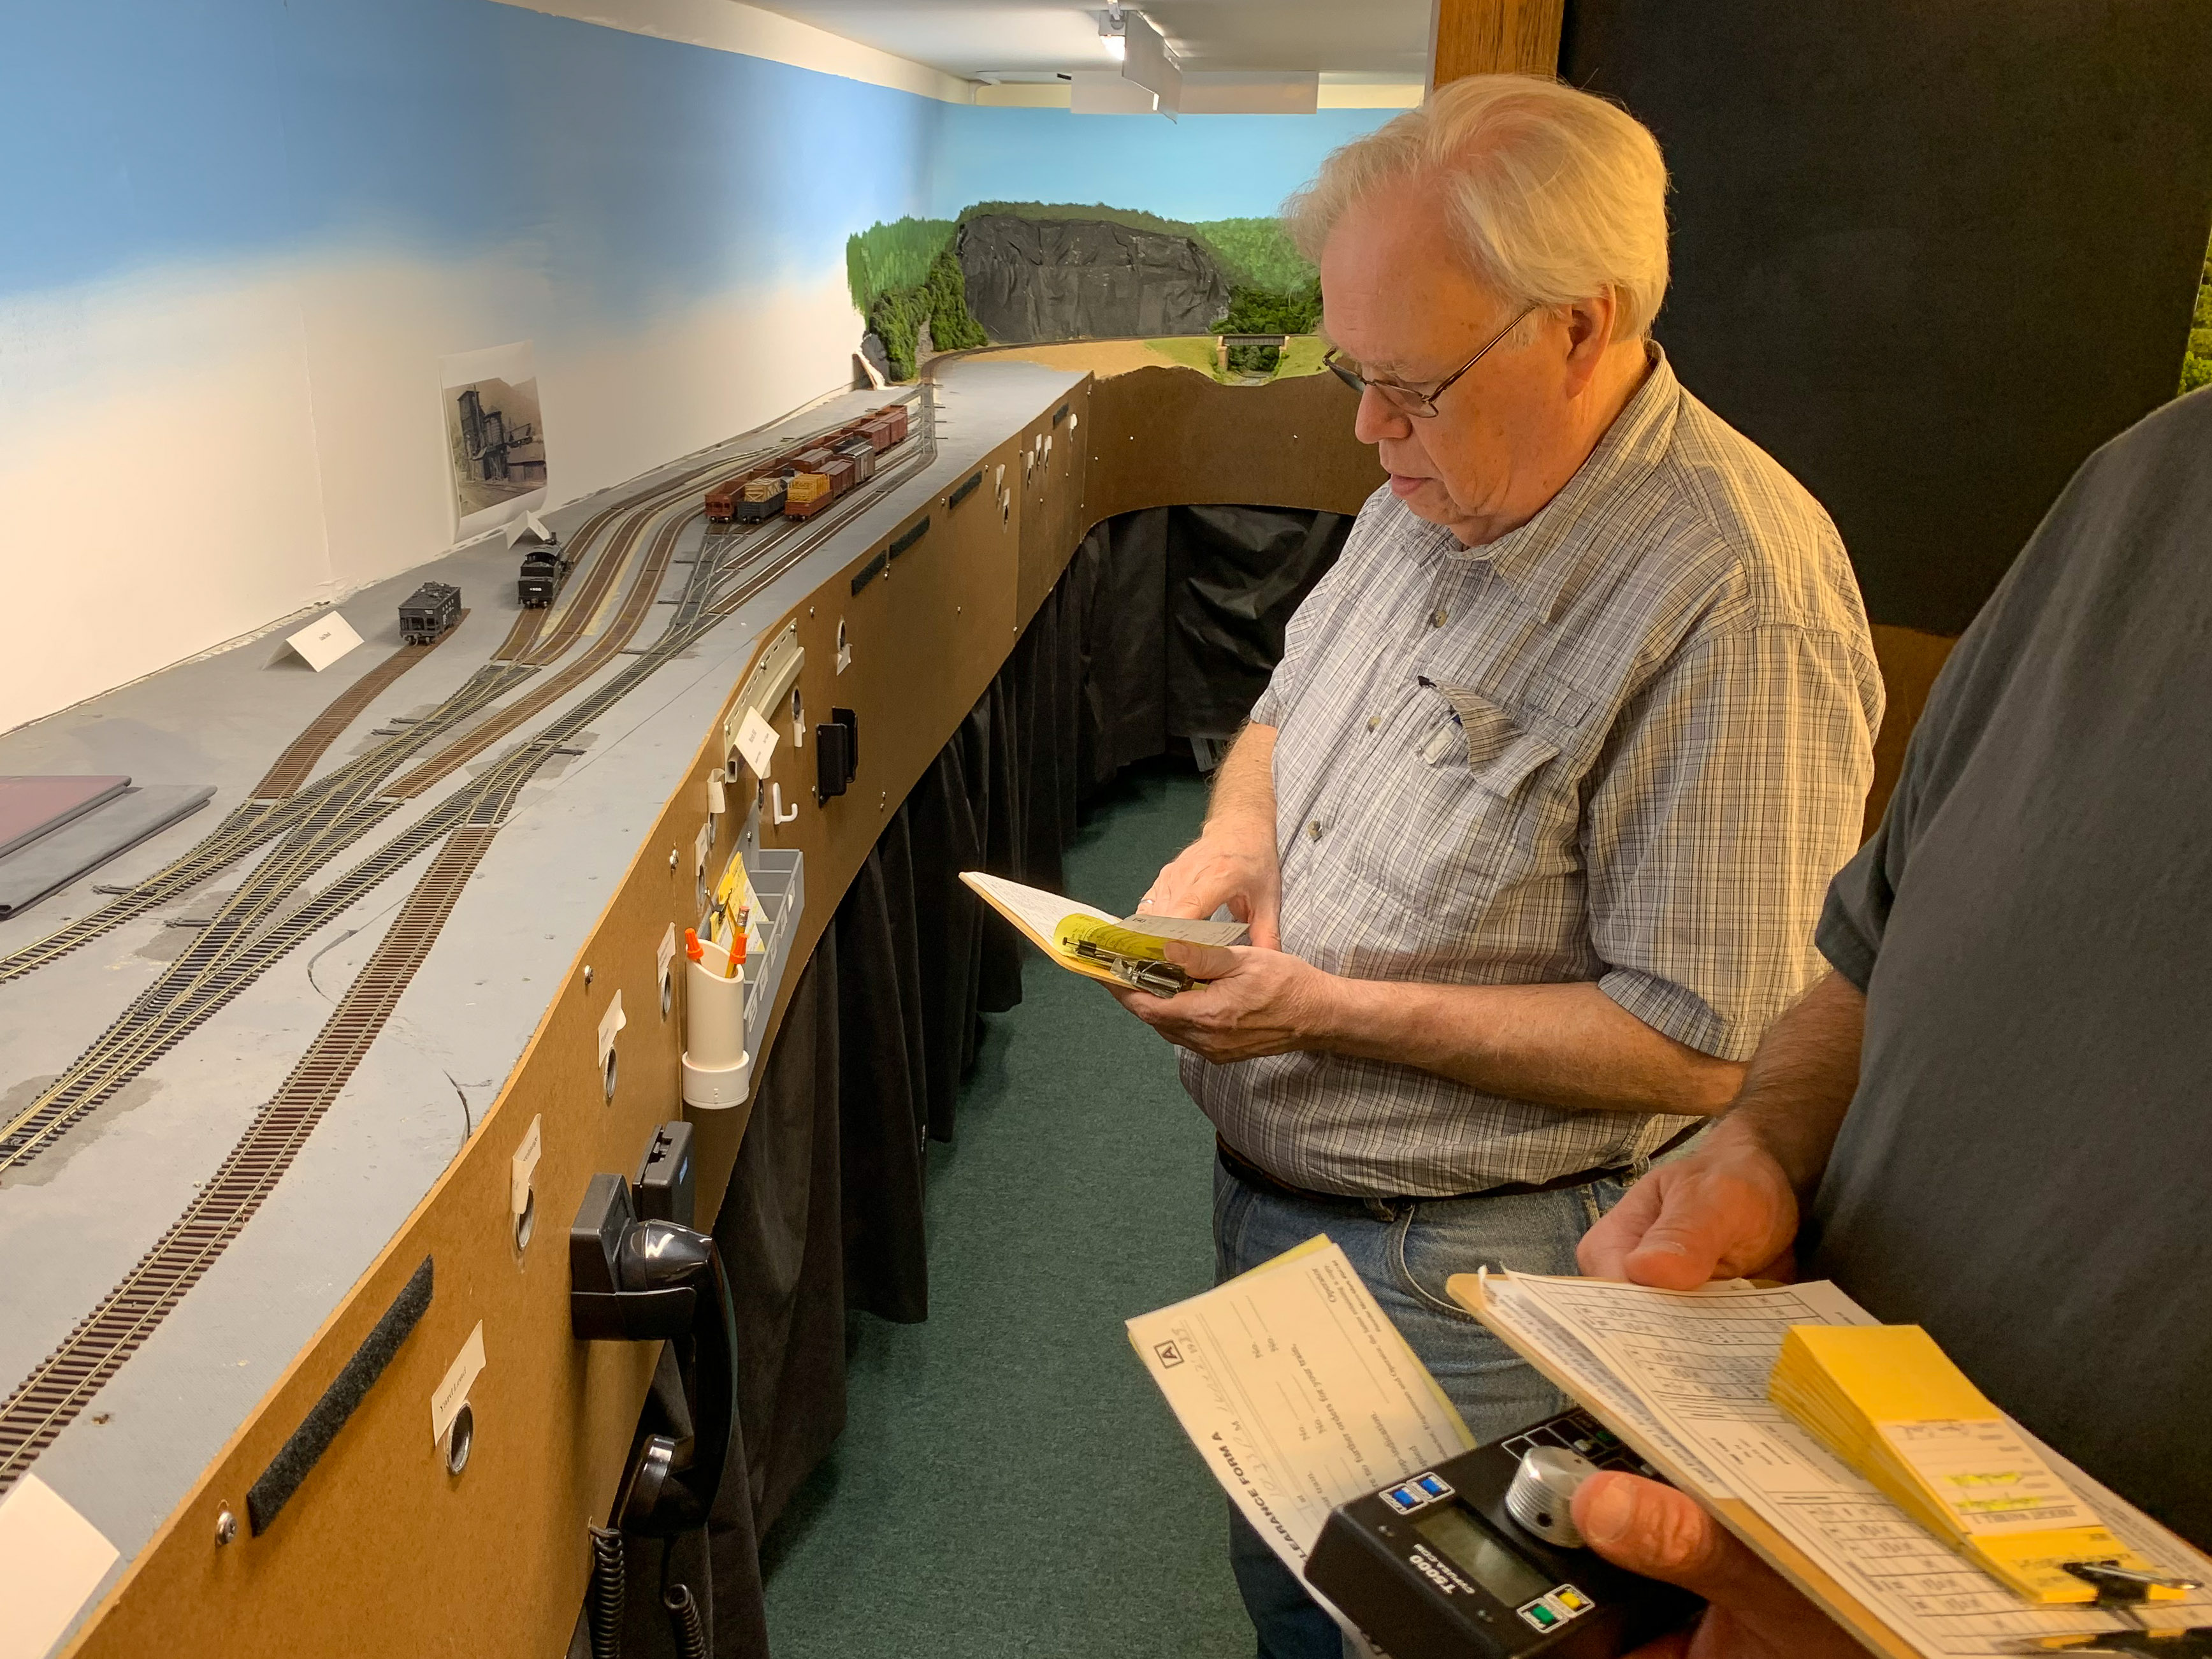
Here, dispatcher B.A. White furiously writes out orders and clearances to get trains on the road:
The work extra pauses at Masten:
Fred L. sorts out his orders before leaving Marsh Hill yard:
All-in-all a successful session. As the bridges were “inspected” and the slow orders rescinded, things calmed down and trains were pretty much on-time as the session wound down. One lesson learned is that I will probably have orders for any special movements pre-written prior to the session. That will make the dispatcher’s job less chaotic at the start of the evening. Until next time…
A little more fun with Photoshop…

In any endeavor, sometimes trying new and different things leads to a dead end. Model railroading has its own pitfalls in that regard. To wit:
I recently started a project to scratchbuild at least 6 flat cars for the model S&NY, the reasons being 4 fold: The Barclay Chemical plant in Laquin needed more dedicated traffic coming in, in the form of hardwood loads, in order to give a local train a bit more to do during an op session; it would help fulfill the requirements towards the NMRA Achievement Program “Master Builder-Cars” certificate; it would help build my skills before taking on more complex projects; and it might be “fun”. The “fun” part is entirely subjective as we shall see…
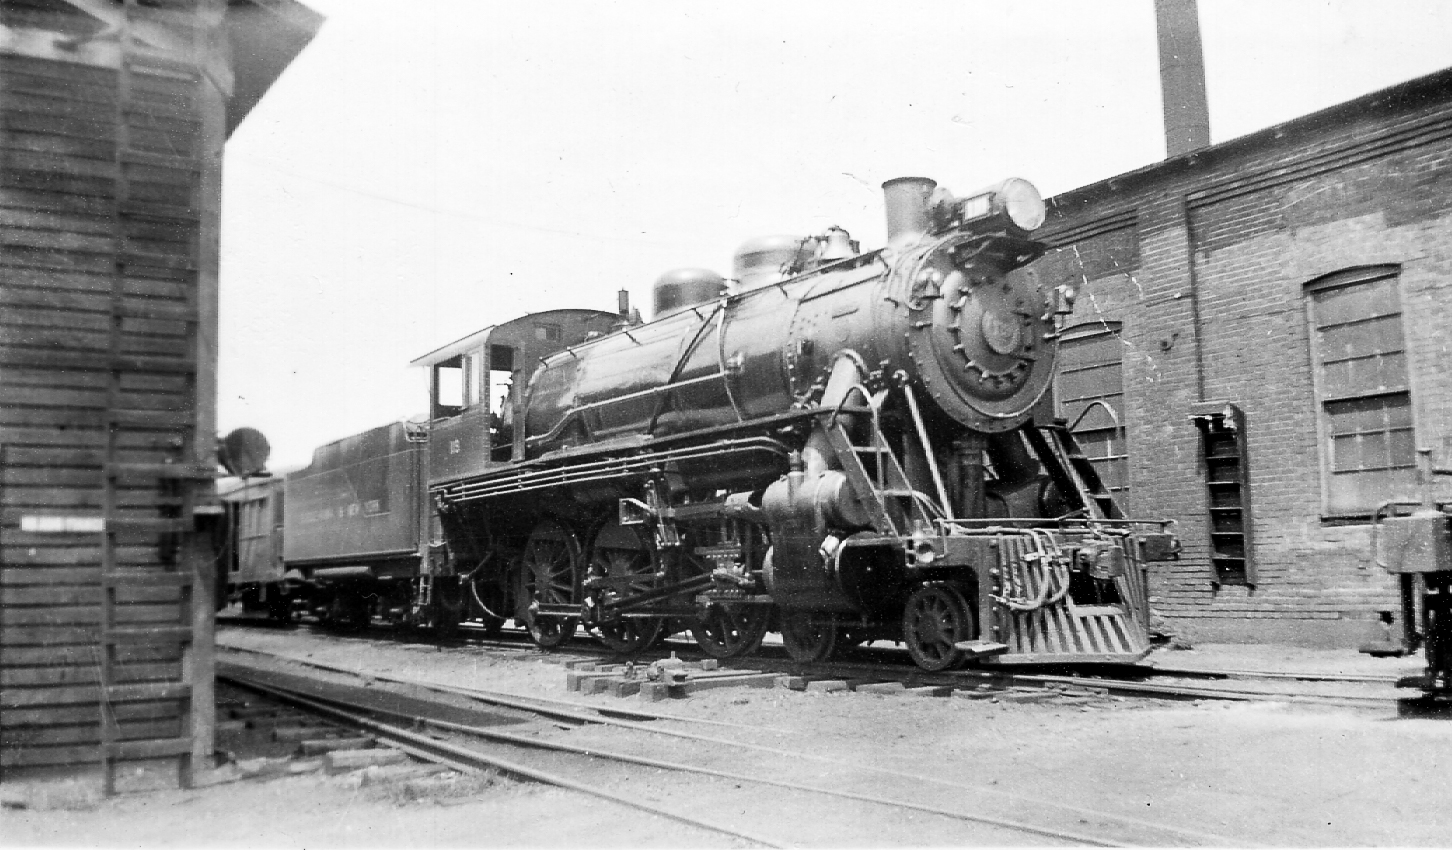
Anyway, I wanted to build several cars using these S&NY examples as a basis:
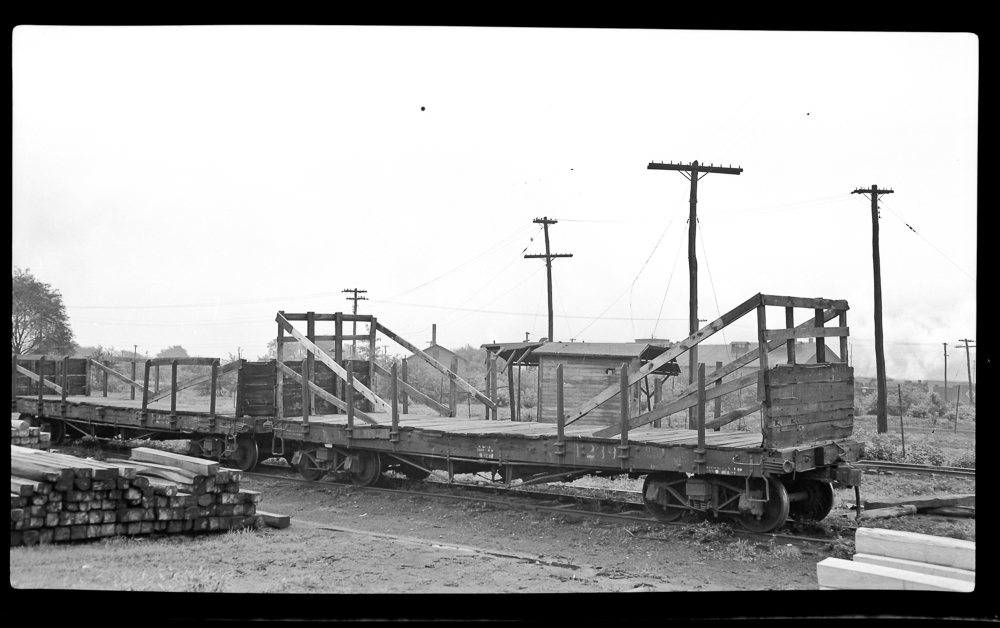
Bradley-Hahn Collection, RRMPA
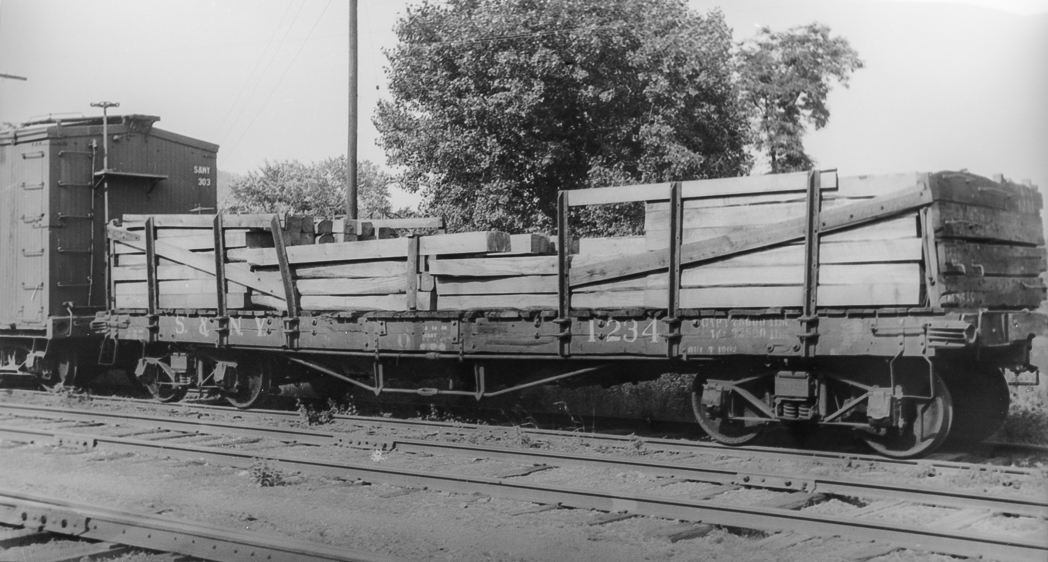
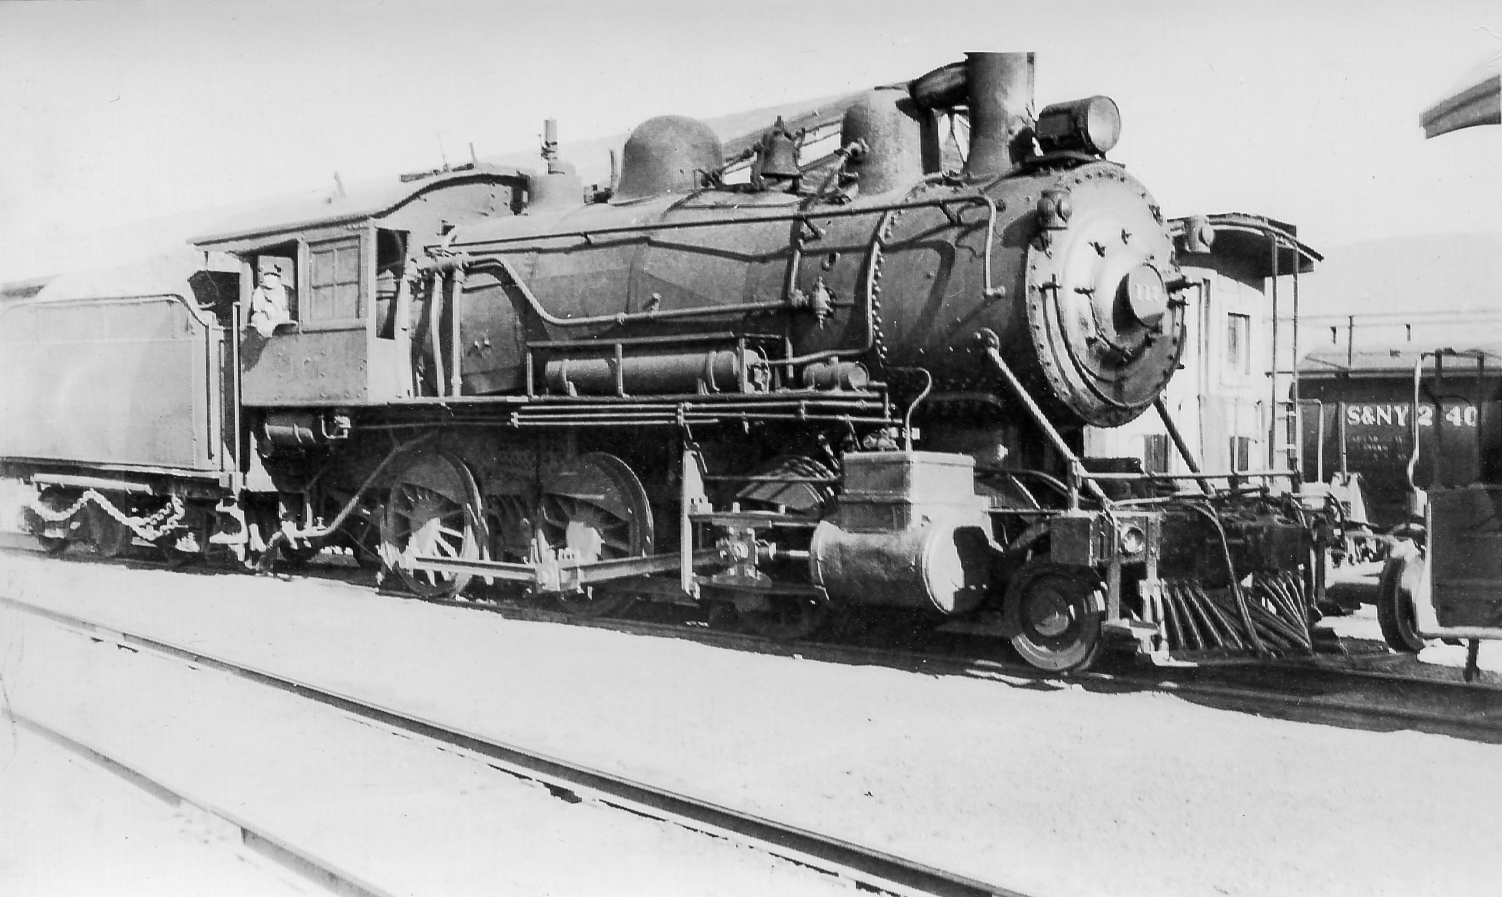
Bill Caloroso – Cal’s Classics
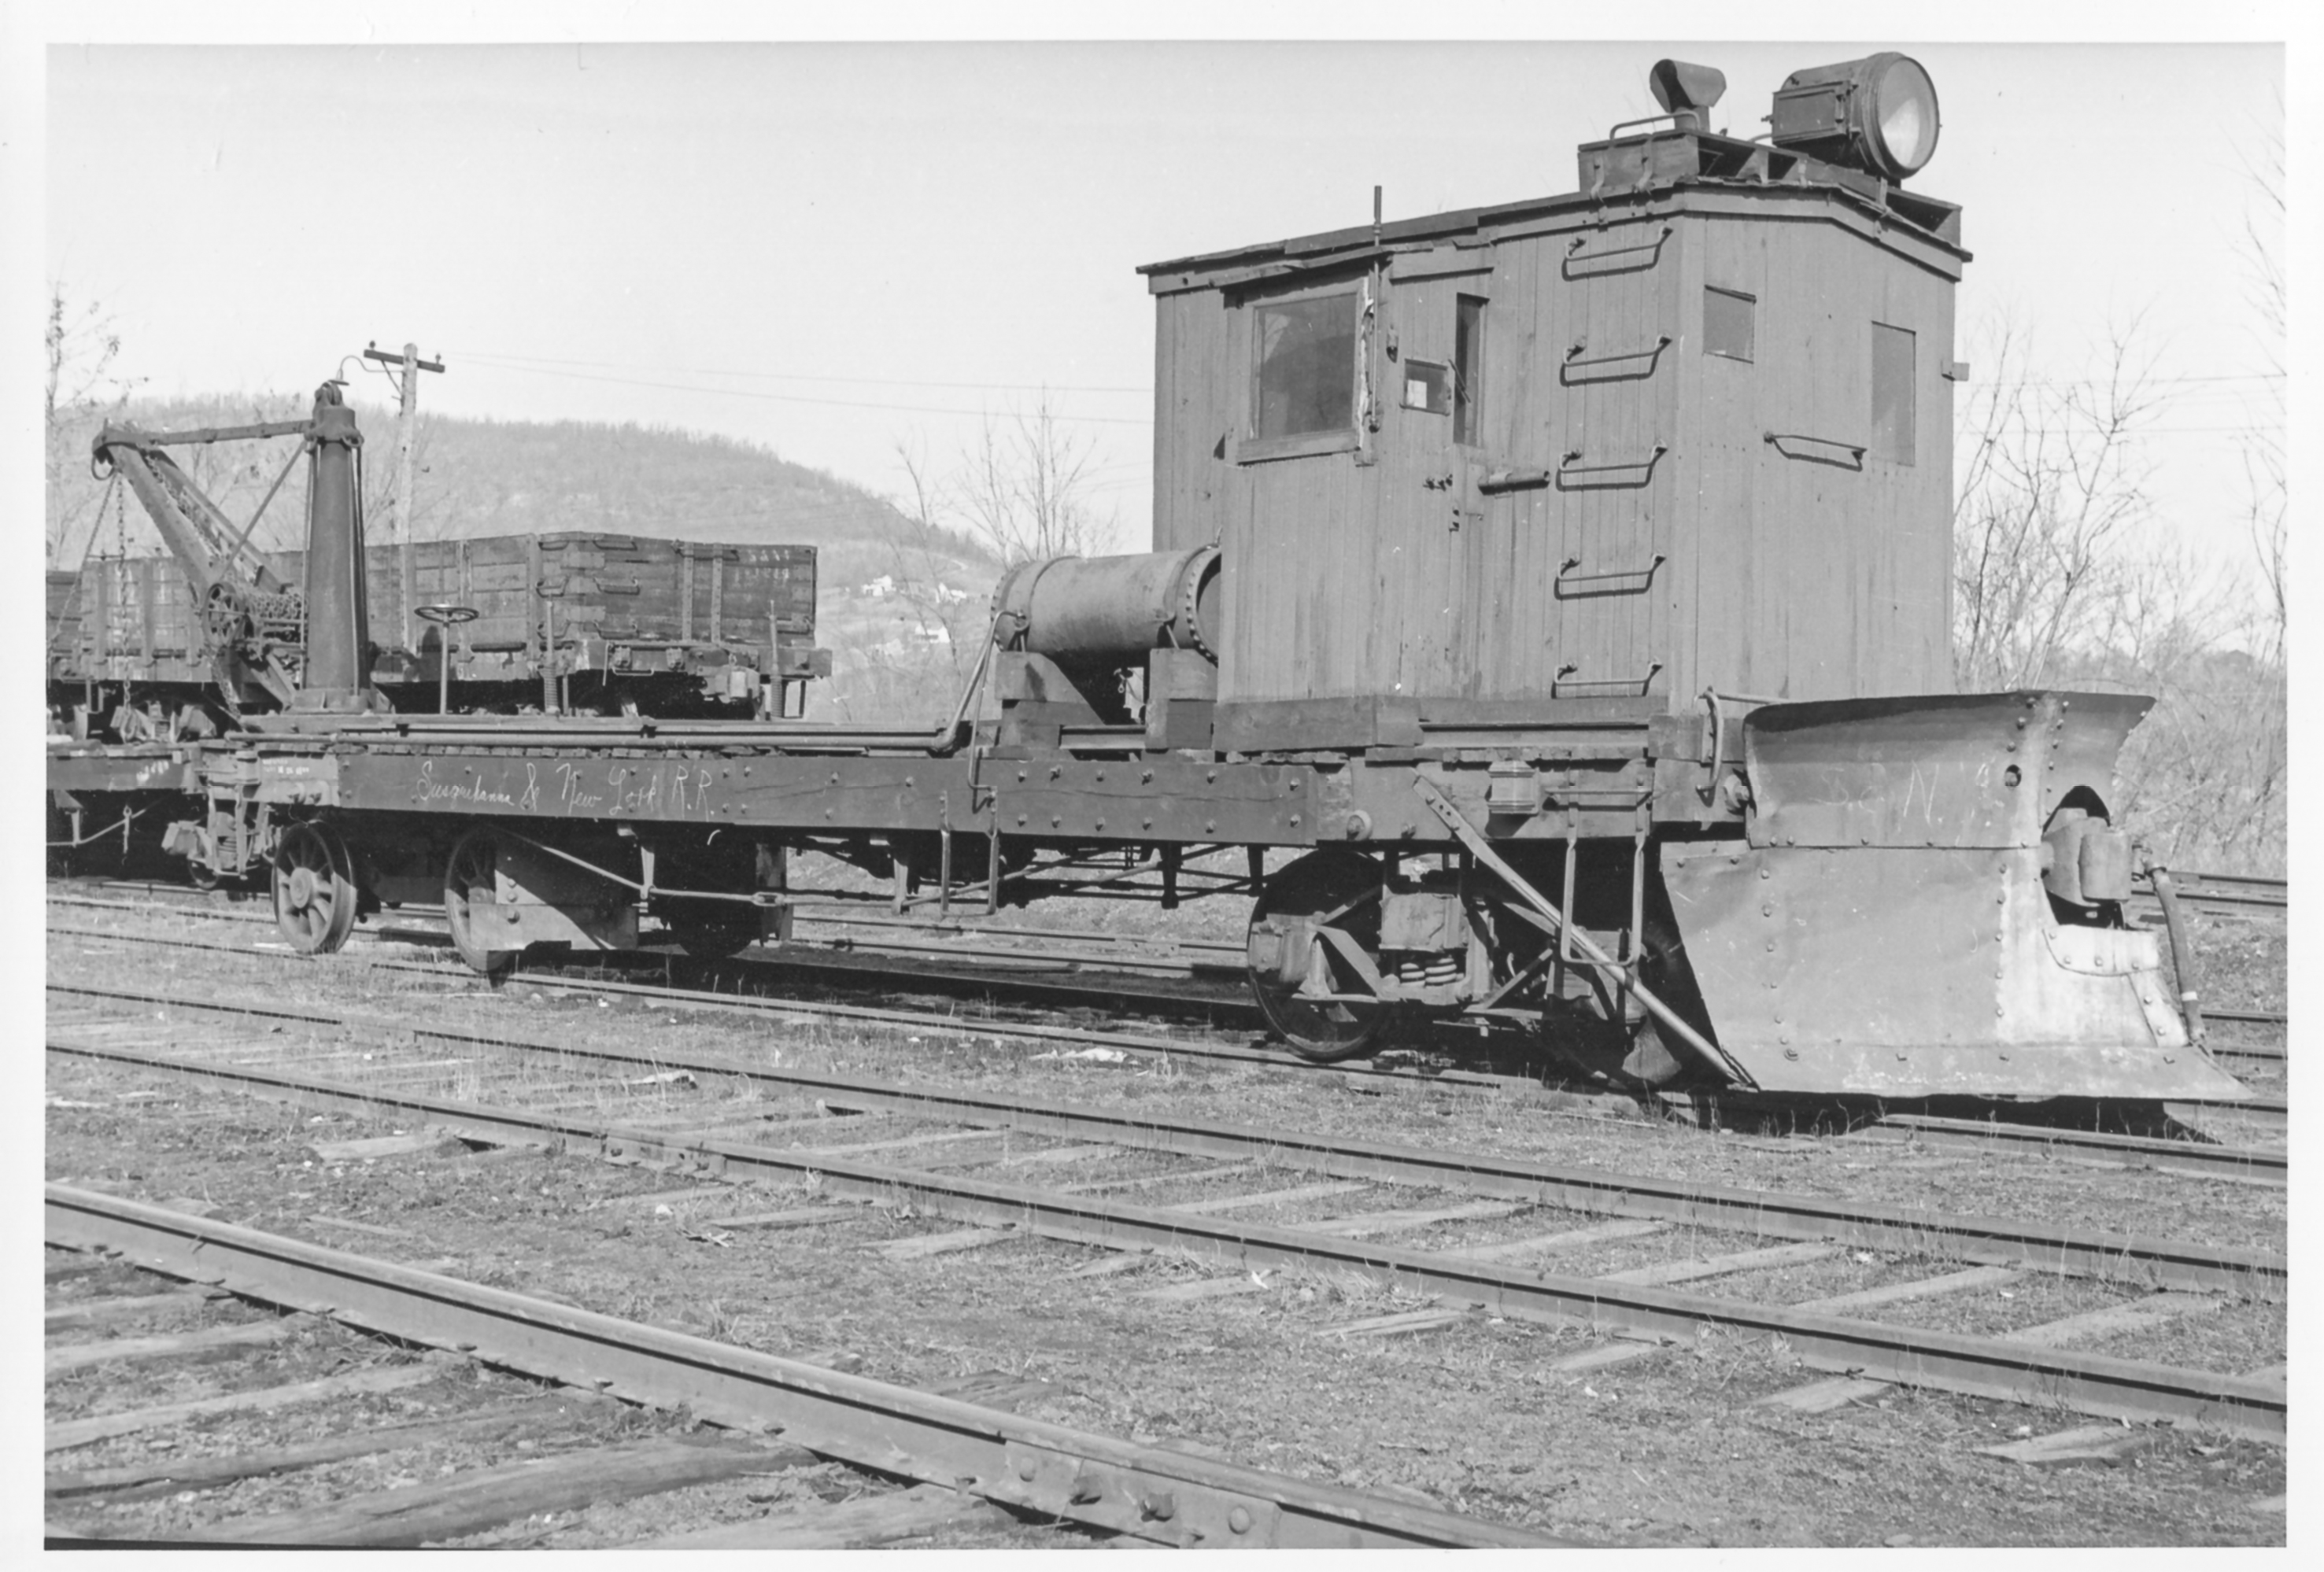
The basic flat car could also serve as a foundation for the S&NY flanger:
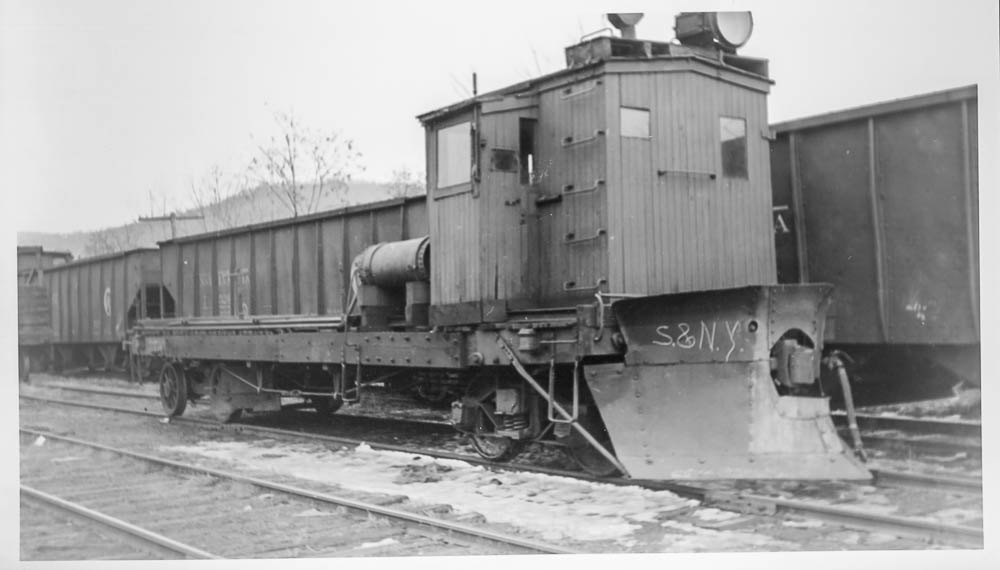
Bill Caloroso – Cal’s Classics
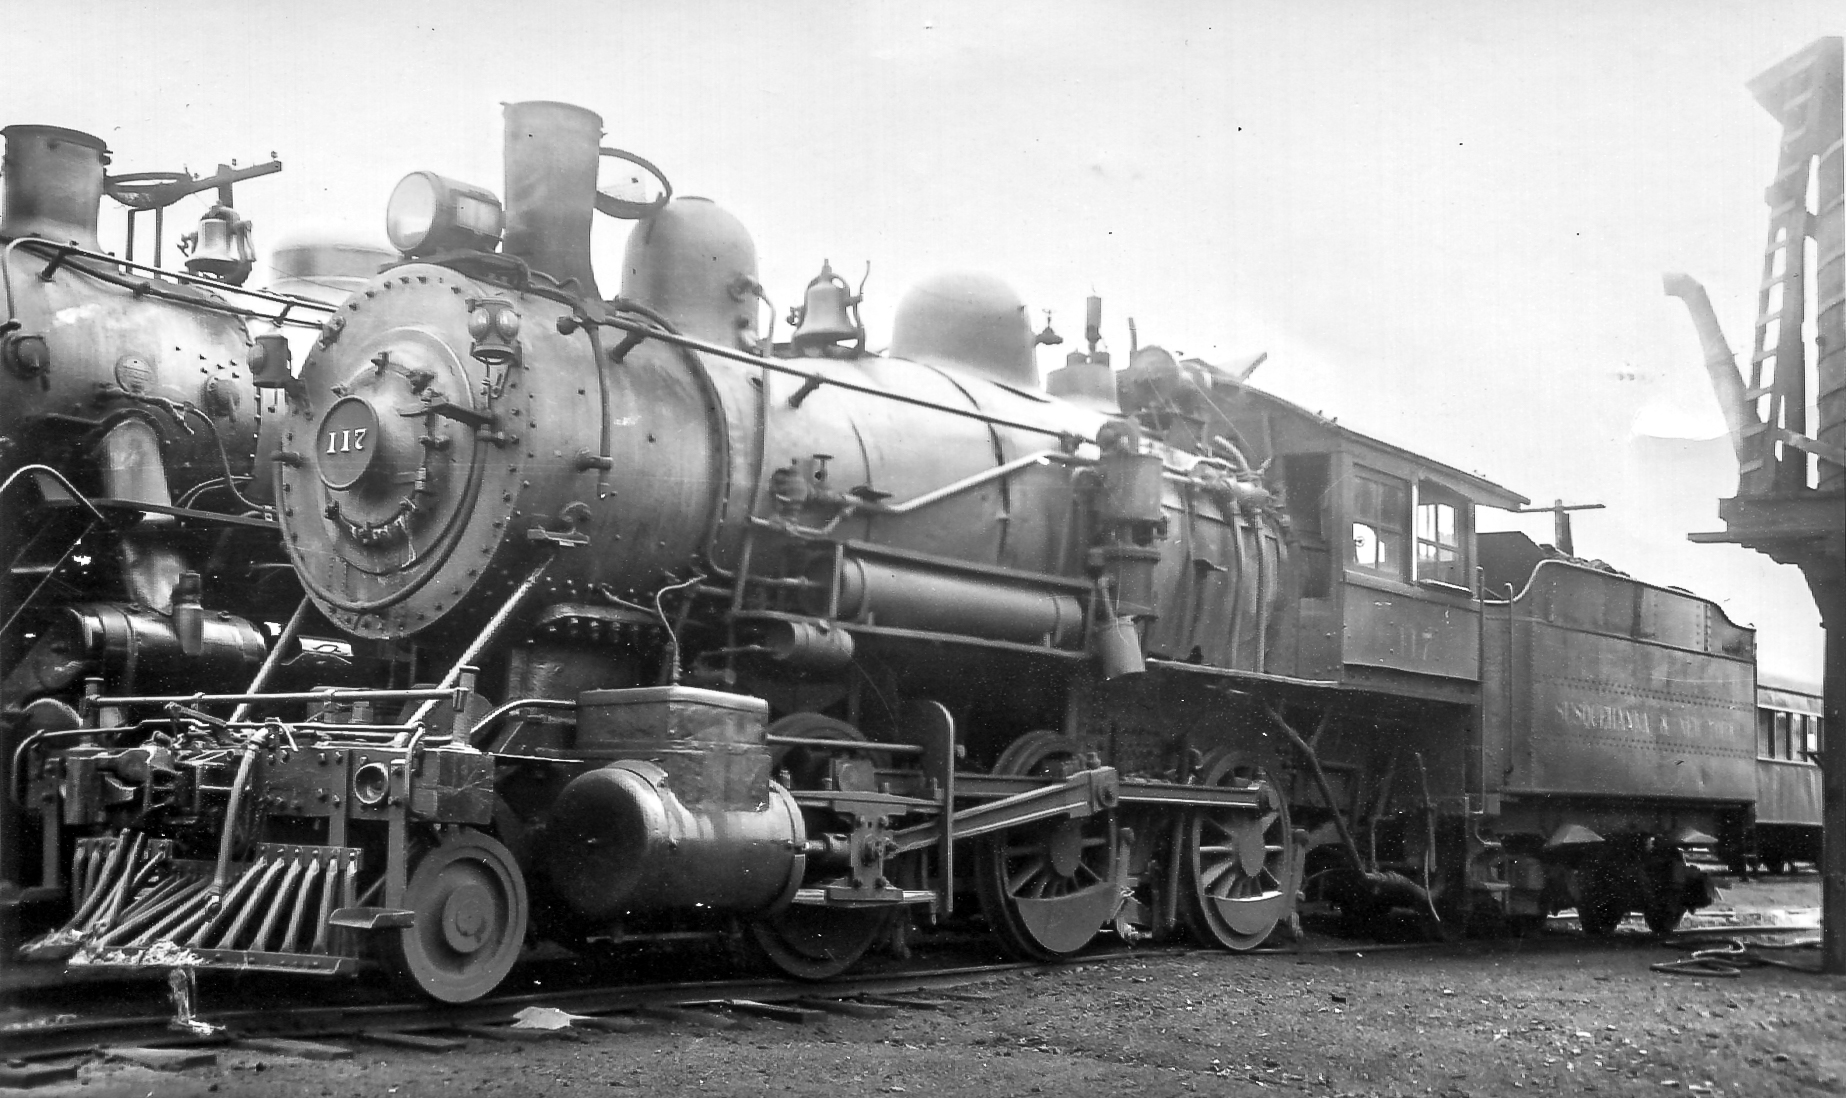
Also a crane-flat:
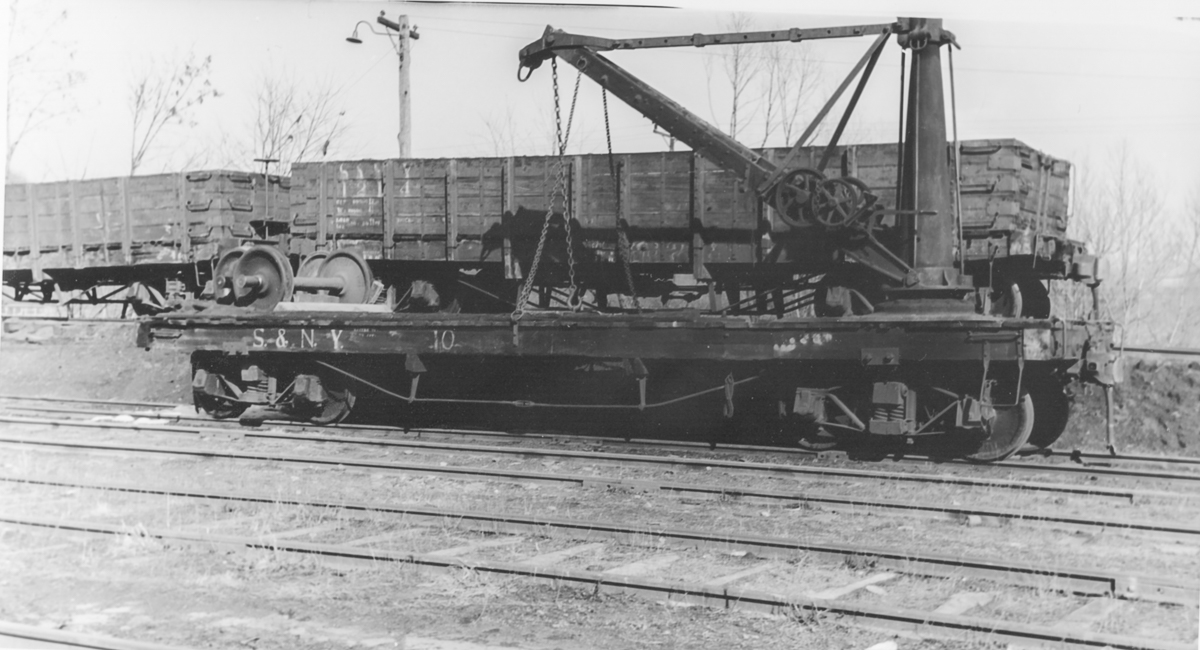
Bill Caloroso – Cal’s Classics
And also the gondolas seen in the background in this photo, and in the one prior:
Bill Caloroso – Cal’s Classics
Mr. Dave Vinci wrote an excellent article on scratchbuilding a PRR class Fk flatcar for “The Keystone Modeler No. 42 January 2007”, and the article is available here: Scratchbuilding a Class Fk Flat Car . I figured I would follow his techniques, but using dimensions from a PRR class Fh car instead. The Fh was shorter than the Fk, (36’5″ vs. 38’4″) and used archbar trucks with a 5’0″ wheelbase, rather than 5’6″ trucks on the Fk. I had half a dozen Tahoe Model Works trucks with the shorter wheelbase, and desired to use these as I think they give a really older feel, visually, than the “standard” archbars.
Mr. Vinci described the difficulty in adding adequate weight to the model in order to bring the weight up to NMRA standards, which should be about 3-1/2 oz. total. The article shows how to use lead shot in the underbody voids to accomplish this, but the weight still comes up short.
I had hoped to add more weight to my cars by laminating lead sheet into the flatcar deck during assembly. I had some 1/32″ lead sheet on hand, and smugly set about building the flat car deck. I had to tweak the dimensions of the end beams and side members a bit, but it looked like it might just work. I used contact cement to glue the lead to a piece of 0.040″ styrene, and used a small wooden roller to ensure even contact. Started to work on the bolsters and underframe, and the coupler height looked like it would be dead-on. So far so good…
Except today when I went to work on the car…something…was…wrong…:
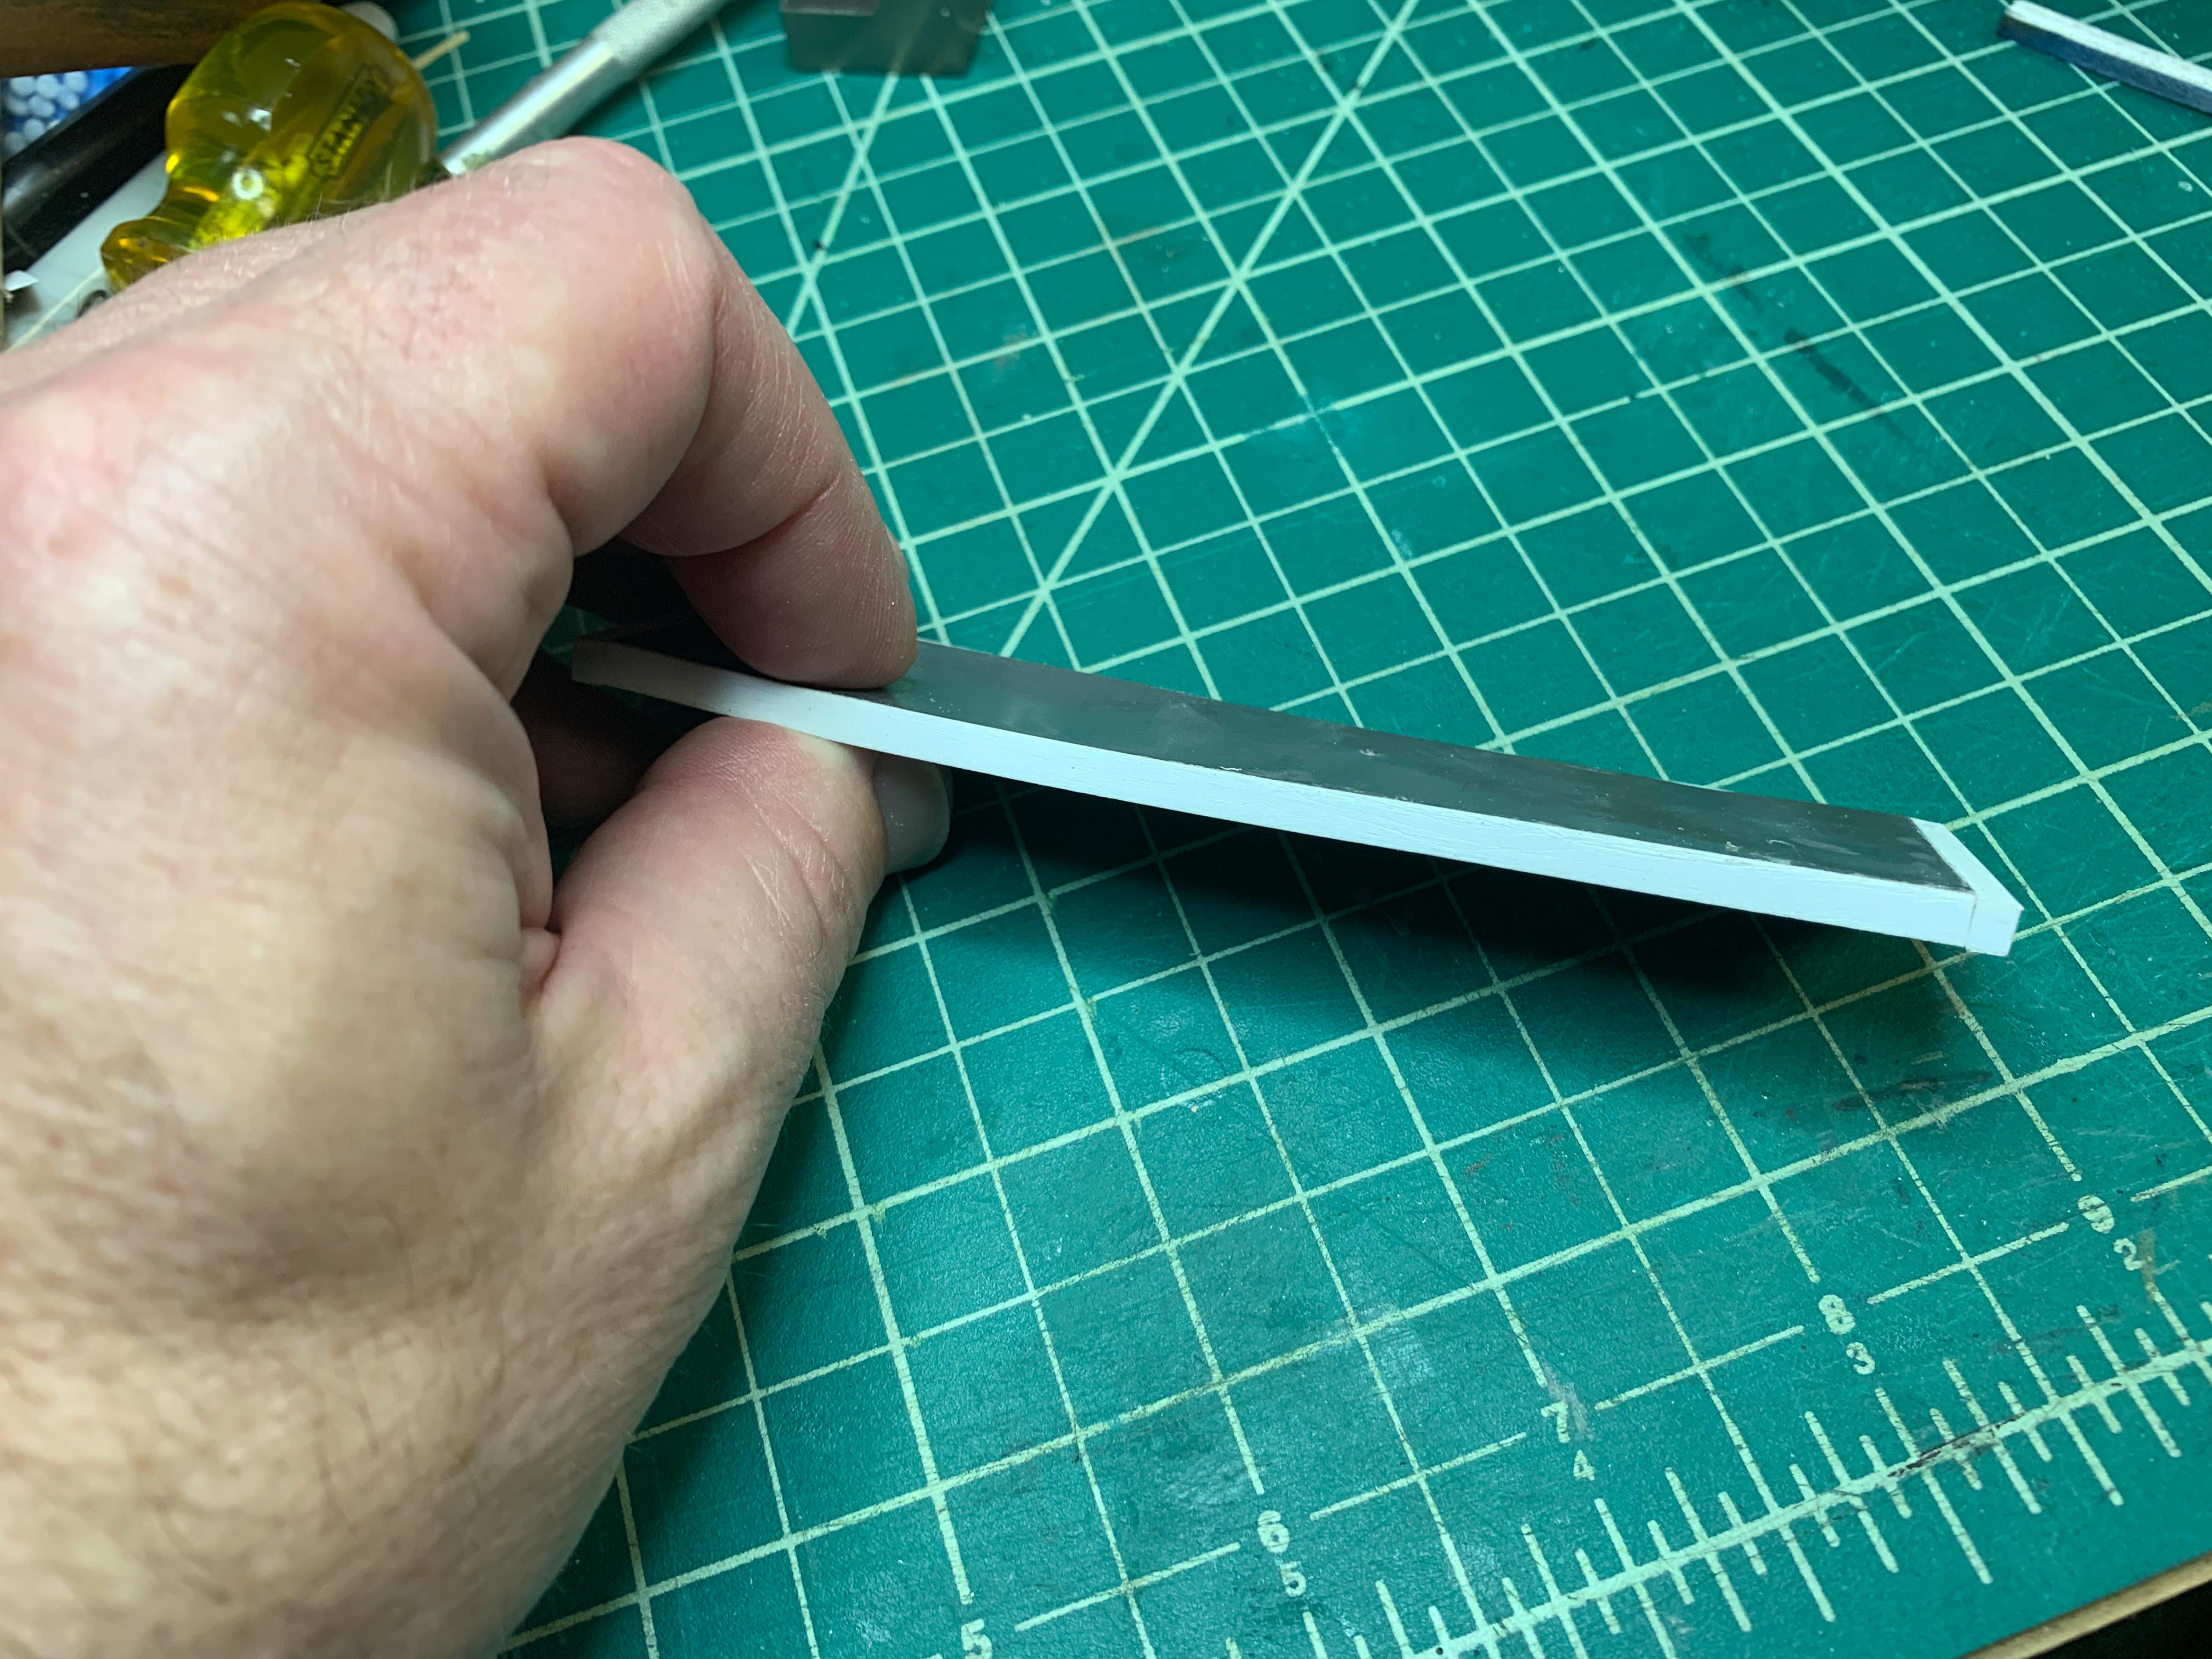
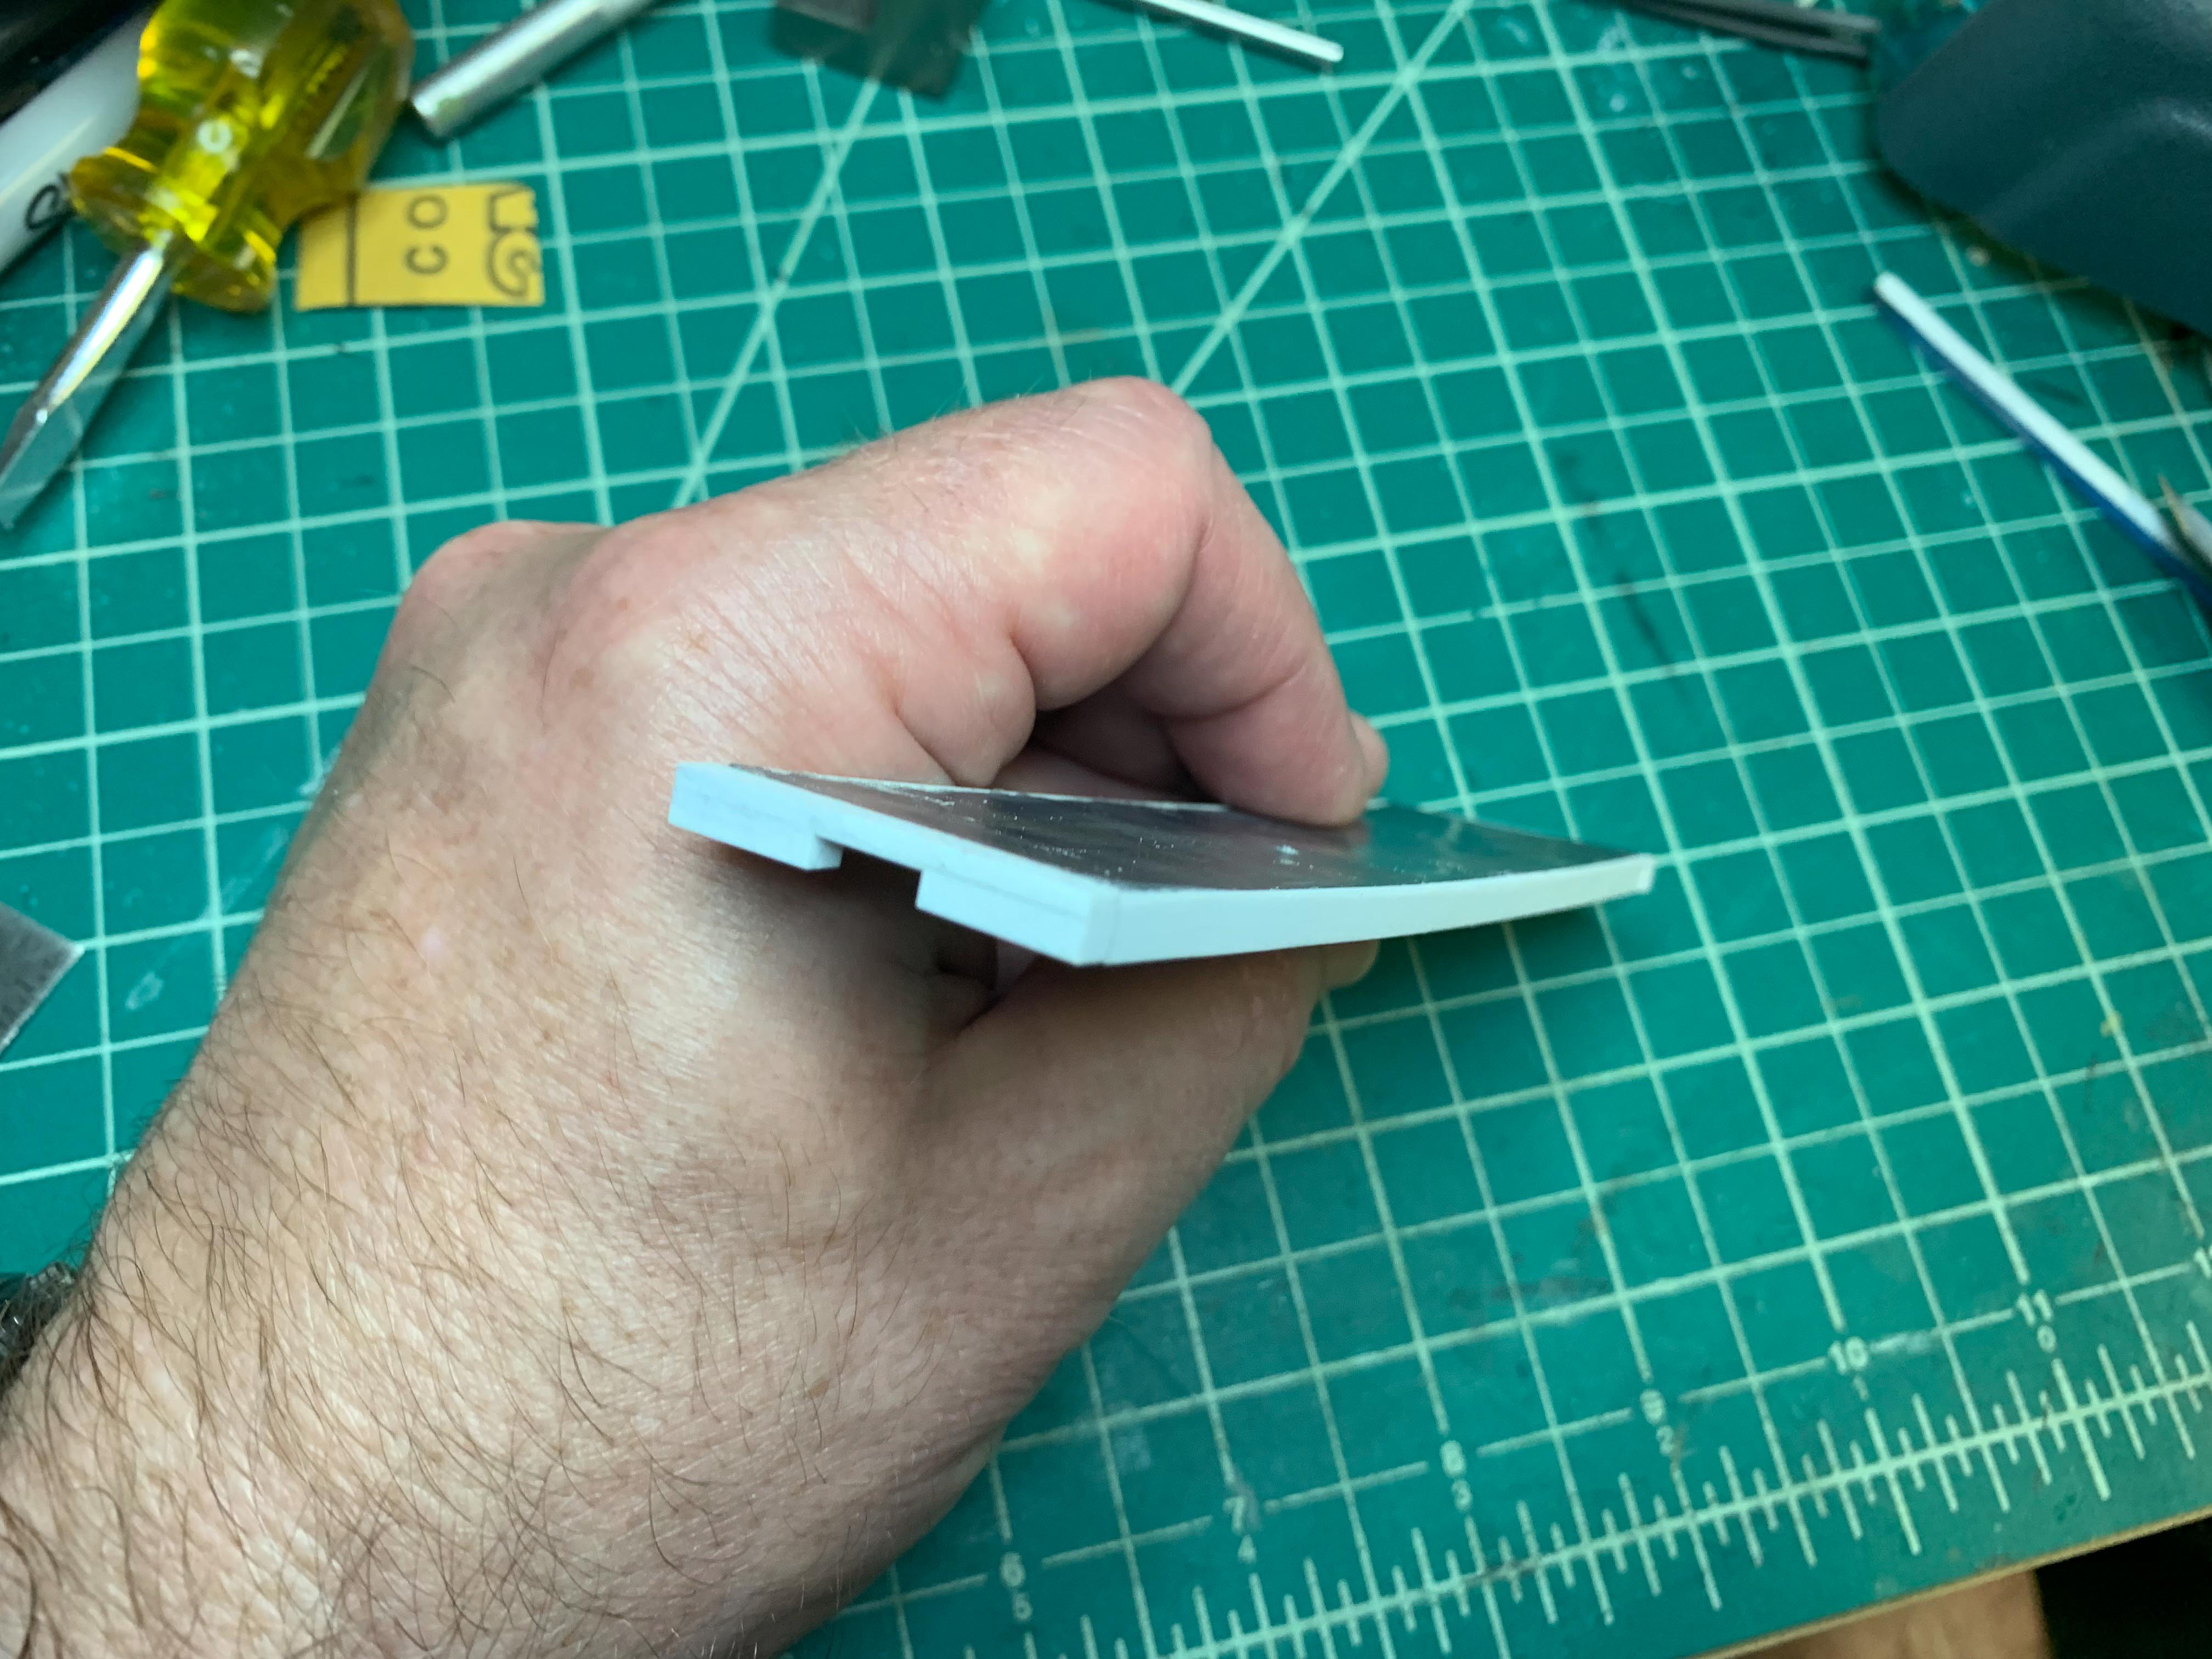
The deck was now all warpy and curved. What the…..?
I had built the deck during some hot and humid days when we had the house A/C on. Meanwhile, the weather cooled off and we turned off the A/C and kept the windows open. The basement warmed up a bit and the air got a touch more humid. Not sure if the lead sheet expanded a little relative to the styrene, or if there was air trapped between the plastic and lead that expanded, or if the glue continued to out-gas and caused some delamination and deformation of the plastic. Either way, the idea of using lead in the deck of the car was not going to work…
Thus, FAILURE!
Also, other issues arose at this point. The PRR Fh is 36’6″ long. The April 1940 ORER lists the S&NY flats as being 38’1″ long. Uh oh.
Further review of some of the photos shows what looks like hoppers underneath some of the cars. Could some of these “flatcars” actually be old cut-down drop-bottom gondolas? I really would prefer not to have to scratchbuild underbody hoppers for 6 or more cars. Double uh-oh…
Well then…What to do, what to do?
After a bit of soul-searching and creative use of profanity, I’ve decided to press ahead using the PRR Fh and Mr. Vinci’s article as a guide. I have no dimensions or more-detailed photos of the S&NY cars to work from anyway, especially the undersides. I’ll construct them to mimic the S&NY flats in appearance as much as possible (and practical!). I’ll lose some conformance points for the NMRA AP certificate, but that is a secondary issue. The ultimate goal is an operational model railroad based on the S&NY, and a few compromises will always be necessary to achieve that.
I’ve already built a new flatcar deck without lead this time, and so far no warping. I’ll update as I can!
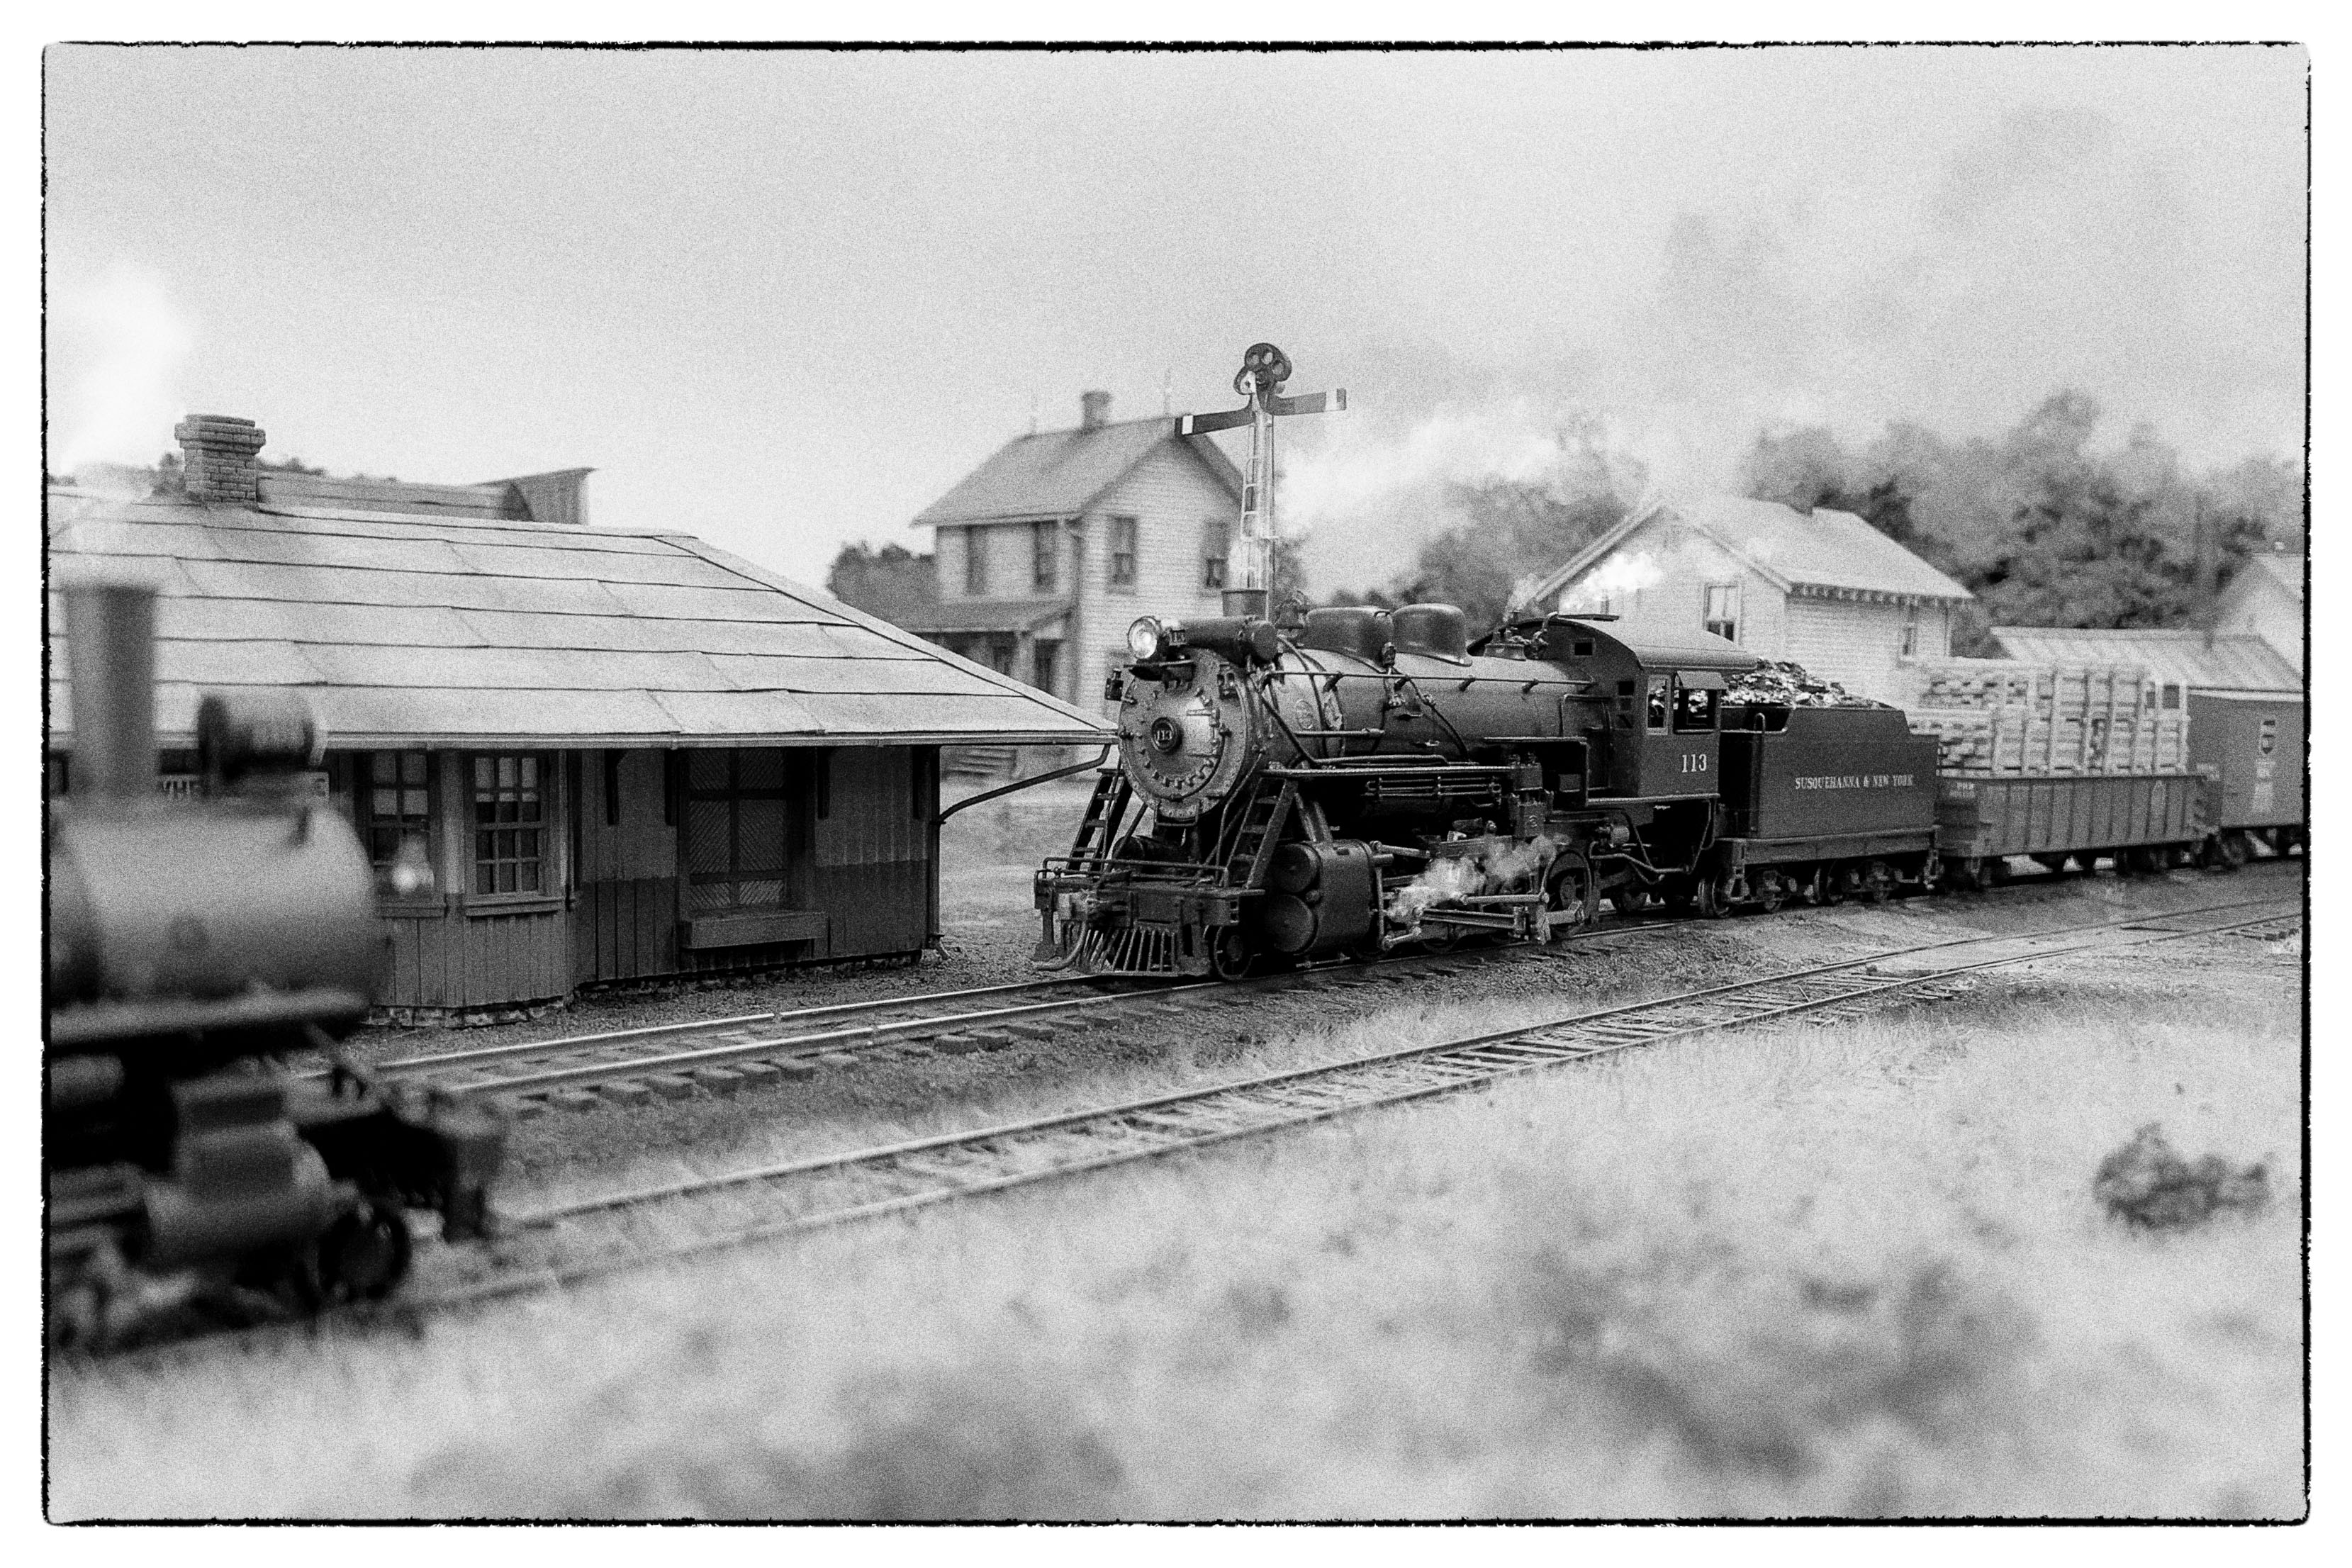
Westbound Train 23 slows for orders at Wheelerville, 6/29/39.
Building a large-ish model railroad, often necessary projects crop up that I lump under the term “infrastructure”. This is the un-sexy non-model railroad stuff that gets glossed over in the hobby press, and is usually covered in one short sentence in layout articles: “After prepping the basement, construction began on the X,Y & Z Railroad”.
Well.
“Room prep” covers ALOT of ground, and often involves ALOT of grunt labor. But, if the owner wants to have a comfortable, warm, well-lit space to work in, and for visitors to enjoy, that work has to be done.
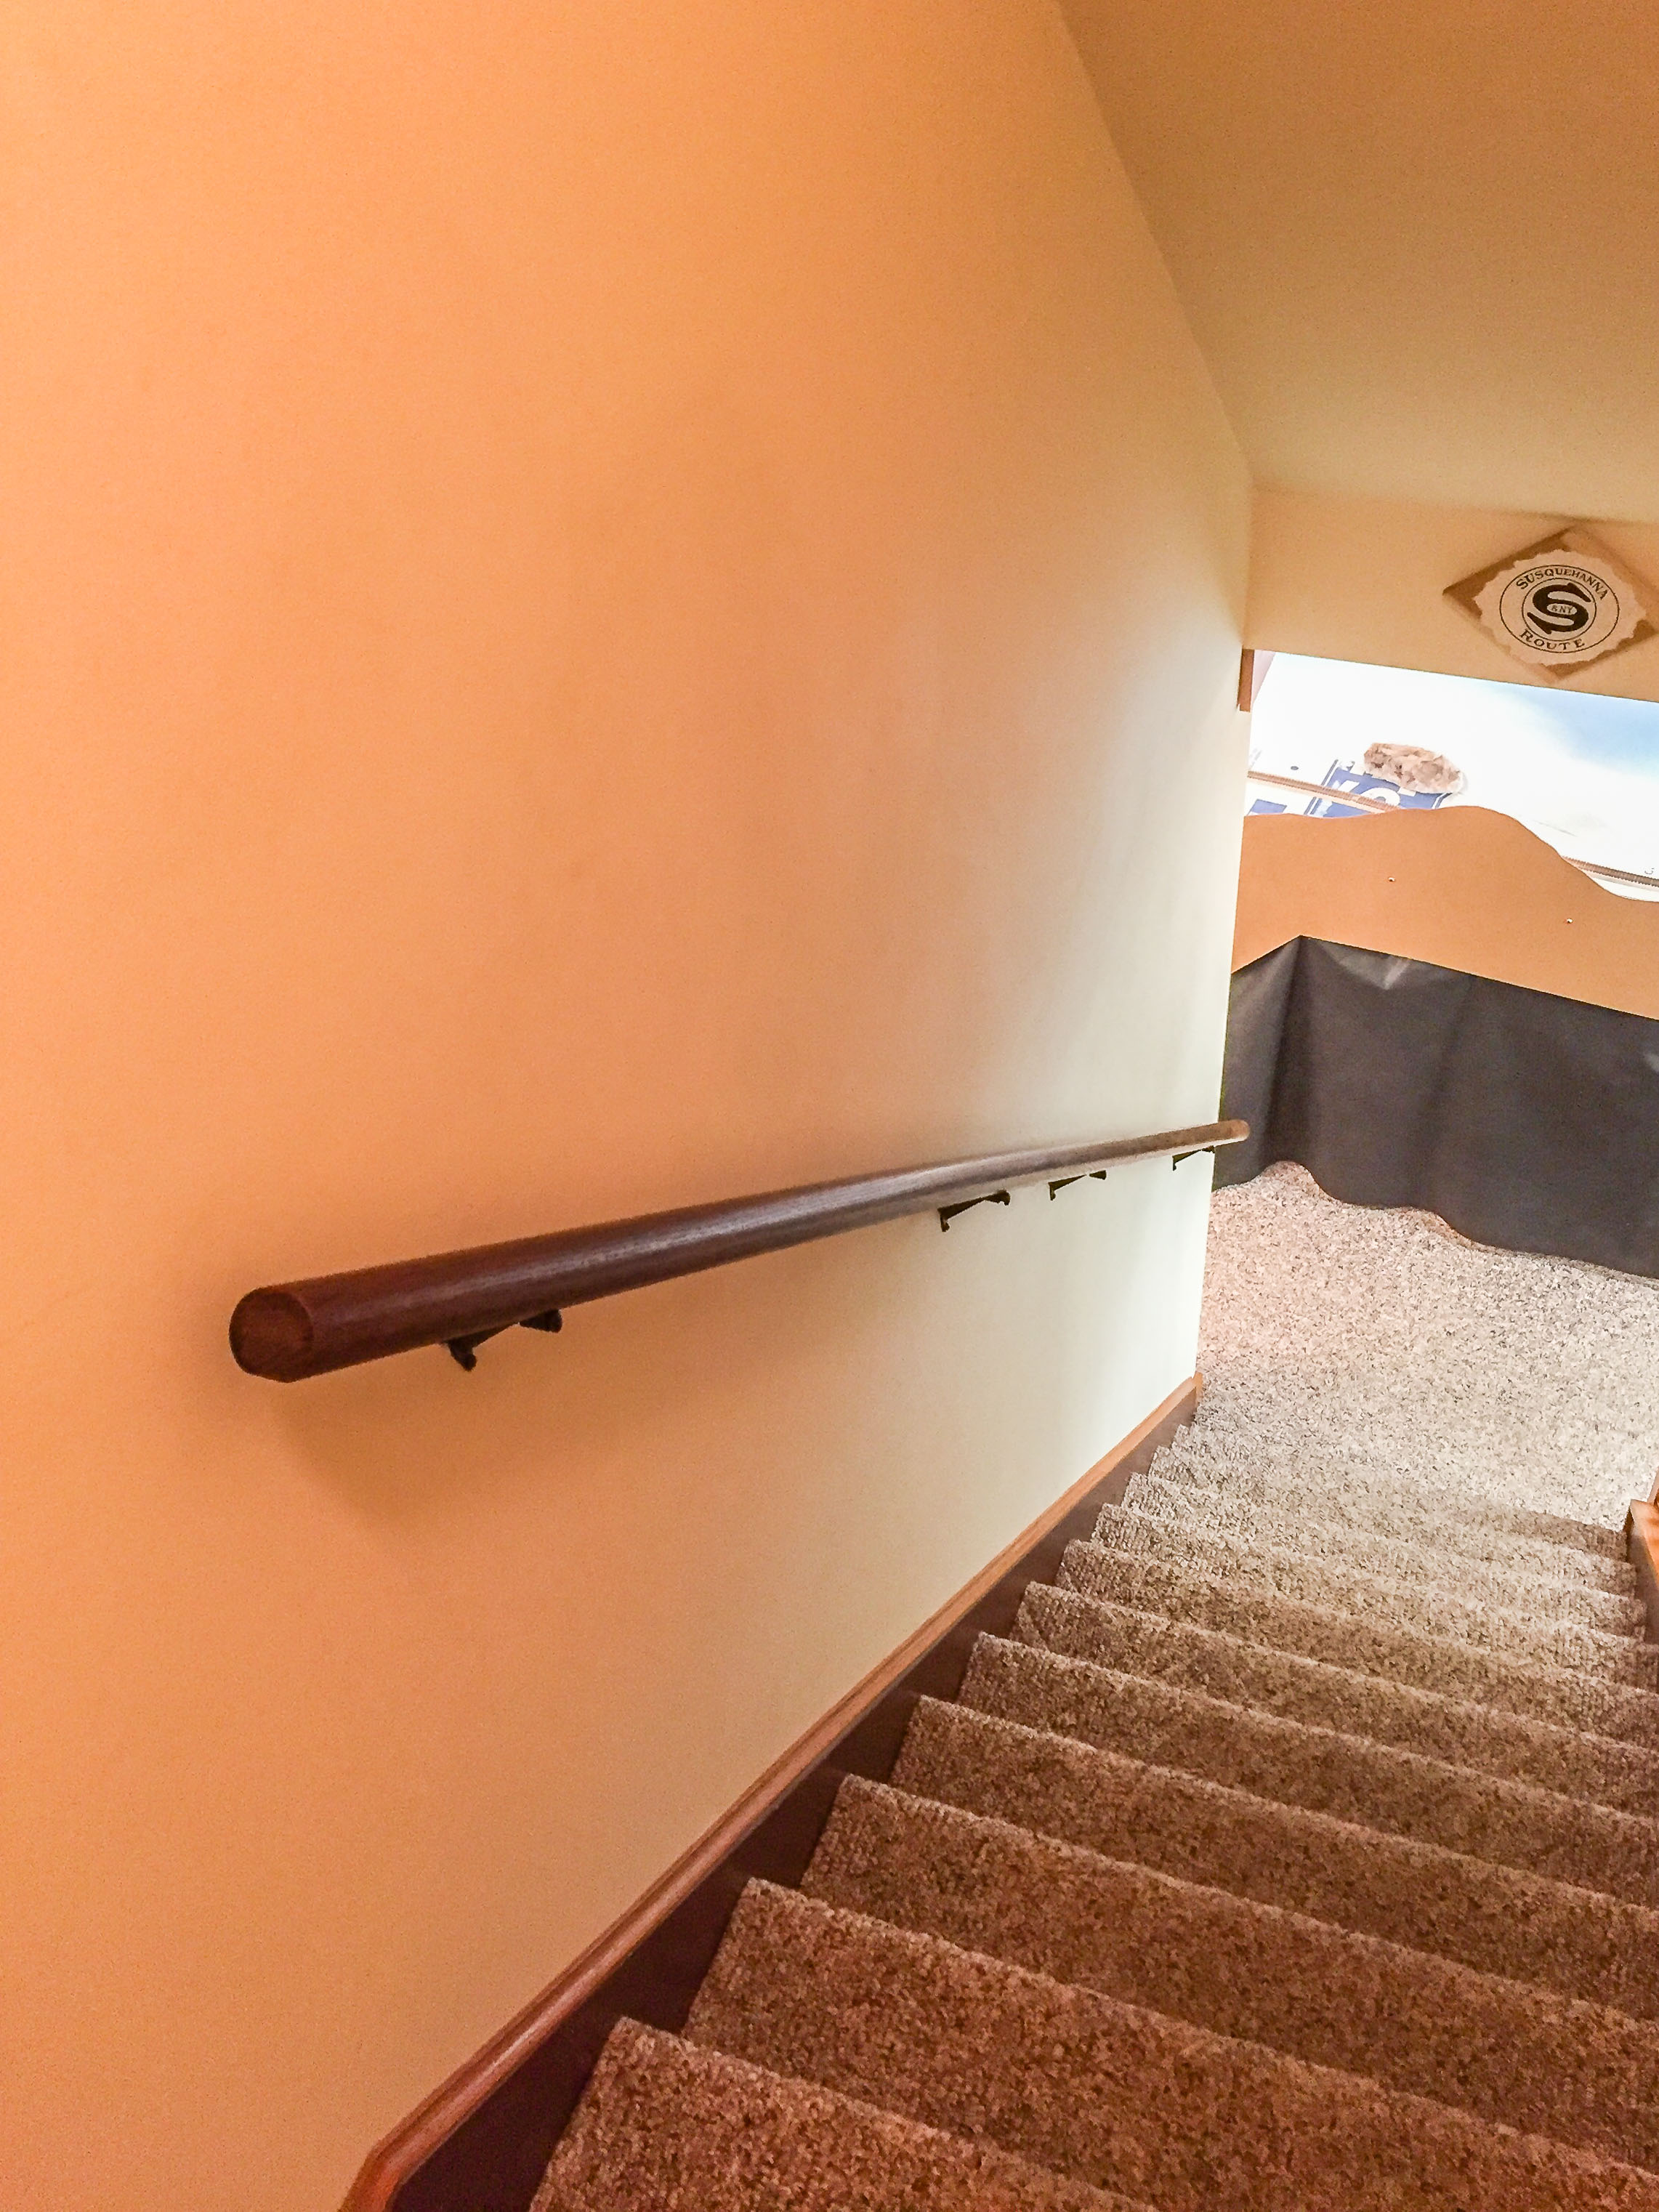
Sometimes “infrastructure” projects become necessary well after railroad construction has begun. Case-in-point: Our NMRA Division (MCR Division12) had layout tours for members this past November. During the tour, I suddenly realized that many of our members are a bit older, and several have a bit of a “hitch in their giddy-up”, so to speak. This resulted in some difficulty navigating the stairs to the basement, as there was no handrail for about 2/3rds of the way. This was not something that had ever been a problem for the family, but for some visitors it obviously was. Besides, it really was not up to code. Thus, putting in a handrail became top priority before the next op session:
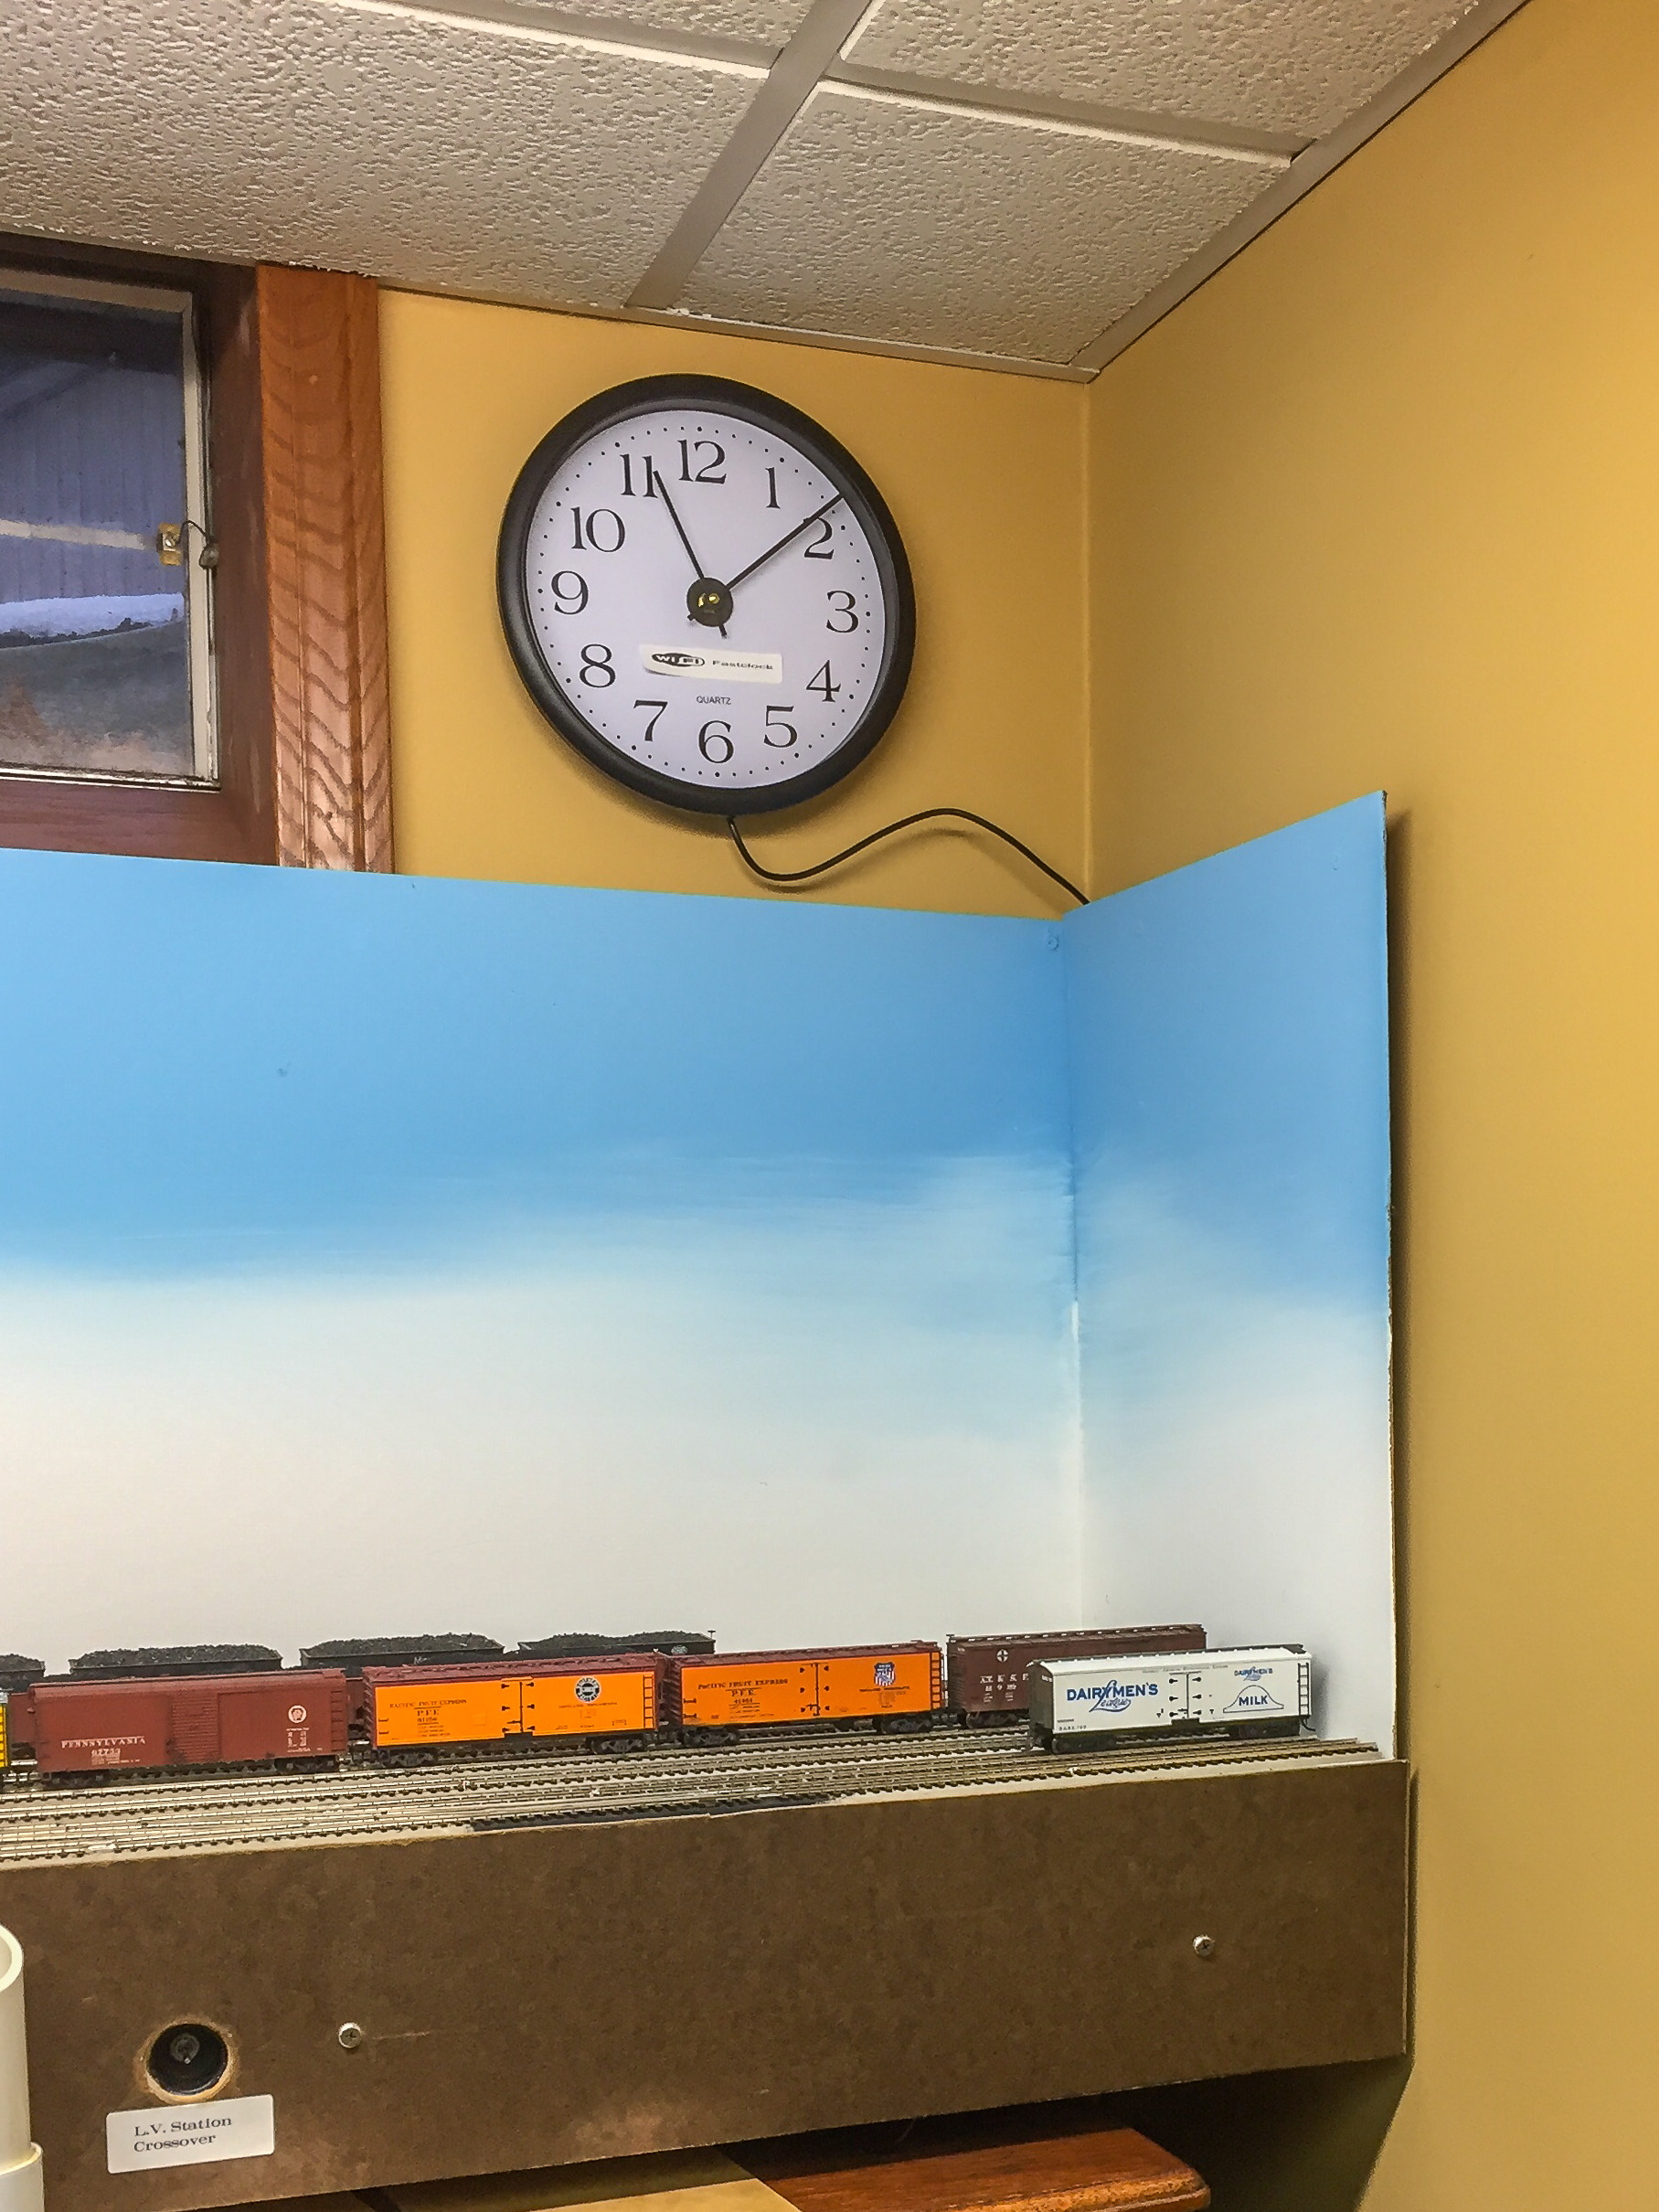
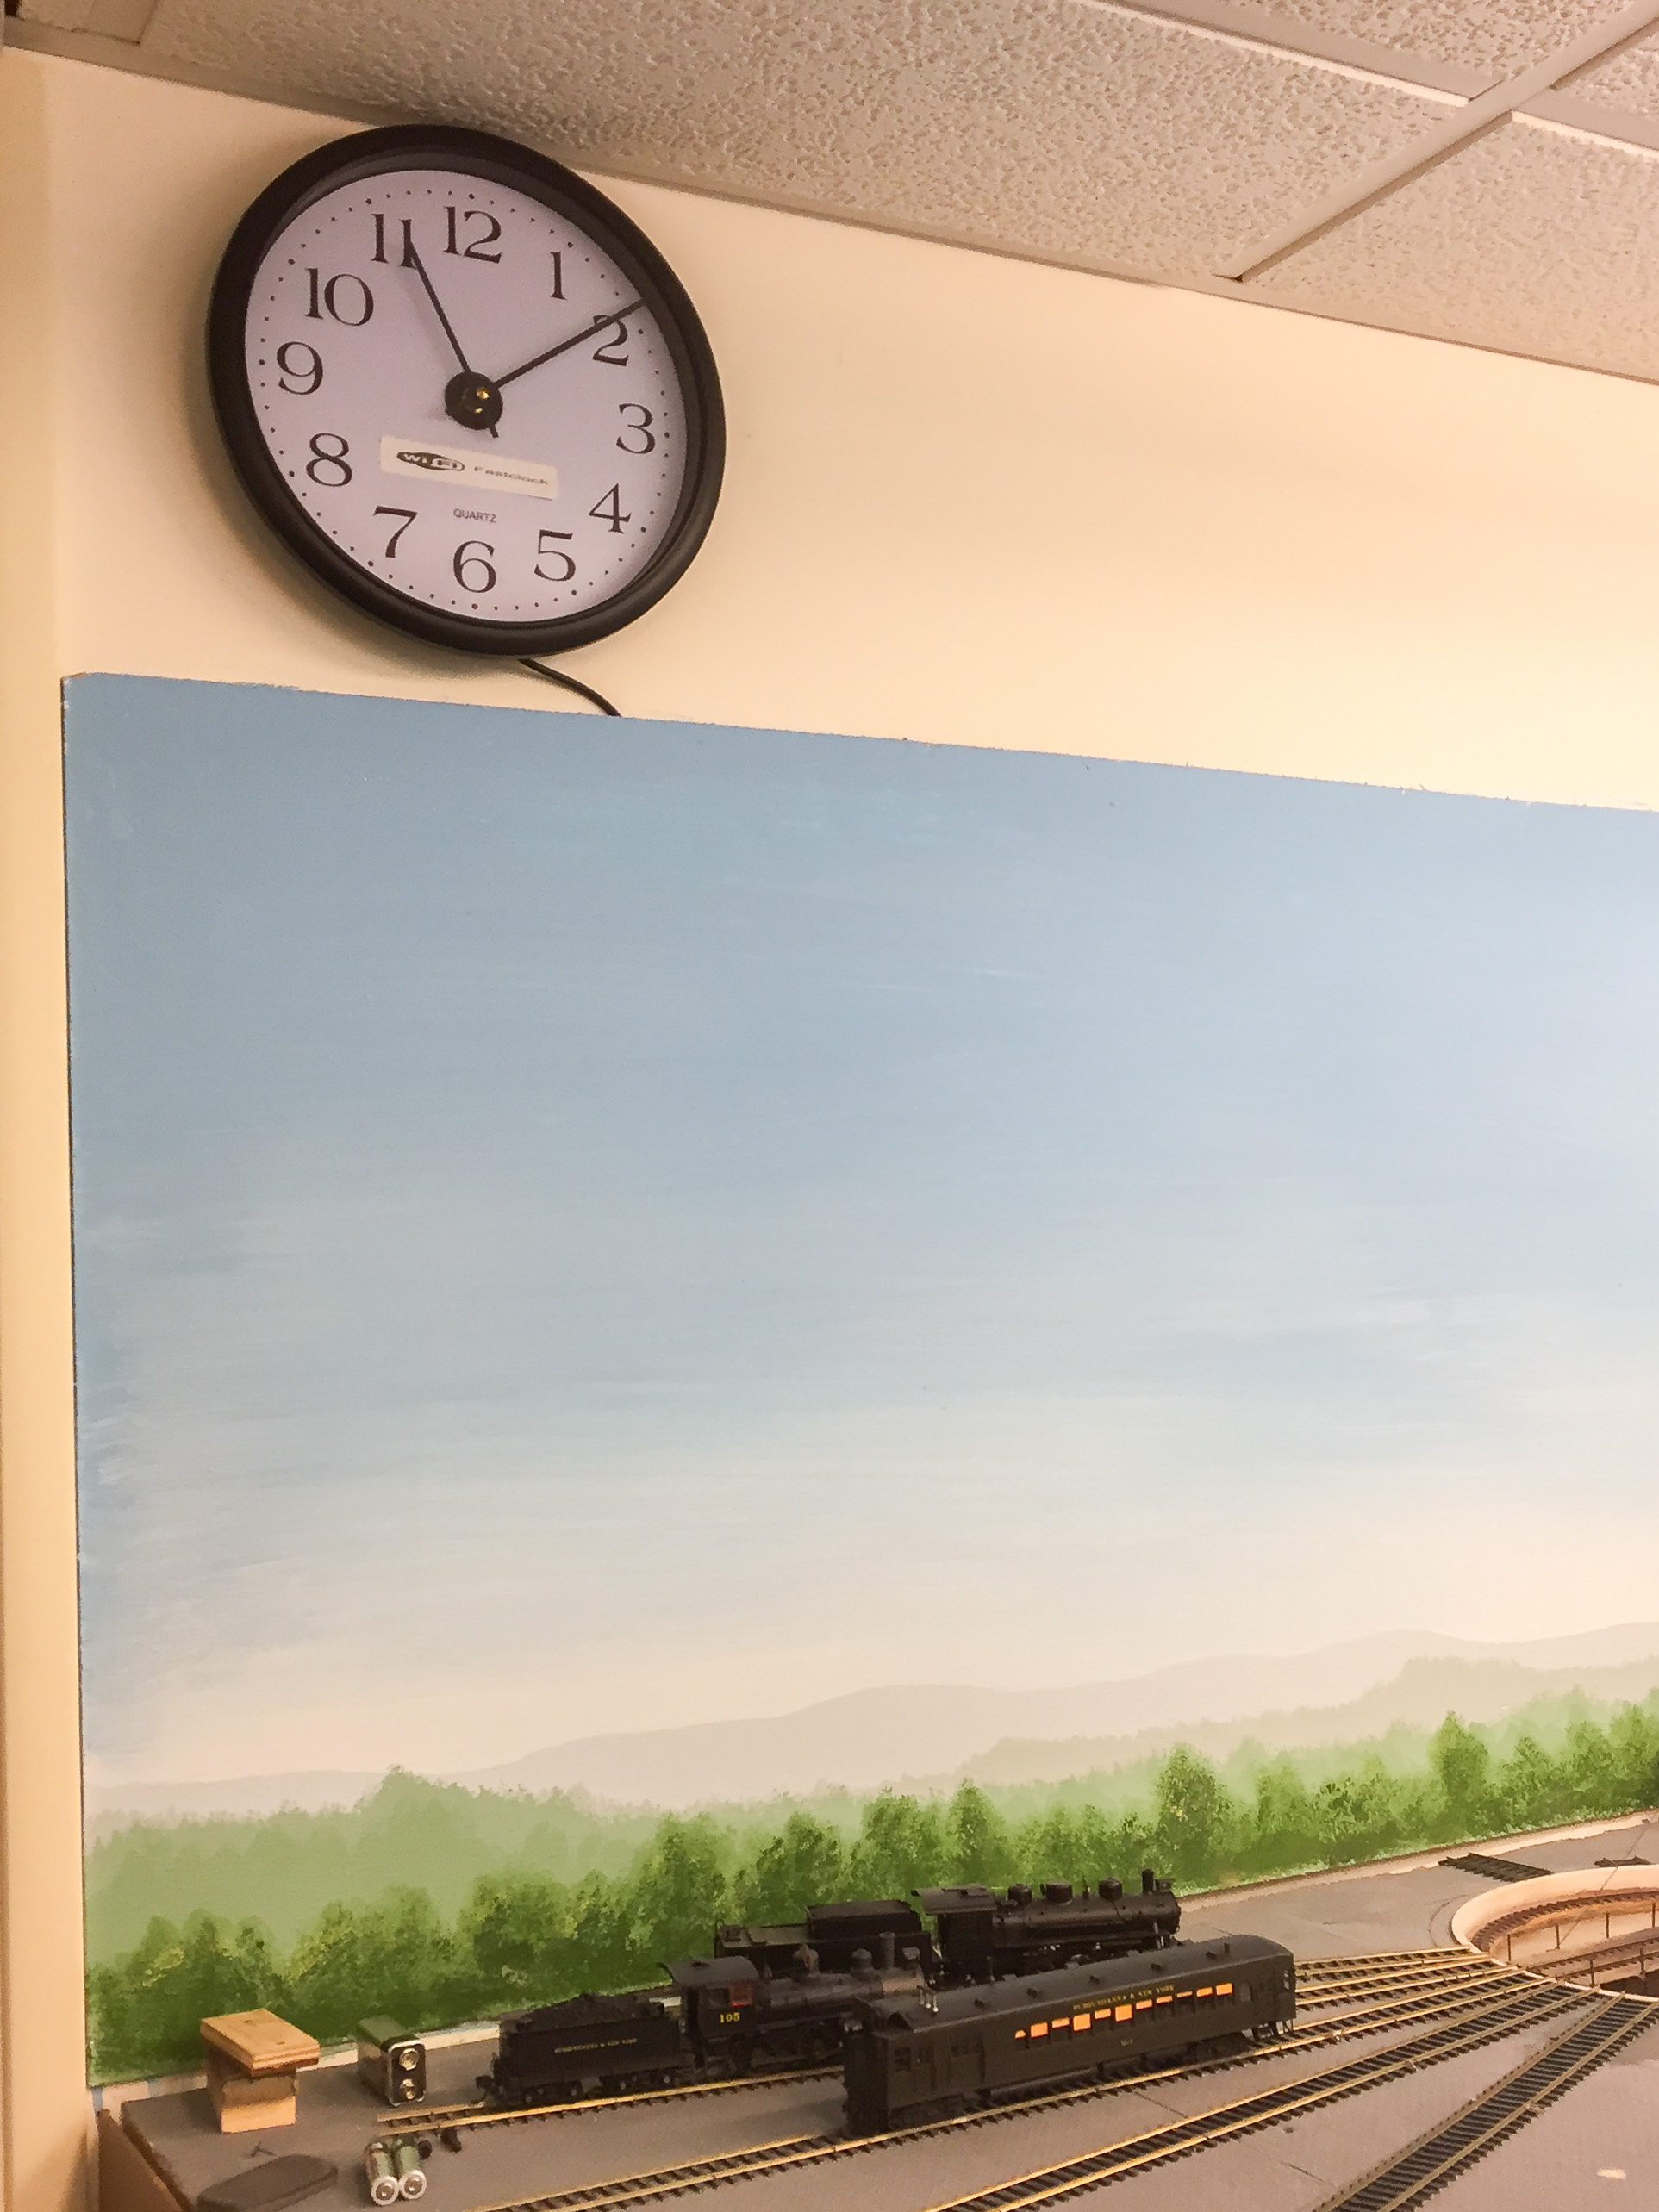
Another order of business was getting Wi-Fi clocks installed around the railroad. The S&NY runs on 1:1 time during op sessions, but the timetable begins at 7:30PM. This was done as most of the early sessions were Saturday evenings, and the crew just used their watches or phones to keep track of the time. The problem was that if there was a glitch that put a halt to ops for a period of time, the timetable and schedule would get out of whack with “real time”. Afternoon sessions were also a problem, in that a totally different timetable had to be used.
Enter Wi-Fi clocks from Model Railroad Control Systems: Wi-Fi Clocks. Finally, a perfect solution! I purchased 3 analog-style clocks, hooked everything up per the instructions, and everything worked perfectly! I put the clocks where at least one clock would be visible from anywhere on the layout. Another “infrastructure” project complete:
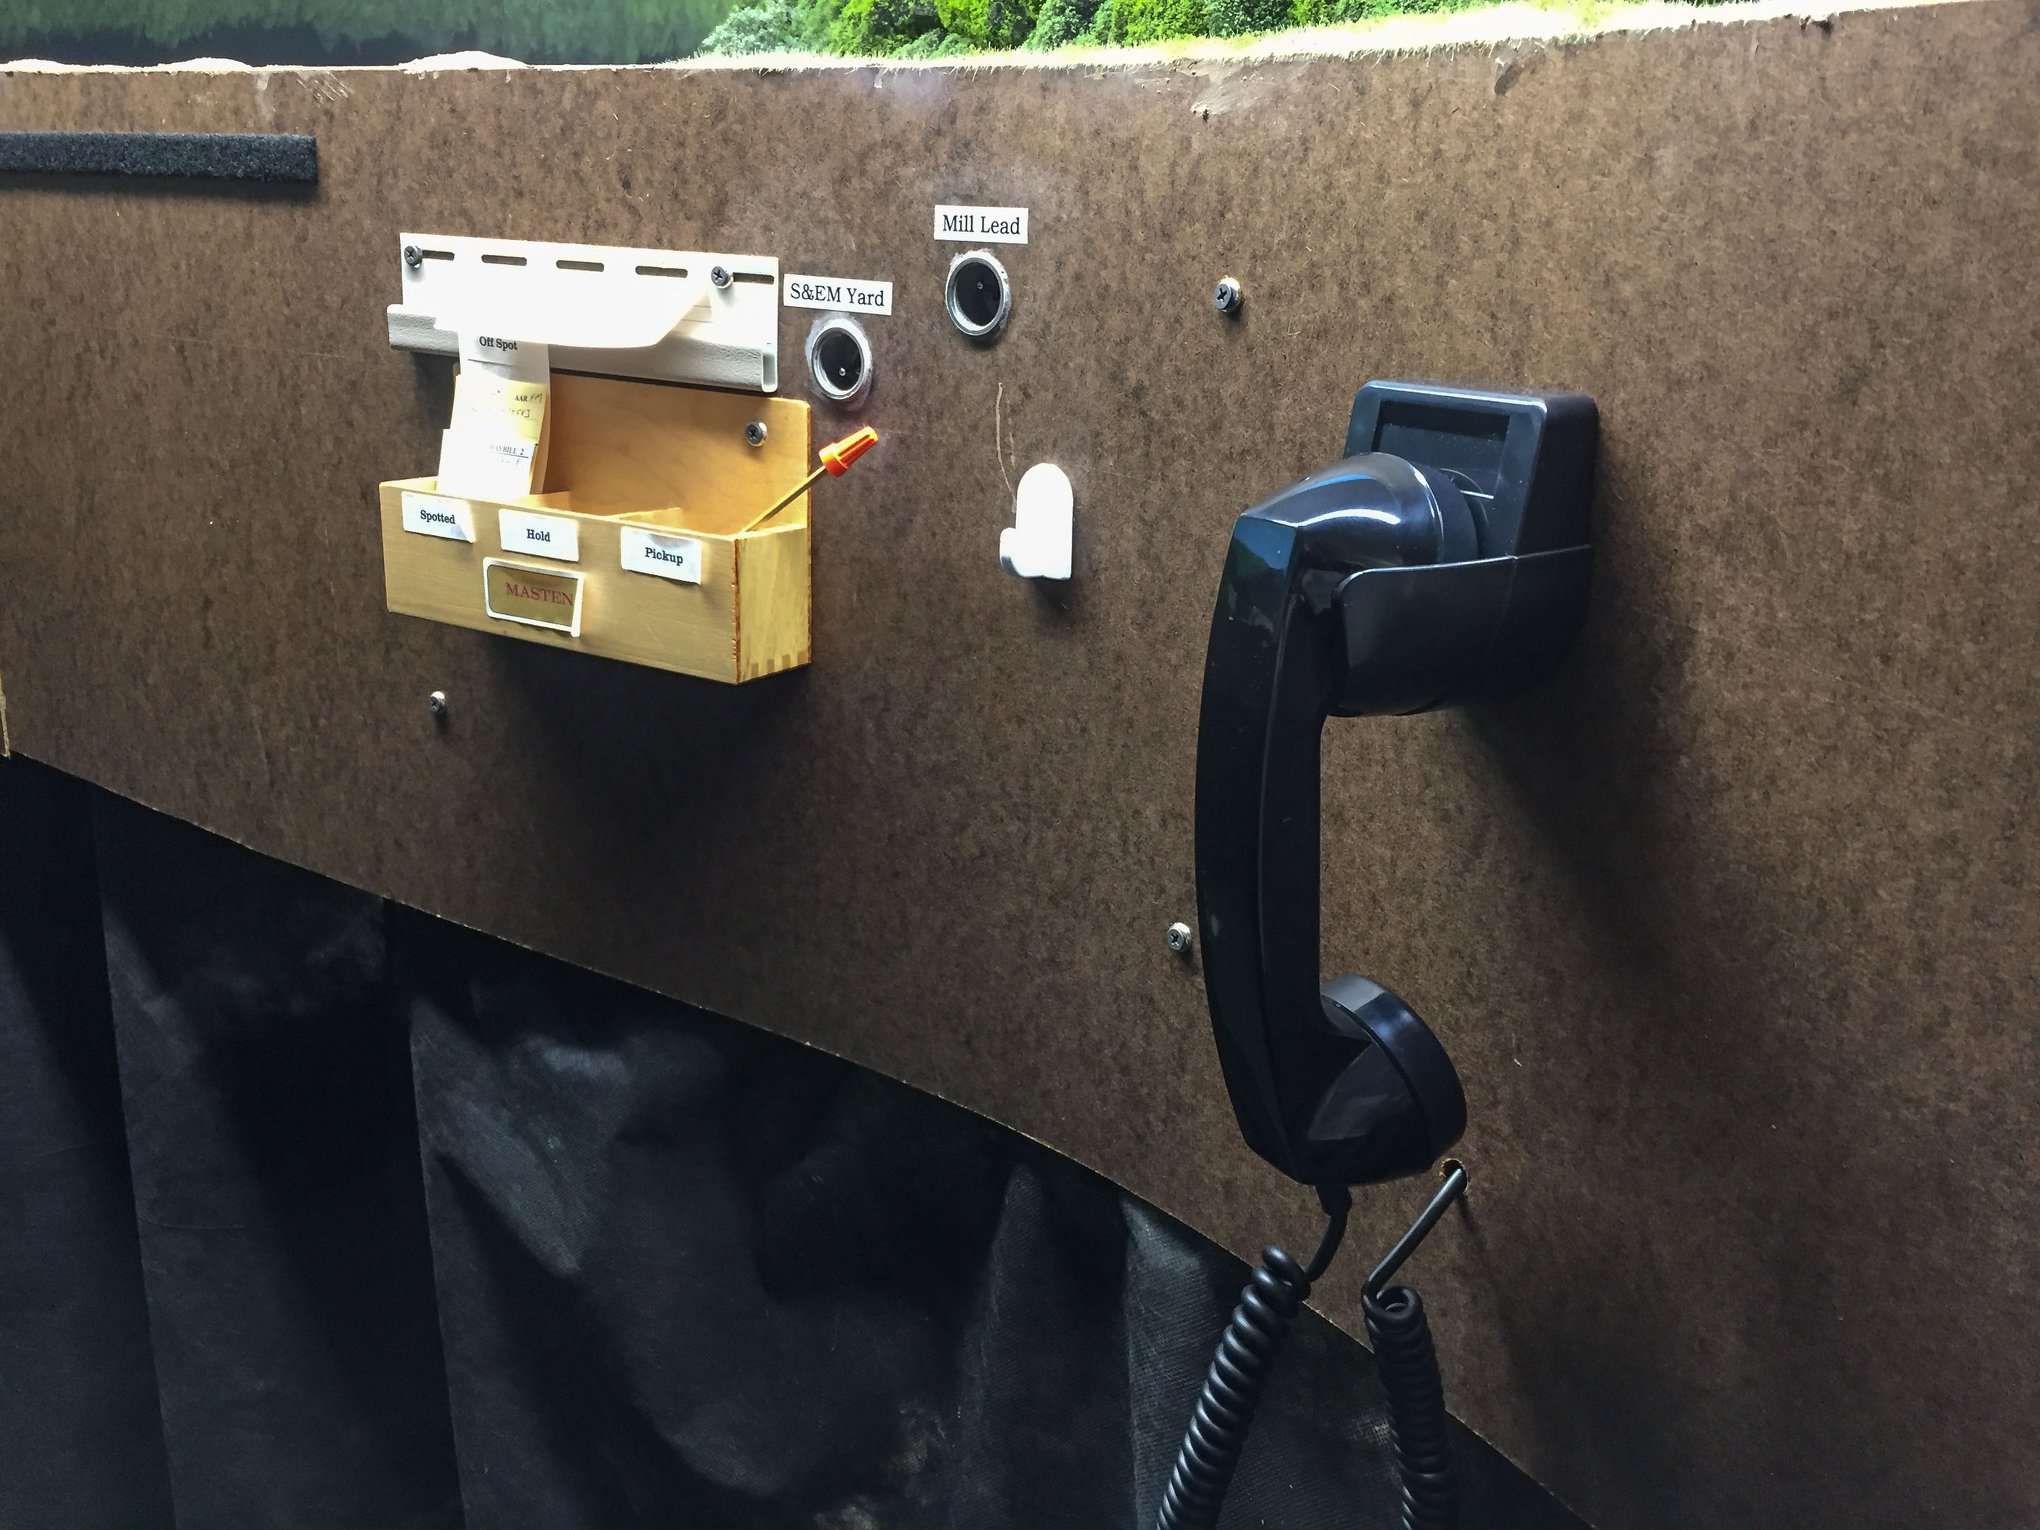
As op sessions progressed, it became increasingly apparent that some method had to be devised to allow crews to “OS” (i.e. notify the dispatcher) when they passed a station. I wanted a solution that would be relatively authentic without being cumbersome for the crews, and I hate FRS radios and headsets. Once again, MRCS came to the rescue: Model railroad telephone systems. While not exactly inexpensive, the phone system is easy to use and relatively authentic. Two op sessions has proved the money well-spent. Seth Neumann at MRCS was extremely helpful with advice and instructions on getting the system installed and operational. The downside was several hours spent underneath the layout with a headlamp, pulling CAT-5 cable. Another unglamorous “infrastructure” project complete: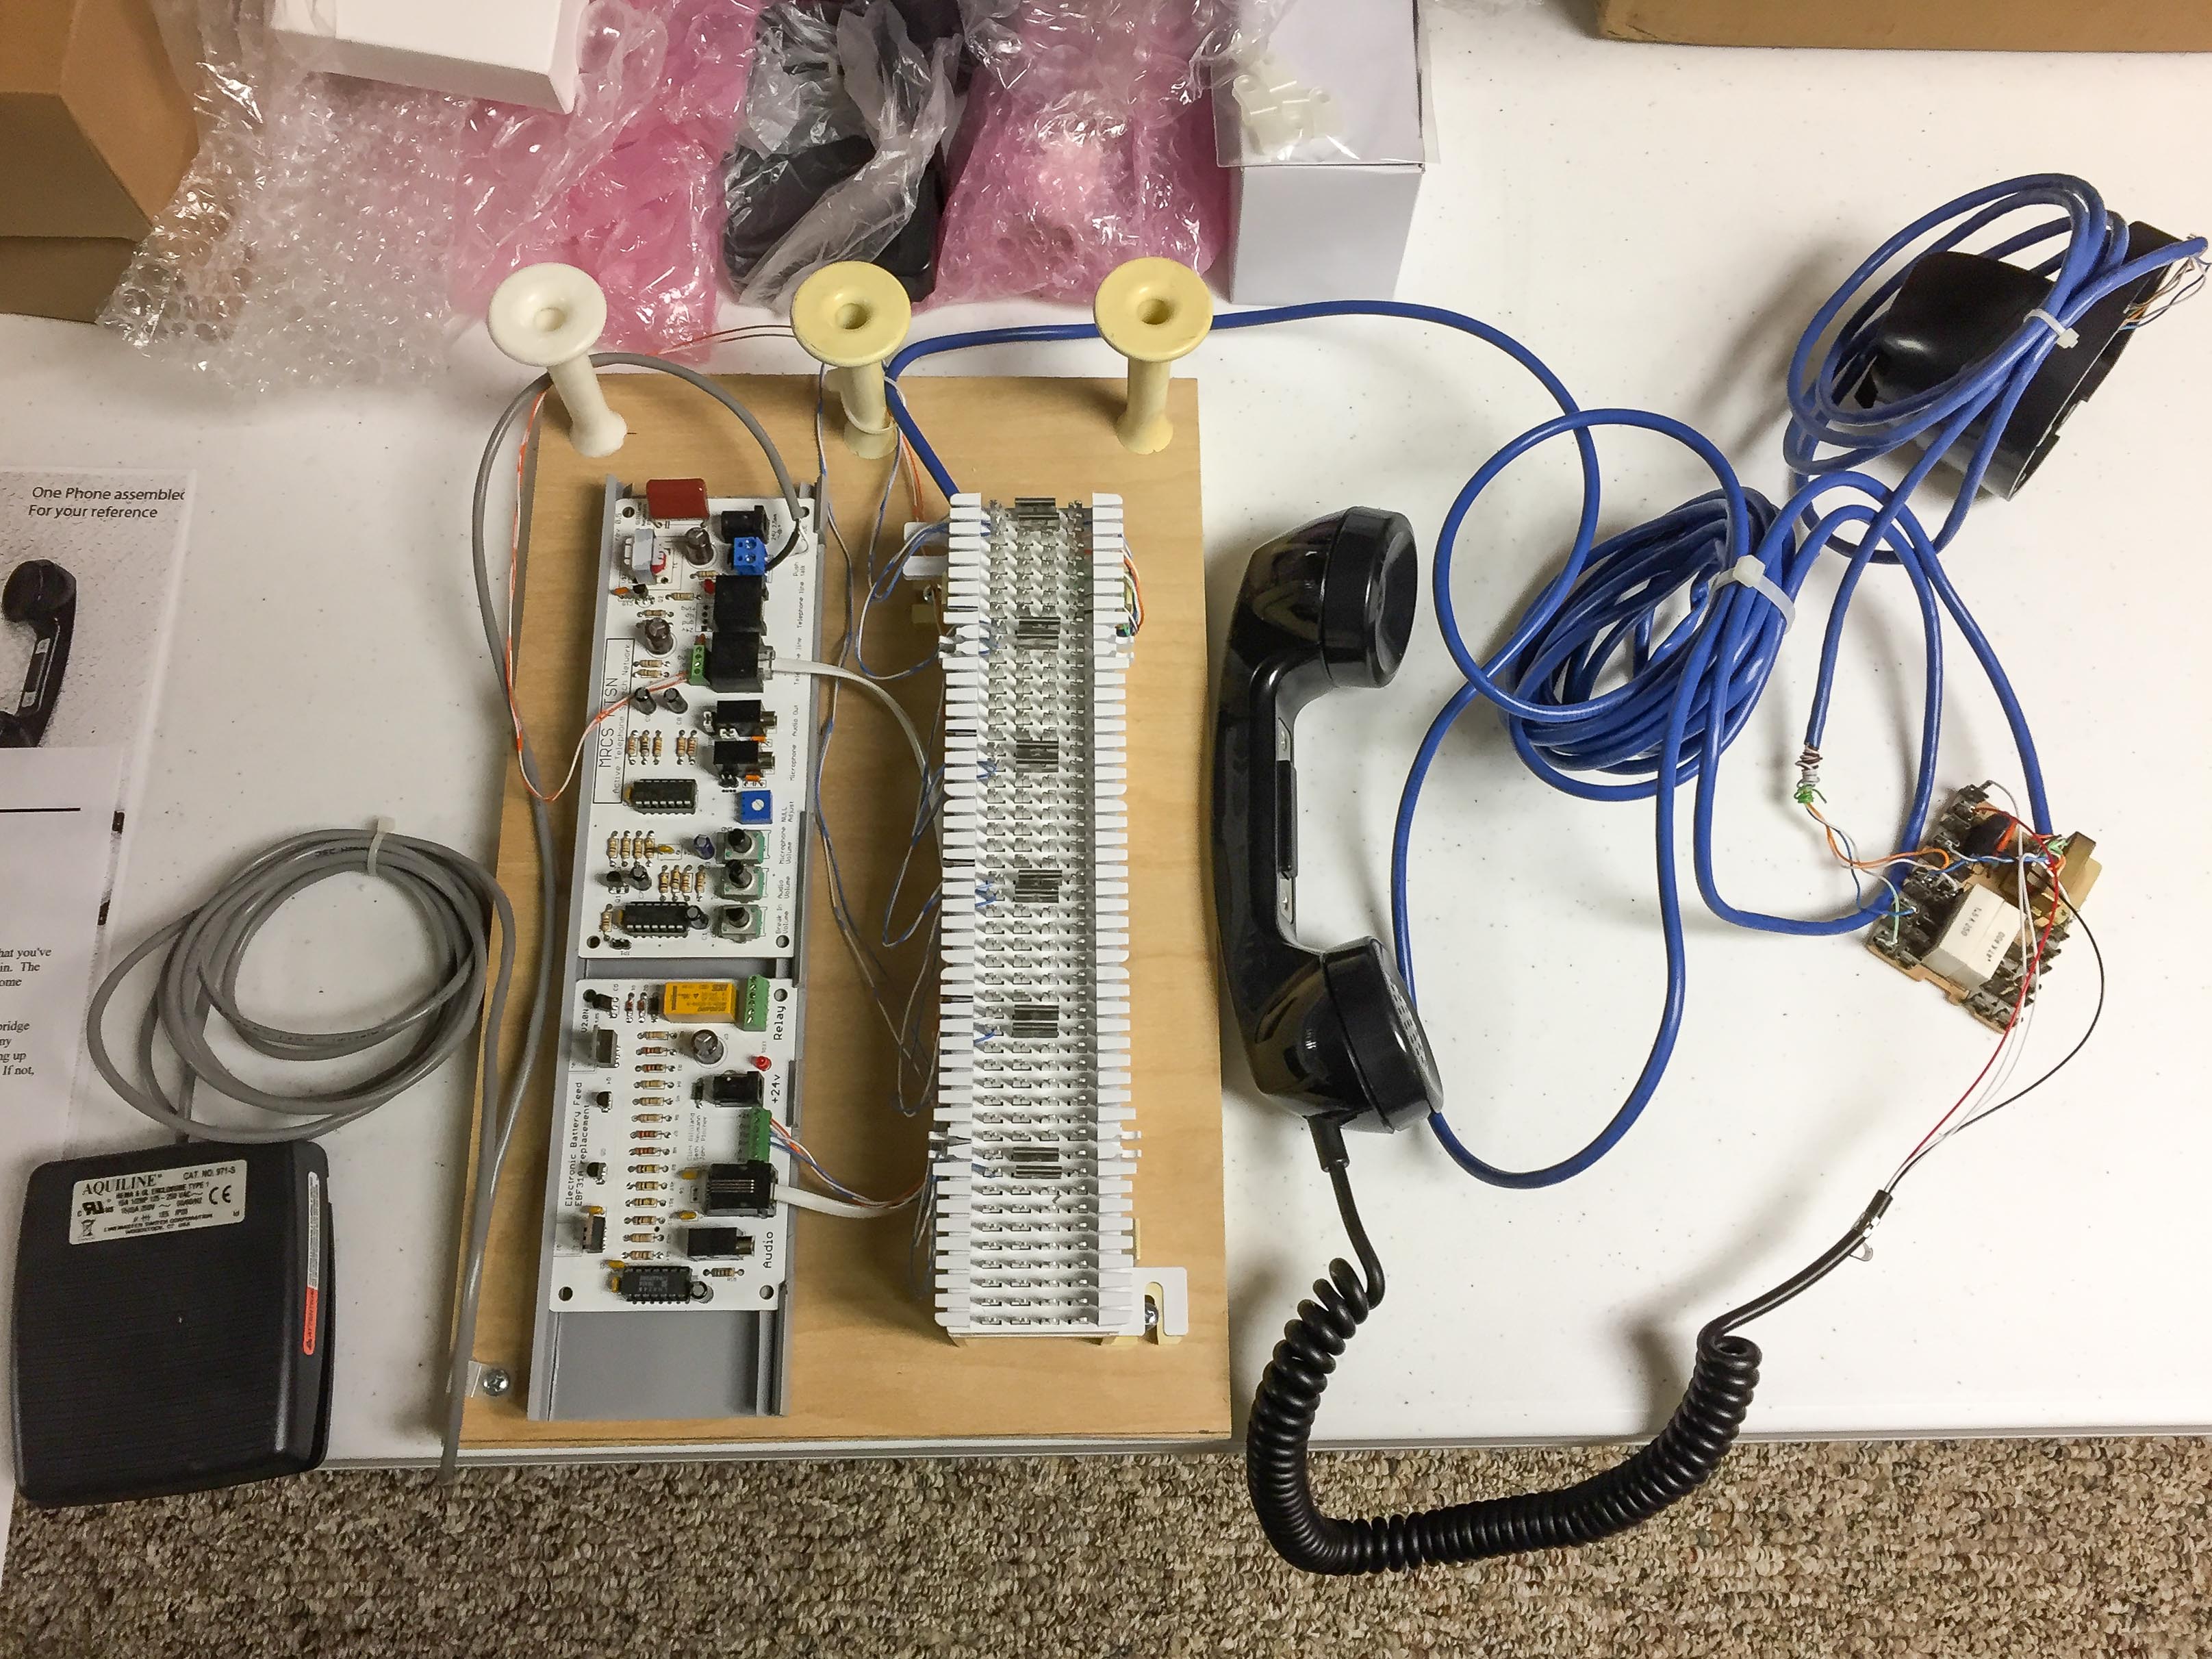
The last project is a minor one, but one that had been bugging me for a while. I used the car-card boxes to hold pencils and uncoupling picks, but the boxes aren’t really deep enough to keep the pencils and picks from flipping out onto the floor. So, over the holidays I picked up a scrap length of PVC pipe and some endcaps from the local hardware store and made pencil and pick holders for all of the station areas. A couple of quick whacks with the chop saw and some hot glue, voila!:
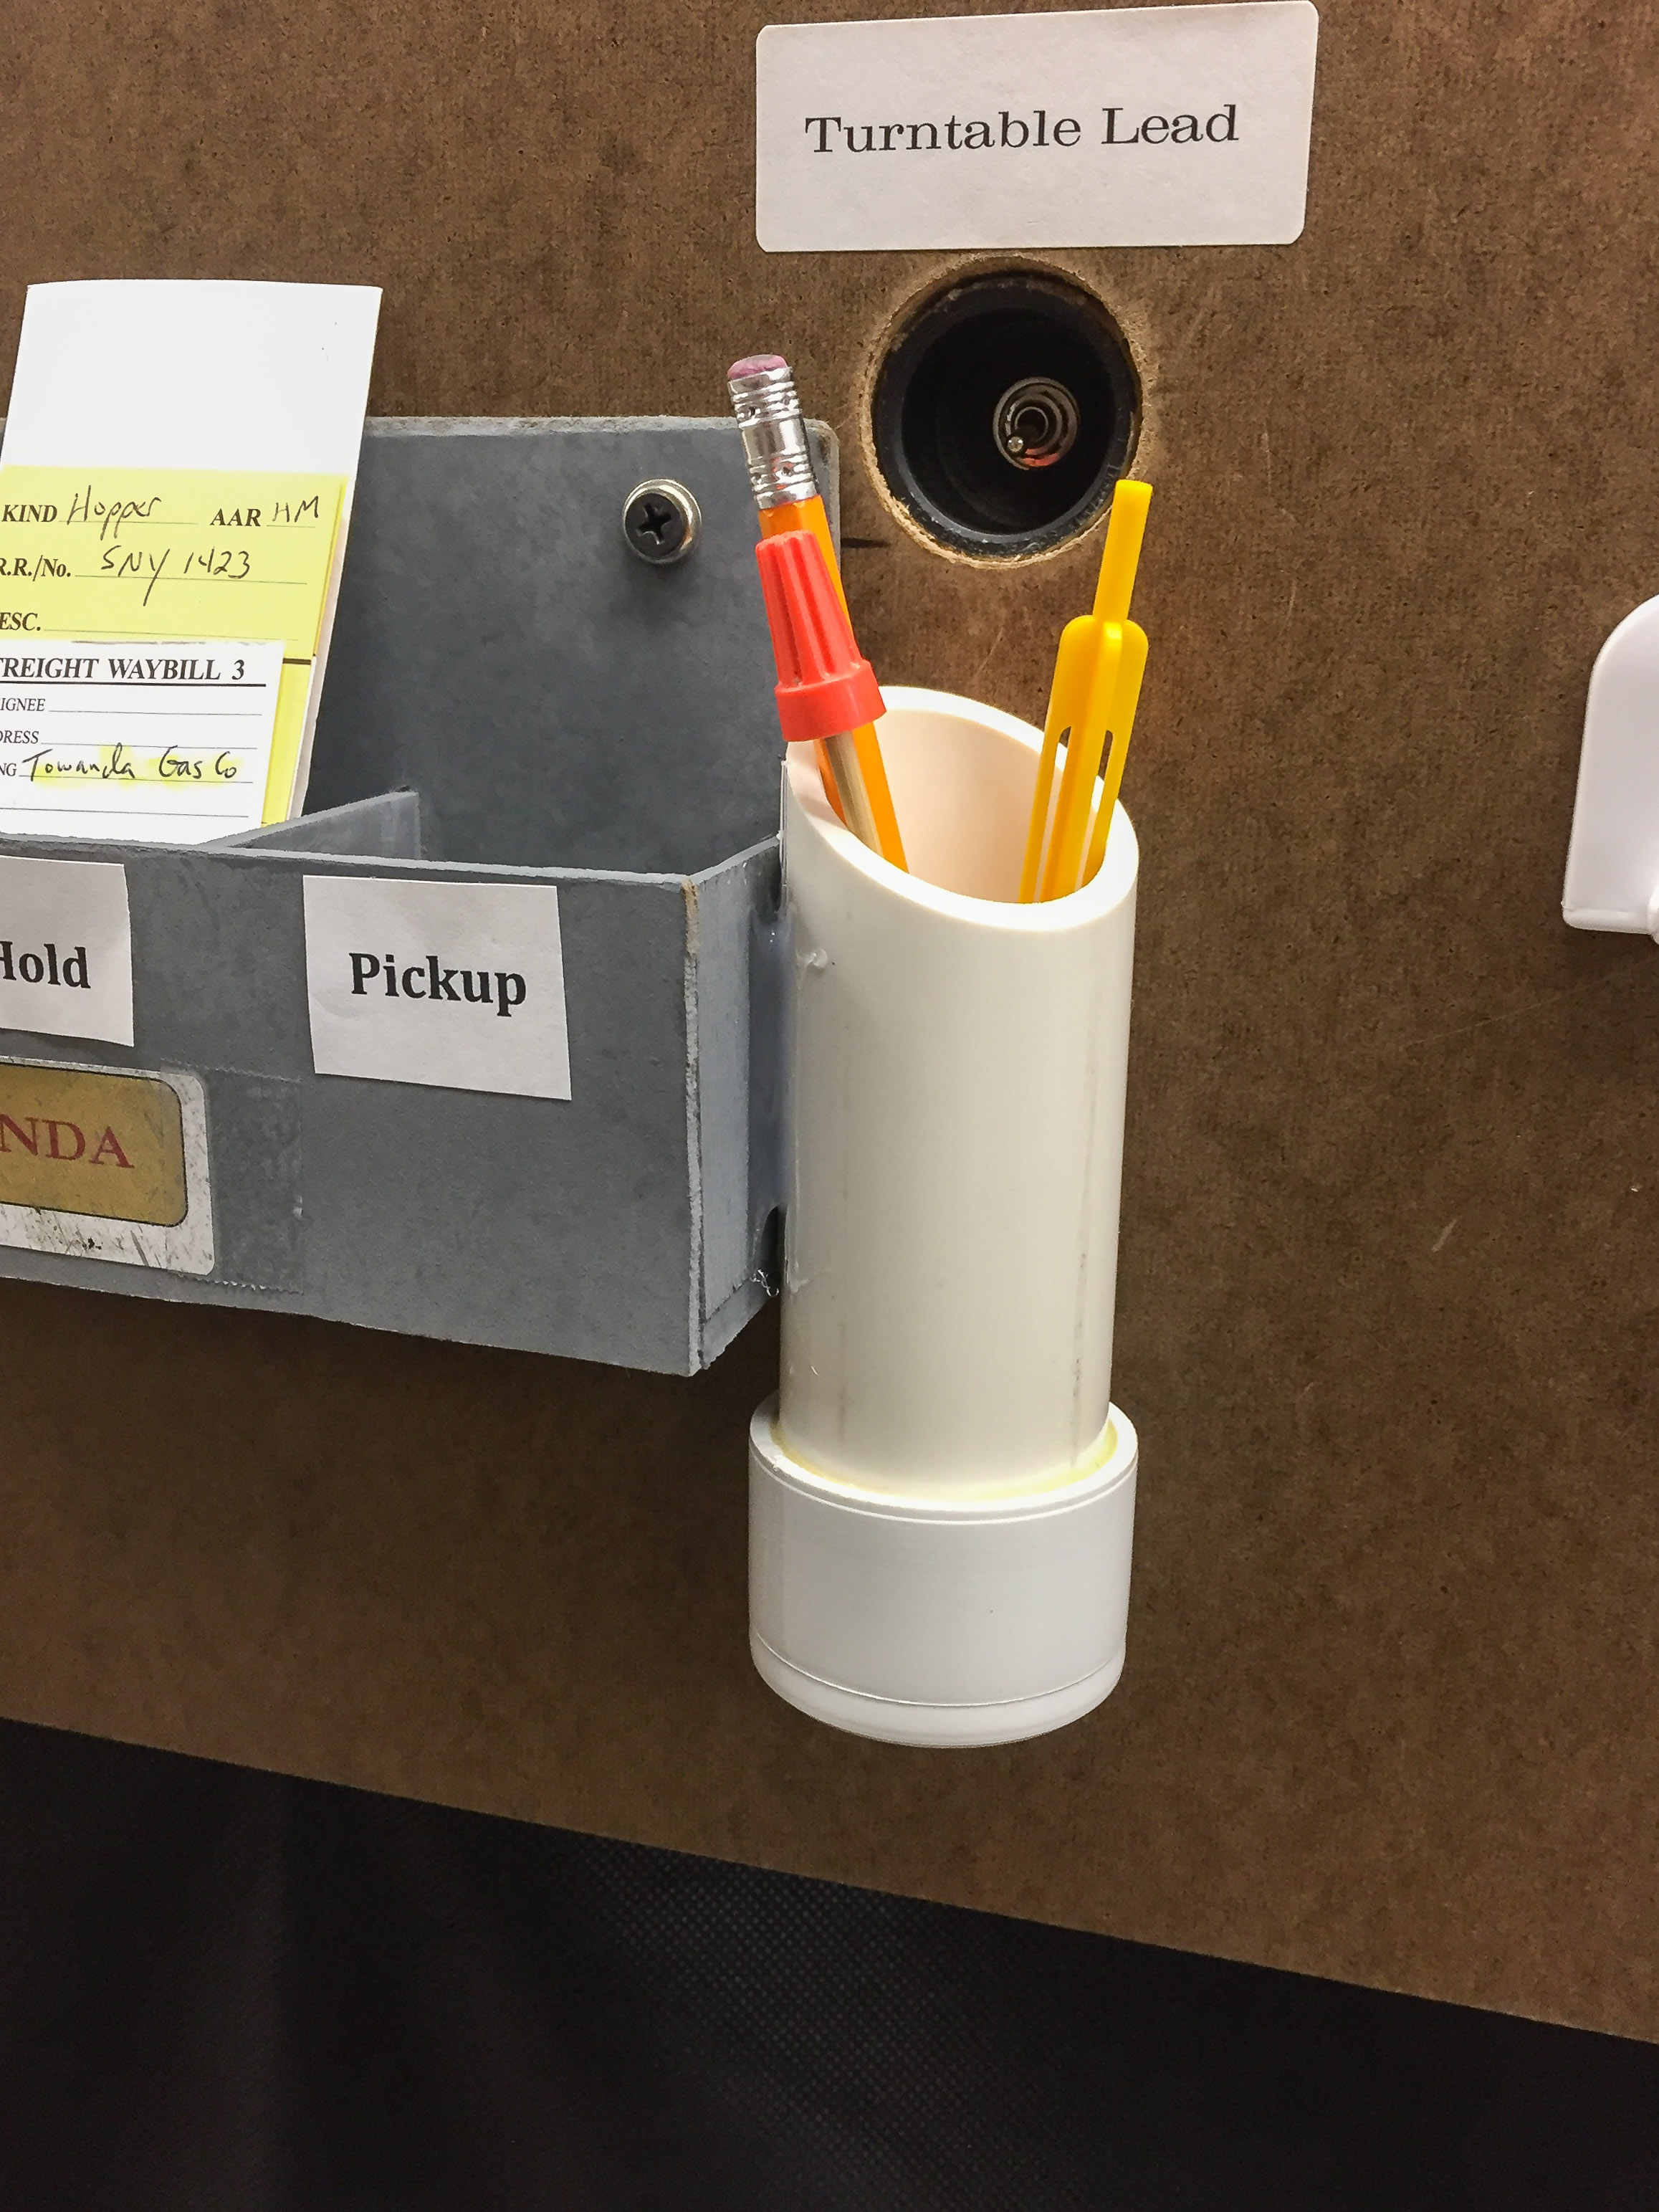
Another small “infrastructure” problem checked off.
Again, none of these things were very sexy, but they all add up to benefit operator comfort, safety, and ease of use. So, that’s what I’ve been doing on the railroad for the past 6 months or so. Looking forward to more actual railroad modeling this Spring!
Recent Comments