Several months ago, I looked around my railroad, and realized though the S&NY interchanges with the Pennsylvania Railroad, I had no PRR boxcars in service. I dug into my stash of to-be-built kits and found a passel of old Red Caboose X29 boxcar kits. Red Caboose is defunct, but the tooling is now owned by Intermountain, who occasionally releases built-up ready-to-run models in various paint schemes. Unbuilt RC X29 kits are ubiquitous at train shows and can often be found at bargain prices. The kits are moderately complex and somewhat “fiddly”, rivaling some resin kits. This may account for why so many languish unbuilt on the secondary market.
The PRR X29 fleet alone numbered over 29,000 cars (!), and similar variants were owned by numerous other railroads. If one is modeling any era from the 1920’s though 1950’s, having representative model X29’s and variants are a requirement. I batch-built 6 of these kits at one time over the course of several months: 2 plain-vanilla PRR 1924 versions, 1 1925 PRR version, 1 PRR REA version, 1 B&O M-26A version, and 1 B&O M-26B version. I plan to detail these builds in a future blog entry.
The trucks included in the old RC kits have a (probably deserved) reputation of being derailment-prone junk. However, the tooling of the side frames is a very well-done representation of the early PRR 2D-F8 trucks equipping most of the early and middle production X29’s. What I’d like to focus on here is how to eliminate the inherent design flaws of these trucks and make them reliable runners.
First, a little background on these trucks. The “2D-F8” nomenclature refers to the PRR system of classifying car trucks. The “2” refers to the number of axles; the “D” is the AAR class of journal diameter, in this case 5 ½ x 10”; the “dash” represents a standard AAR axle diameter; “F” represents intended usage, “(F)reight” in this case; and “8” represents the eighth consecutive design of this class.
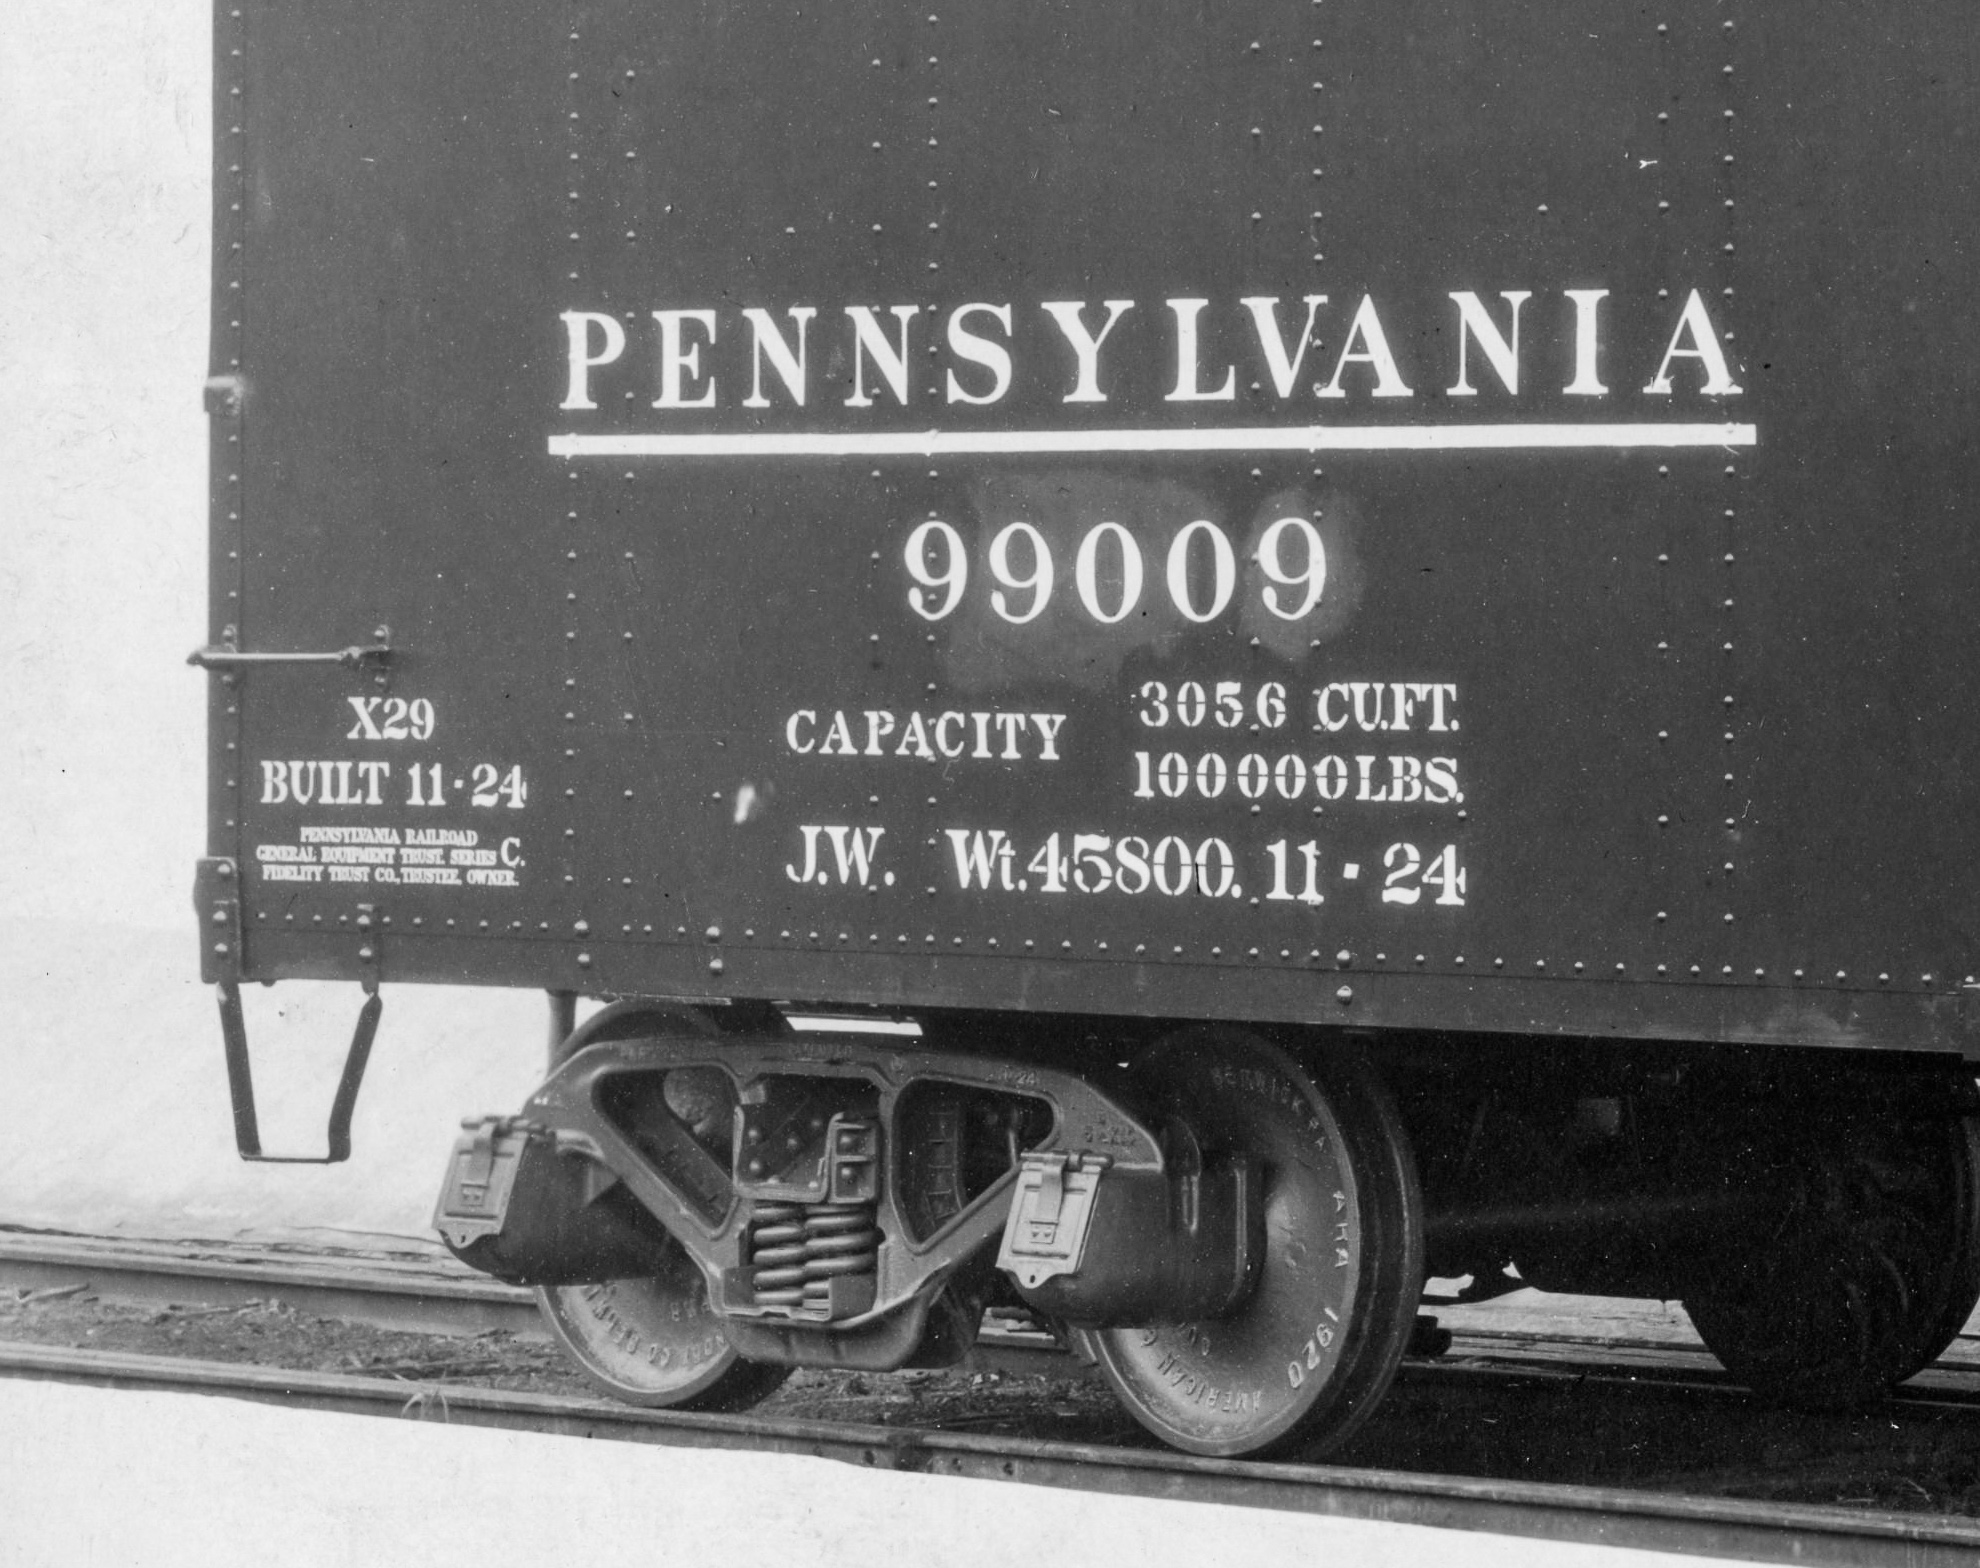
Ray Breyer Collection
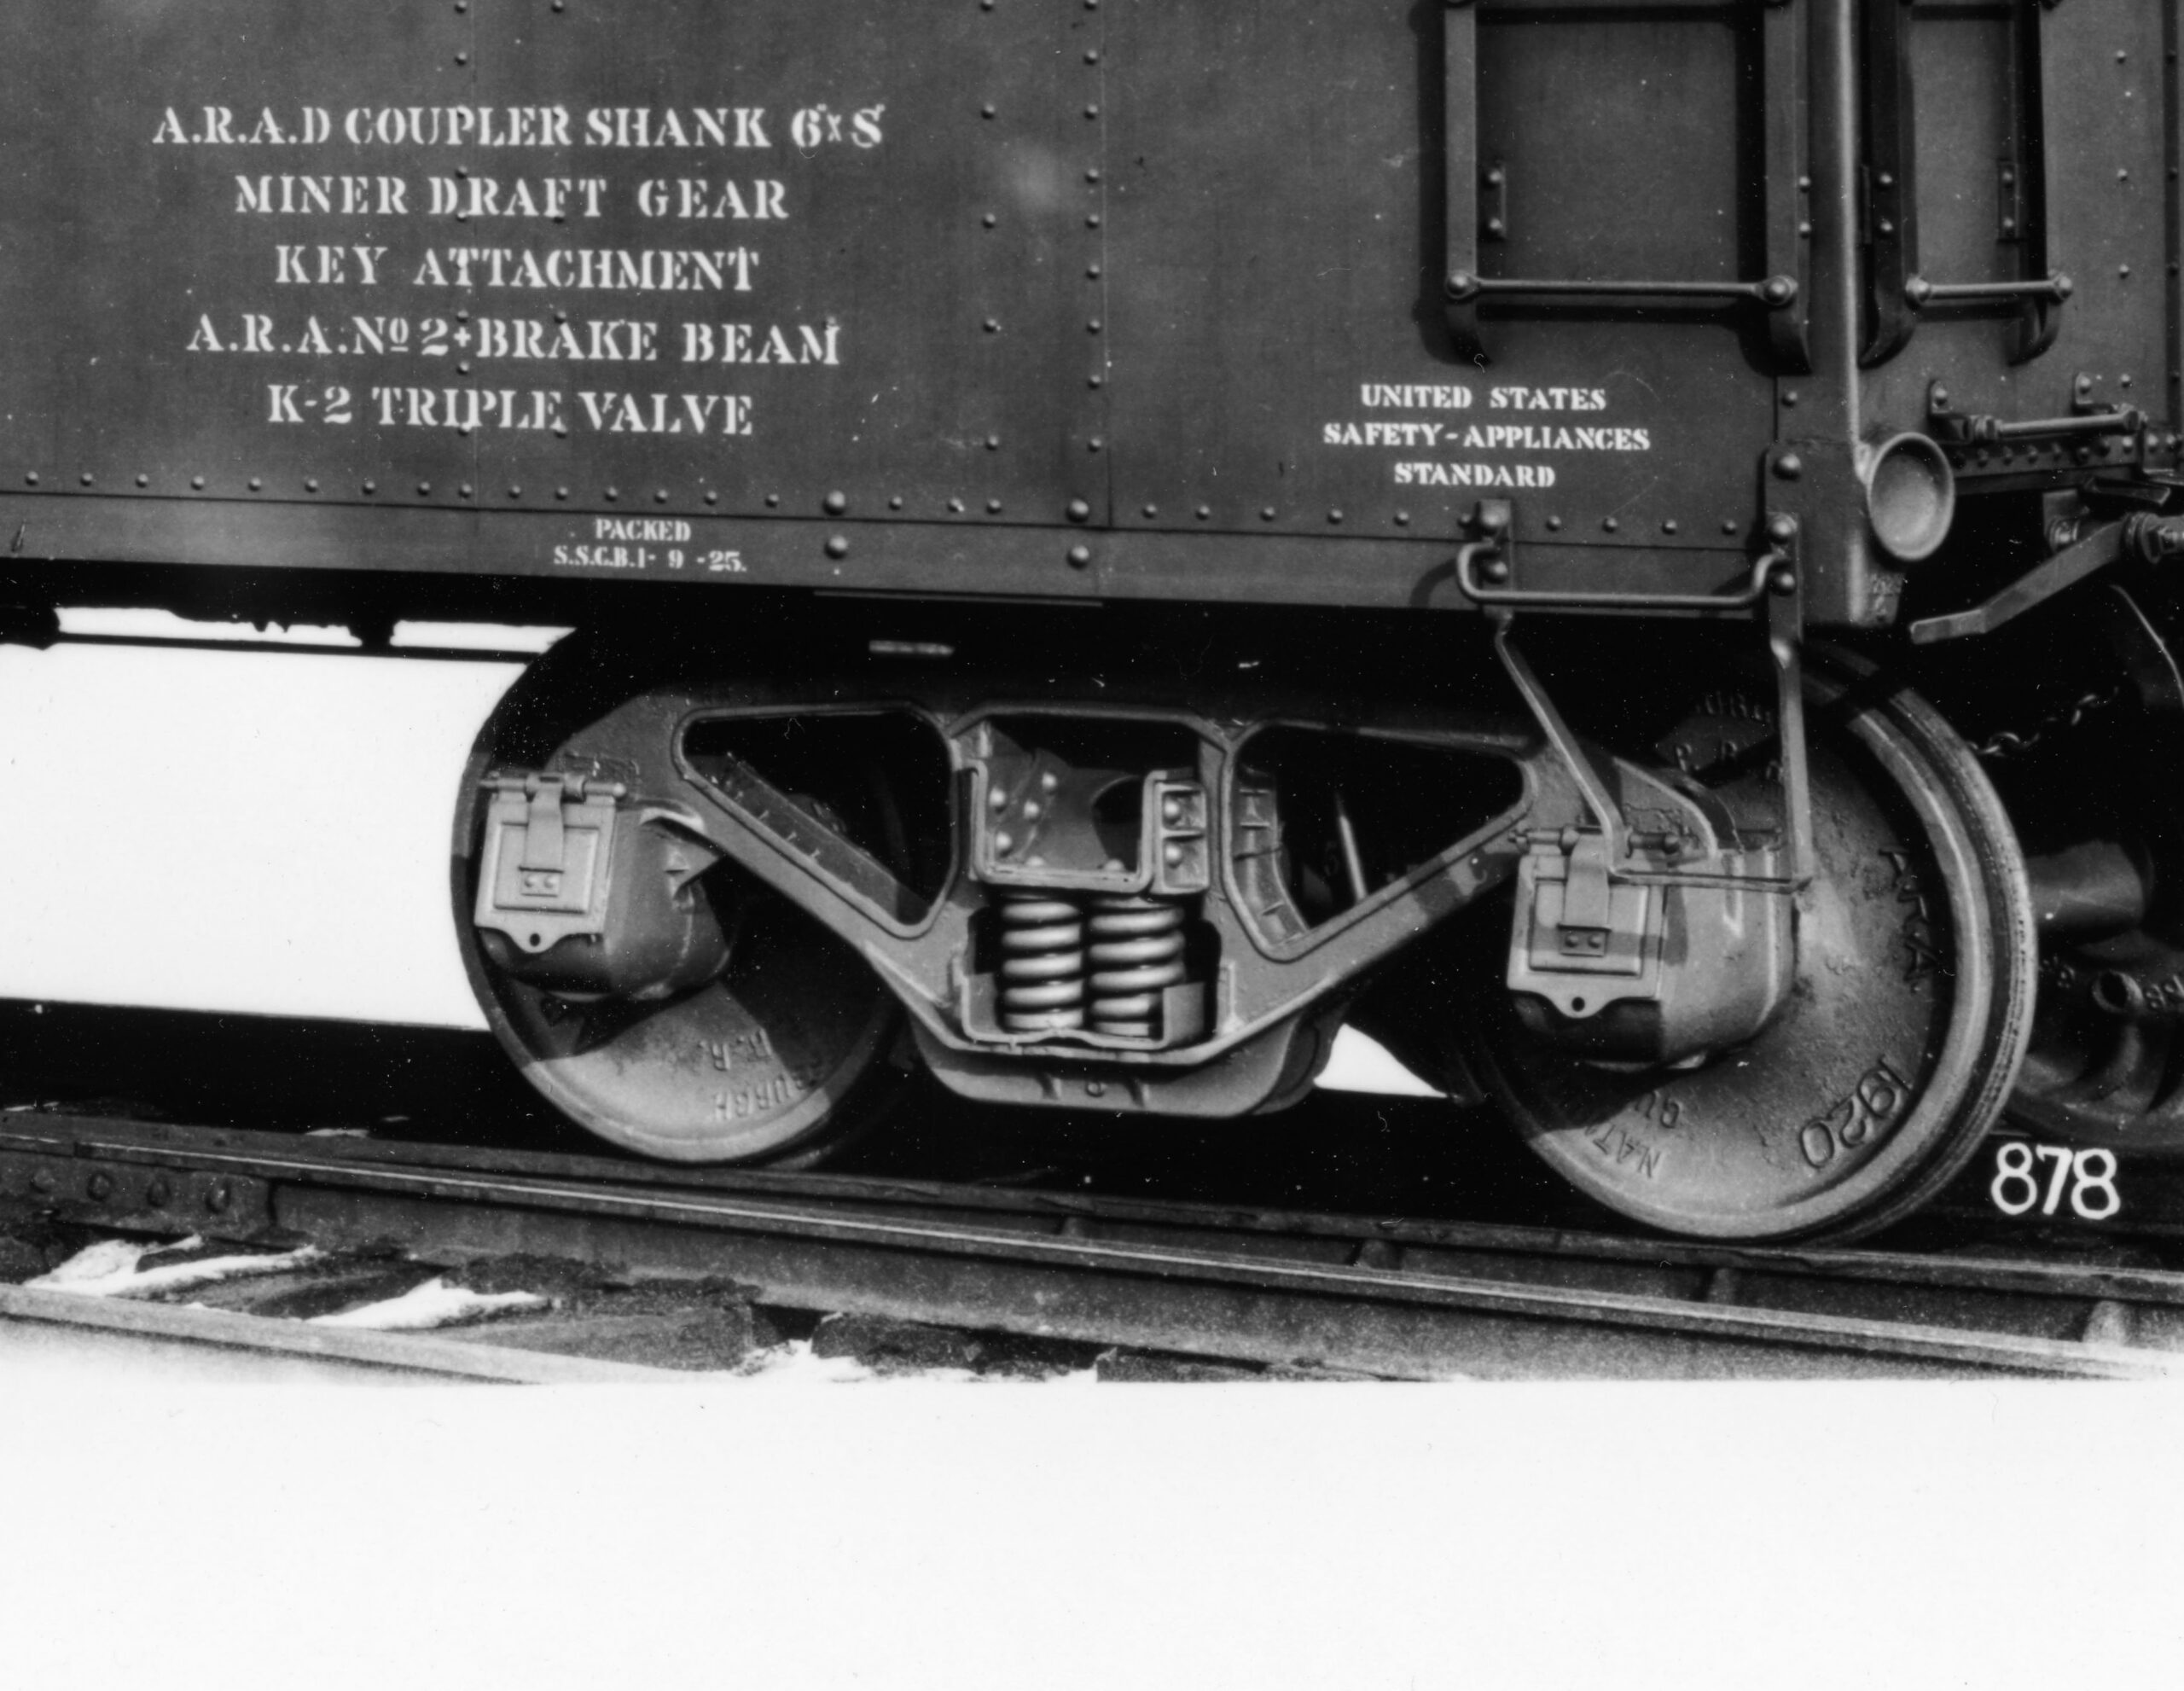
Ray Breyer Collection
There were many 2D-F8 variants, mainly distinguished by the appearance of the truck bolster end. The Bowser offering is a good example of a later variant with a vertical rib in the bolster end. The Red Caboose trucks, however, are the only available example of the early version found under the X29 boxcars. Once you know what to look for, you can’t unsee it, and being a 1930’s-era modeler I wanted these distinctive trucks under my models.
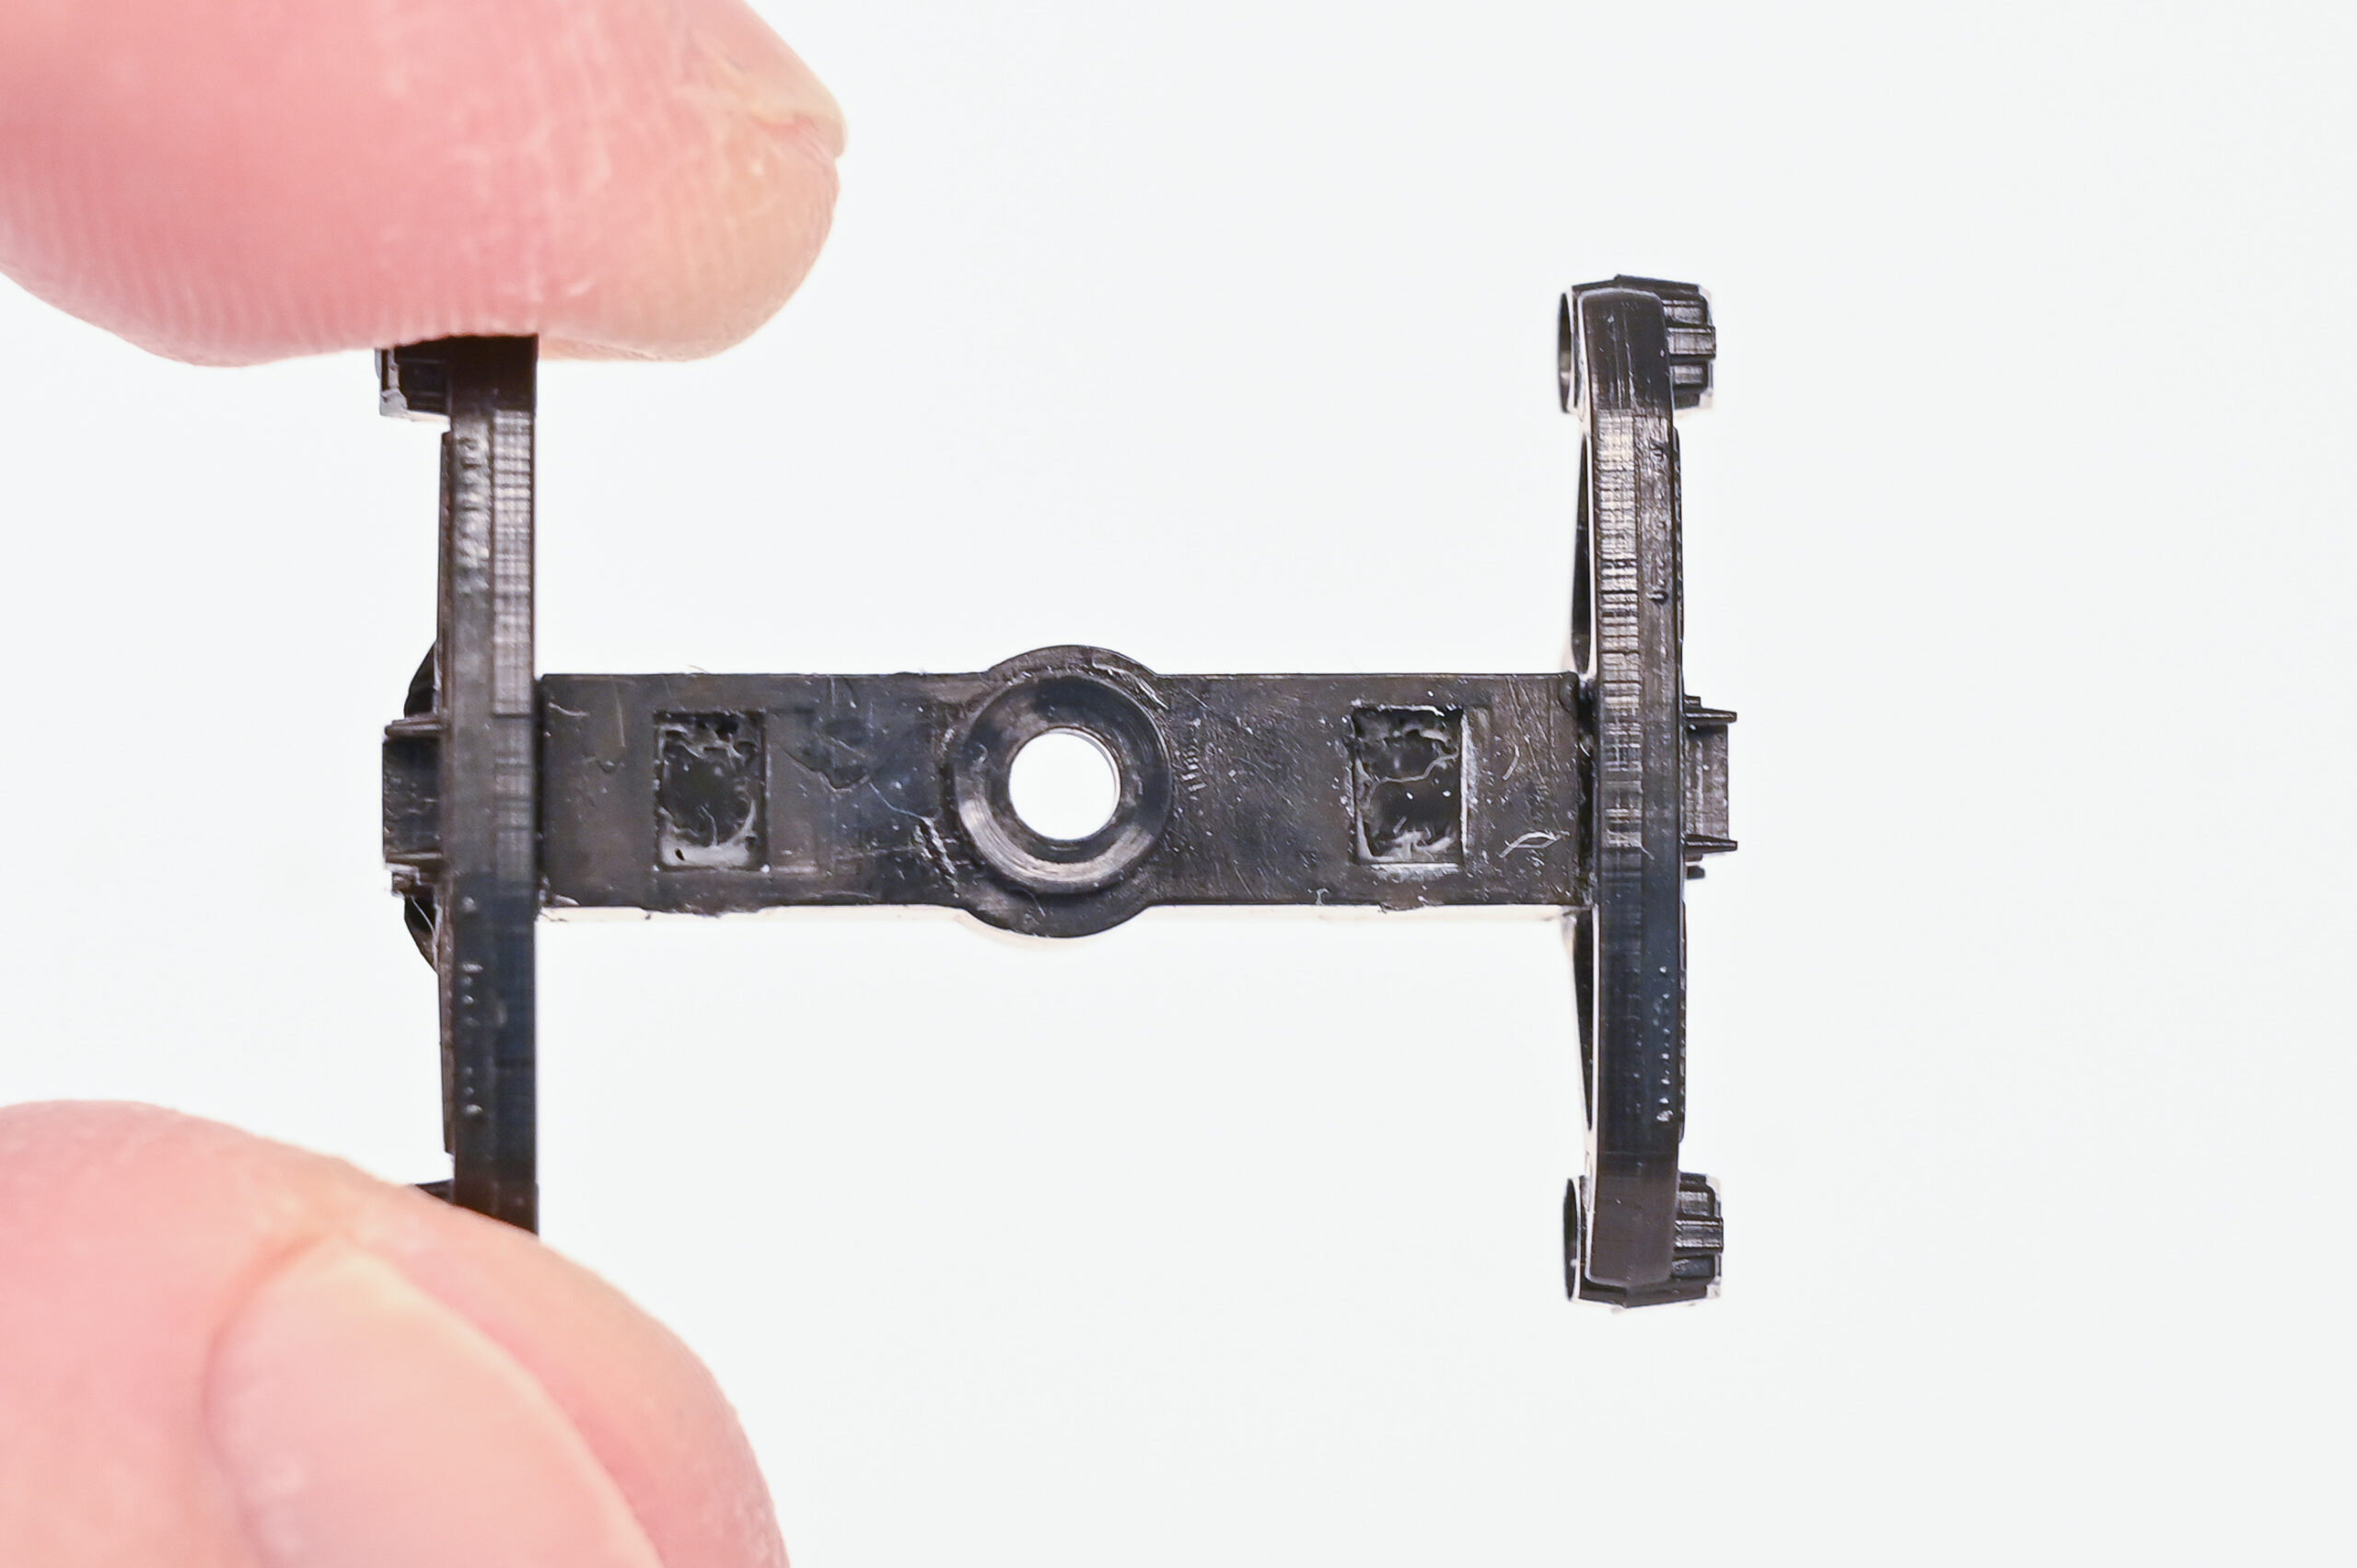
The Red Caboose trucks are a three-part assembly consisting of both side frames and the bolster, and are molded in a slippery engineering plastic, likely Delrin or equivalent. The side frames snap into the bolster ends. The design flaw is that manufacturing tolerances may allow the side frames to twist a bit on the truck bolster rather than locking everything square, causing the wheelset axles to no longer be parallel with each other. The fit is tight enough that the twist will remain, lifting one or two wheels of the truck off the railhead. Another problem is that the axles of the wheelsets provided in the kits are way too short, such that if the truck twists far enough, the wheelsets simply fall out of the side frames. A third problem is the supplied kit weight is well over an ounce too light for the car length, per the NMRA Recommended Practices.
So, the combination of off-kilter trucks, too-short wheelset axles, and car underweighting is a recipe for operational disaster. How do we fix this?
Freight car guru Ted Culotta devised a method of using tiny Torx screws to physically and rigidly attach the side frames to the bolsters and using longer-length Reboxx wheelsets to eliminate much of the slop of the stock wheelsets. He described this method on his website: Prototype Railroad Topics: Creating Operational HO Scale Red Caboose Trucks (prototopics.blogspot.com)
Using tiny screws seemed a bit fiddly to me, and I wondered if there was a way to simply glue the trucks together. I knew engineering plastics are notoriously difficult to glue together to both themselves and other materials, and I was about to give up when I stumbled across an internet automotive forum discussion about adhesives and engineering plastics in engines. These forum members had success with several industrial adhesive products that used a primer material to improve adhesion. More internet searching turned up a similar consumer product by DAP, called “RapidFuse with Plastic Primer”, advertised to bond everything.
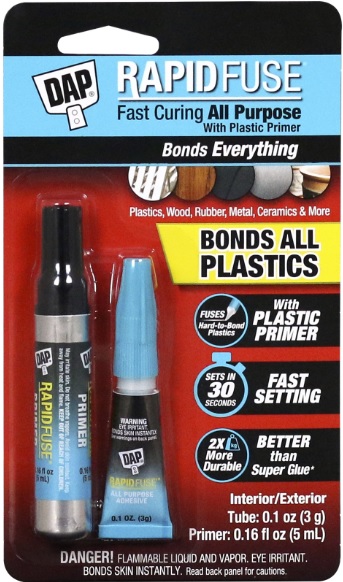
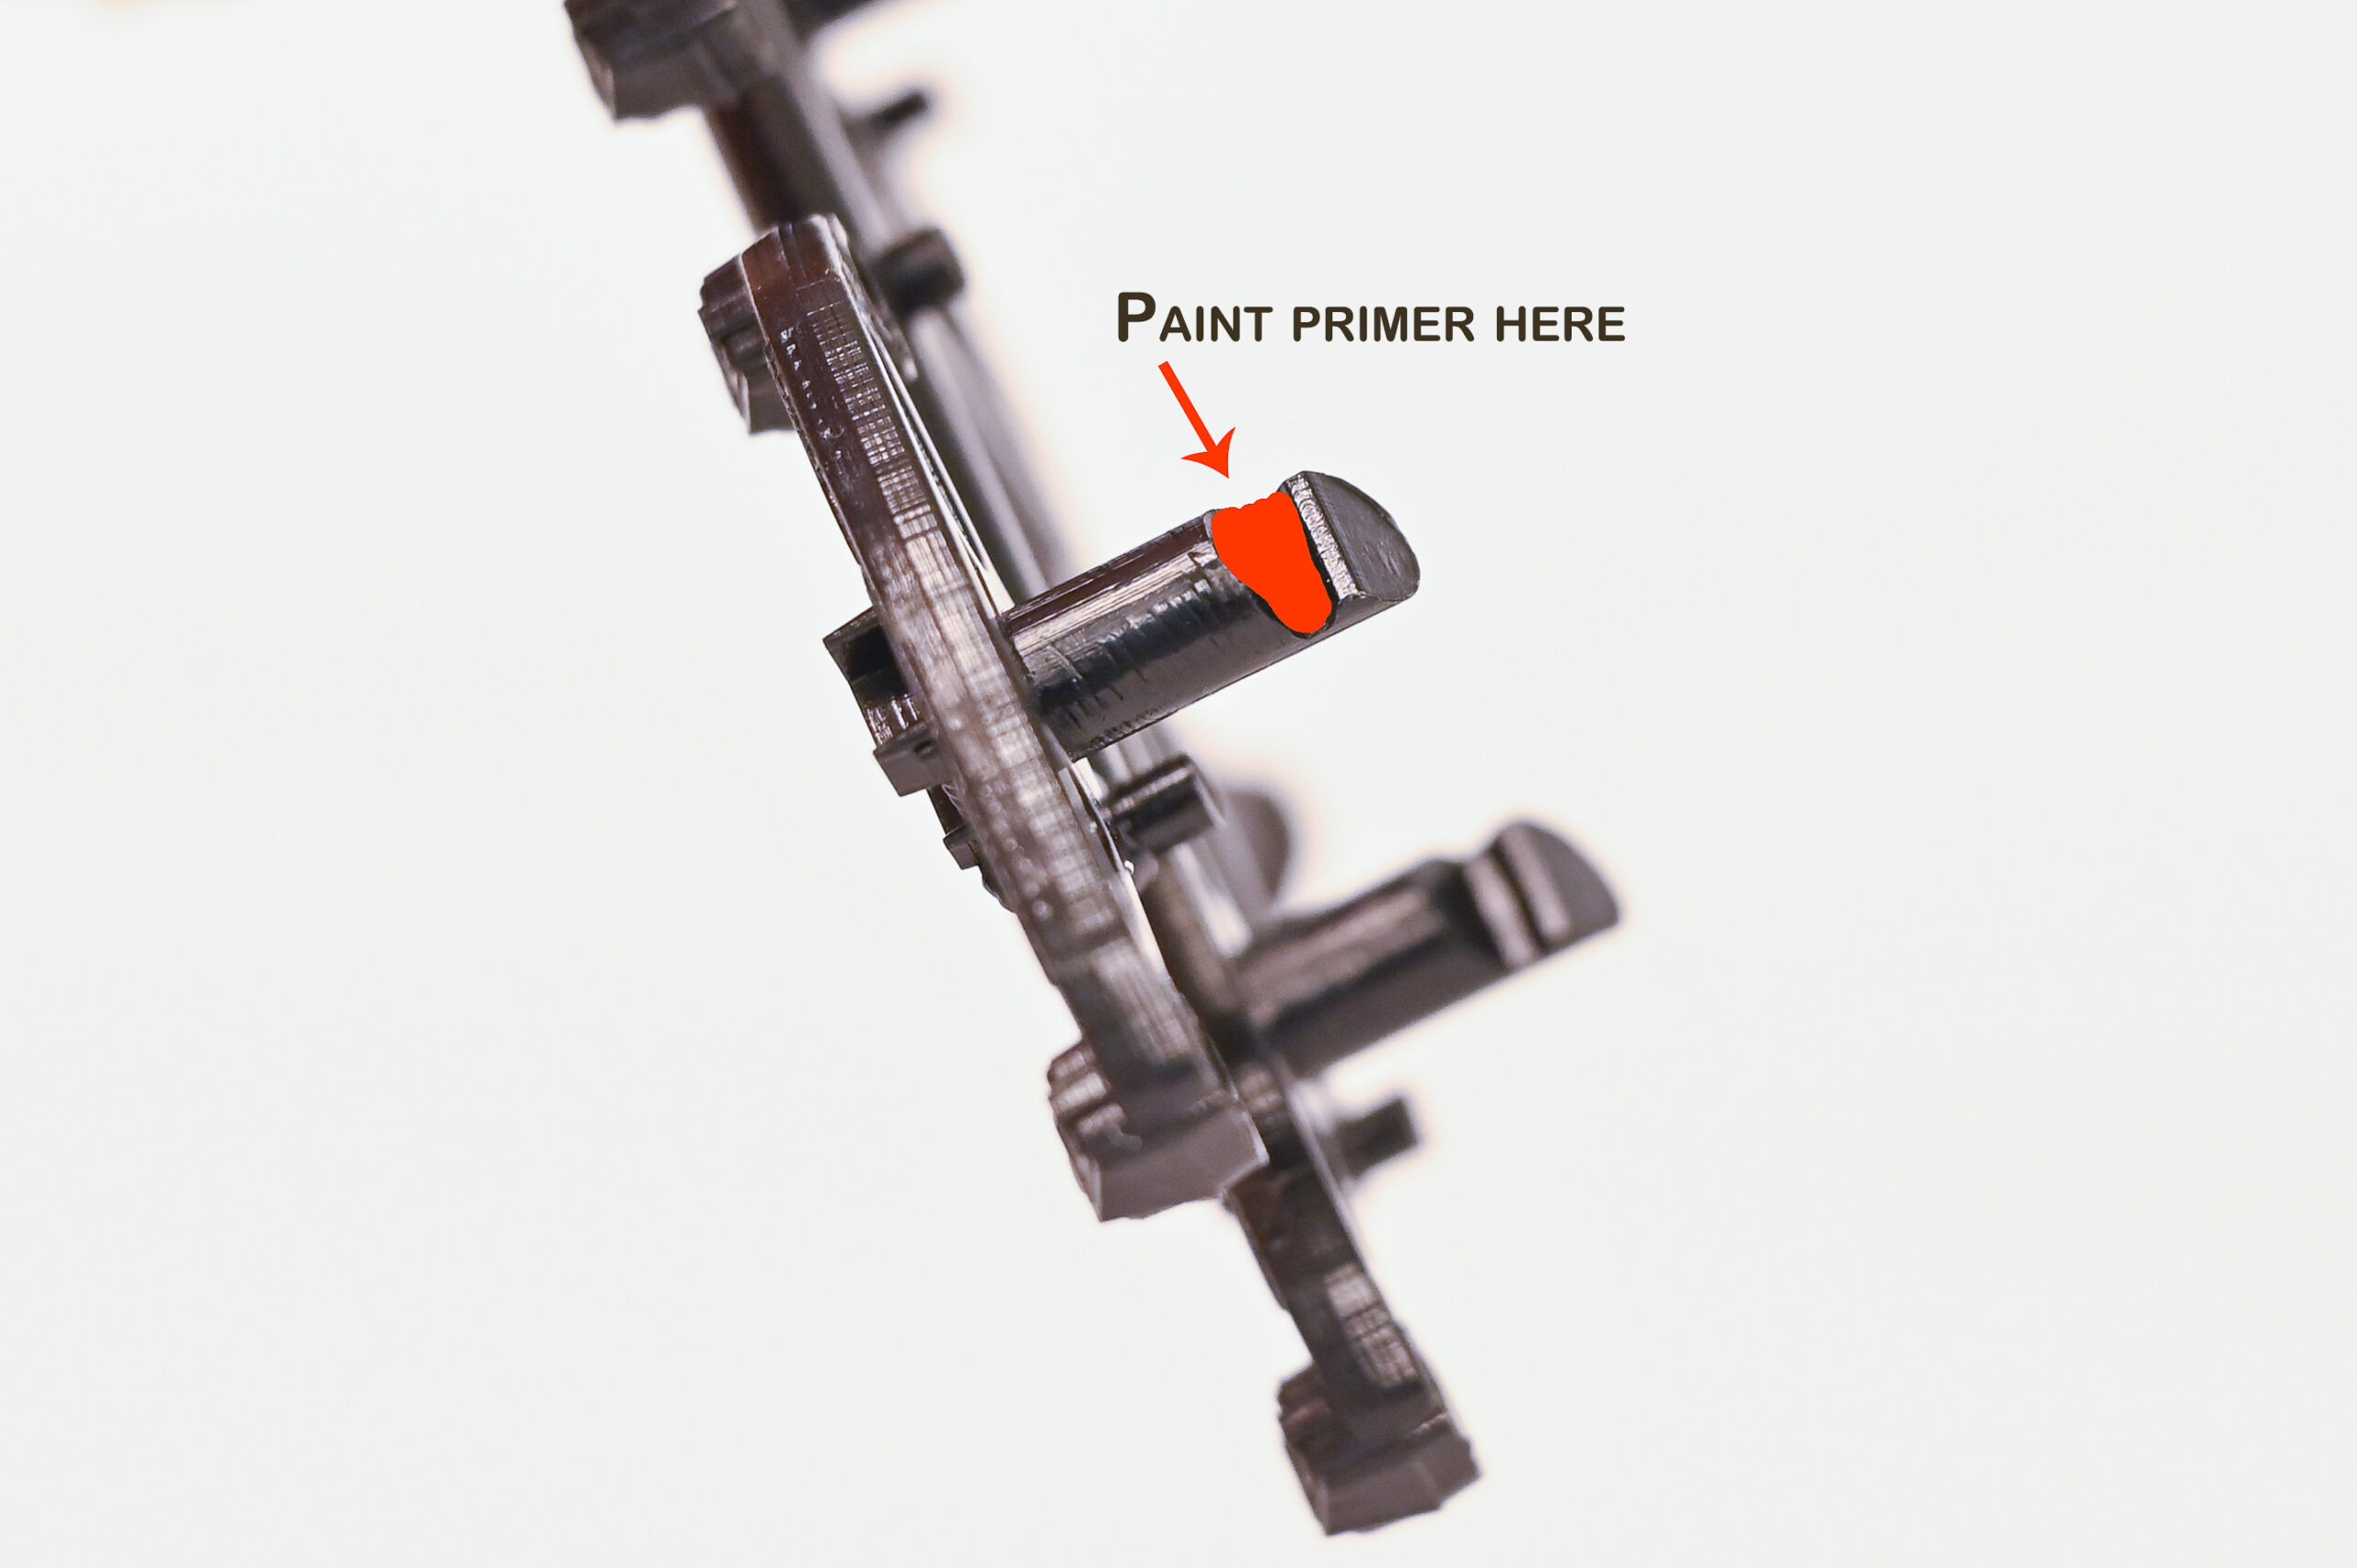
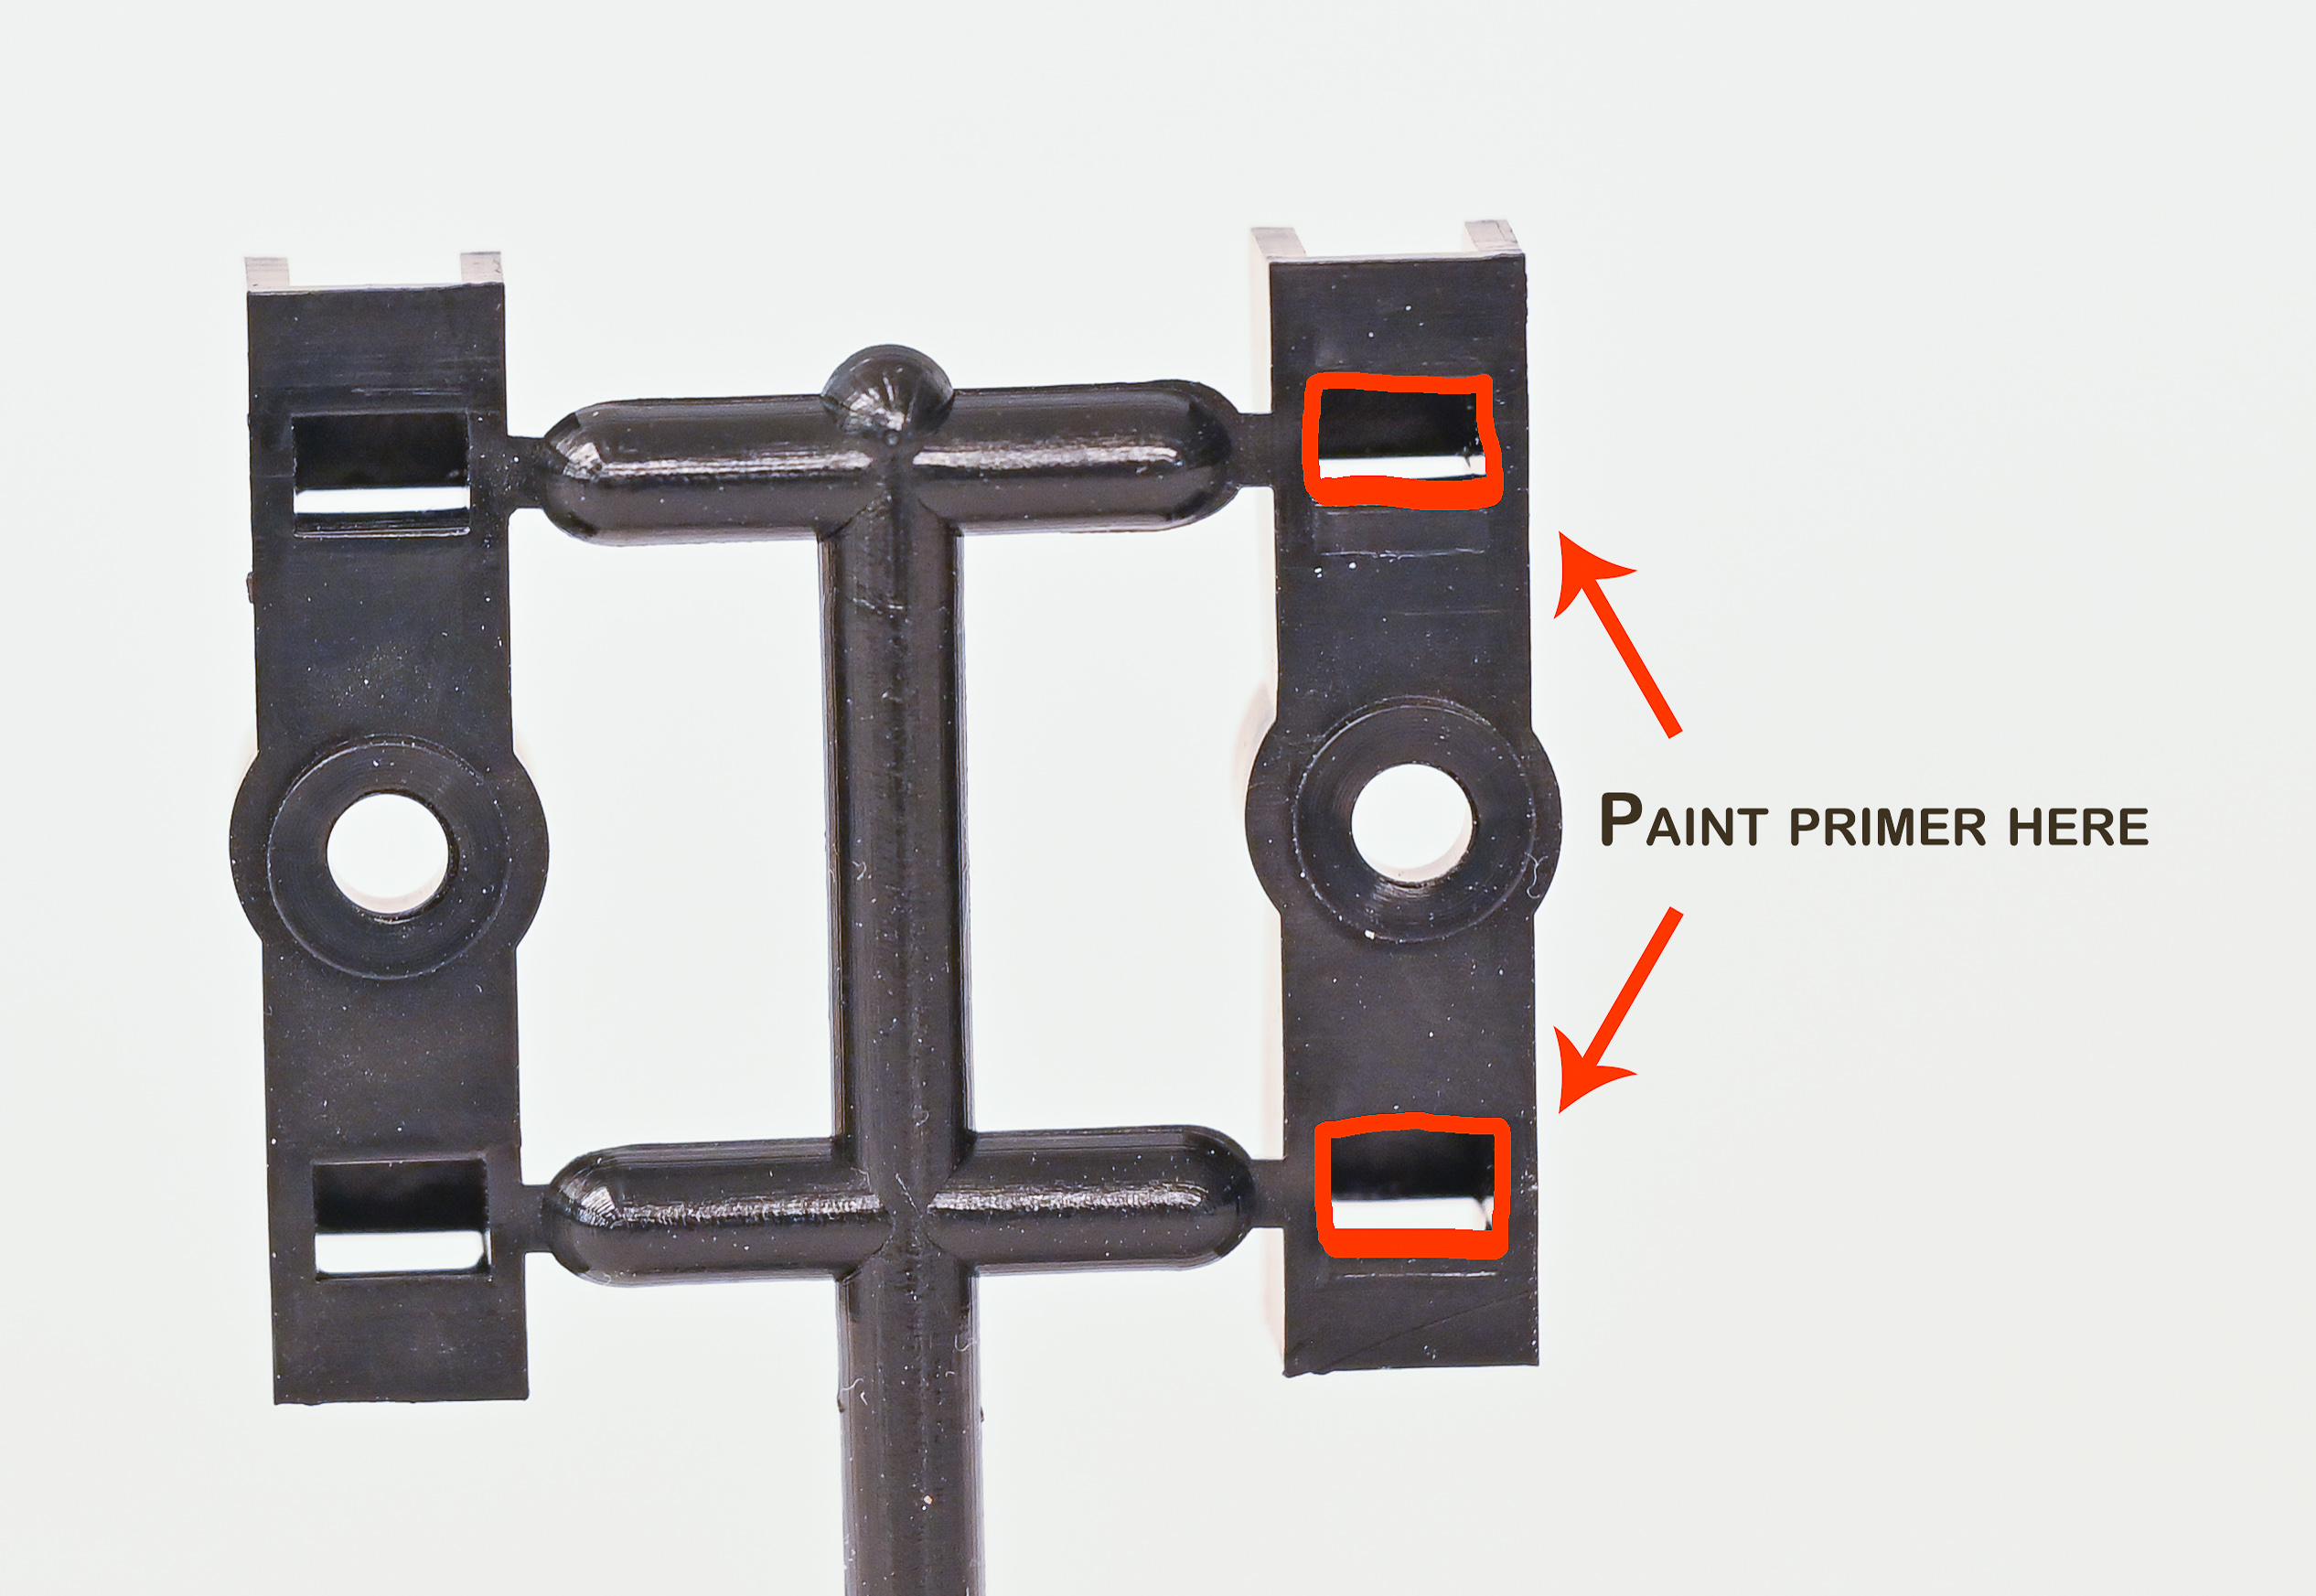
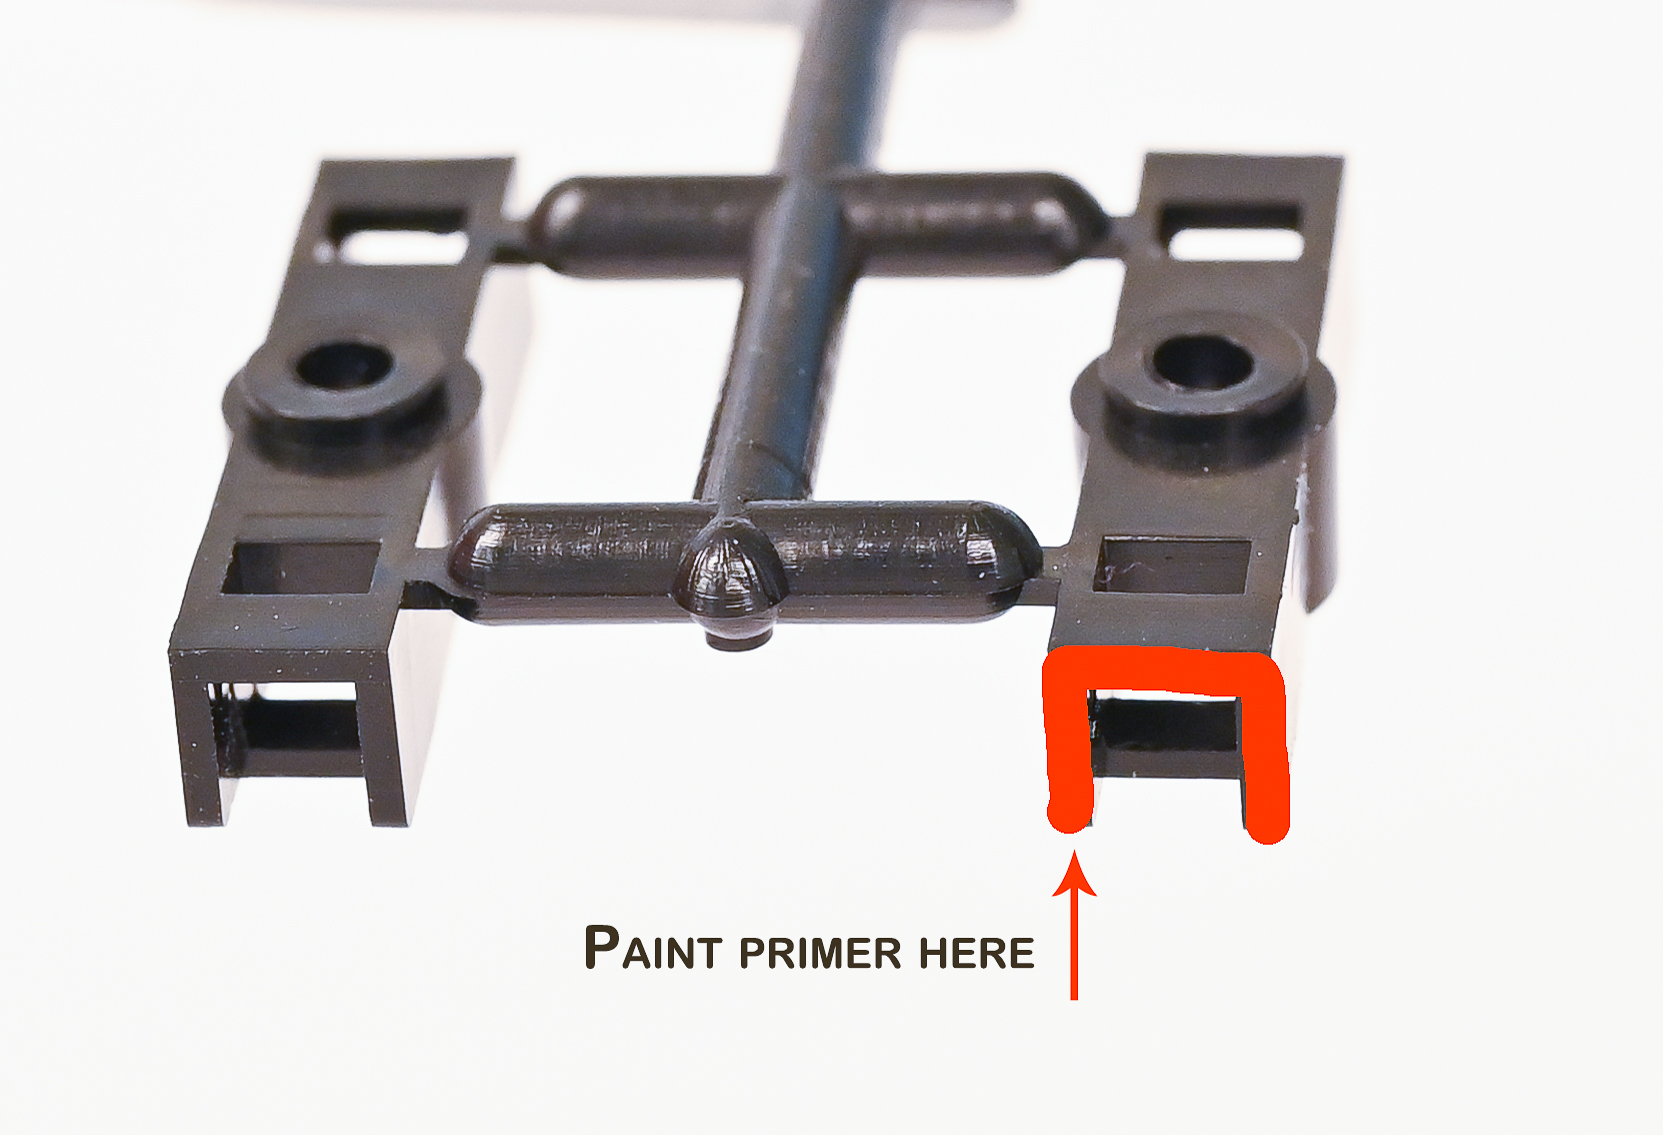
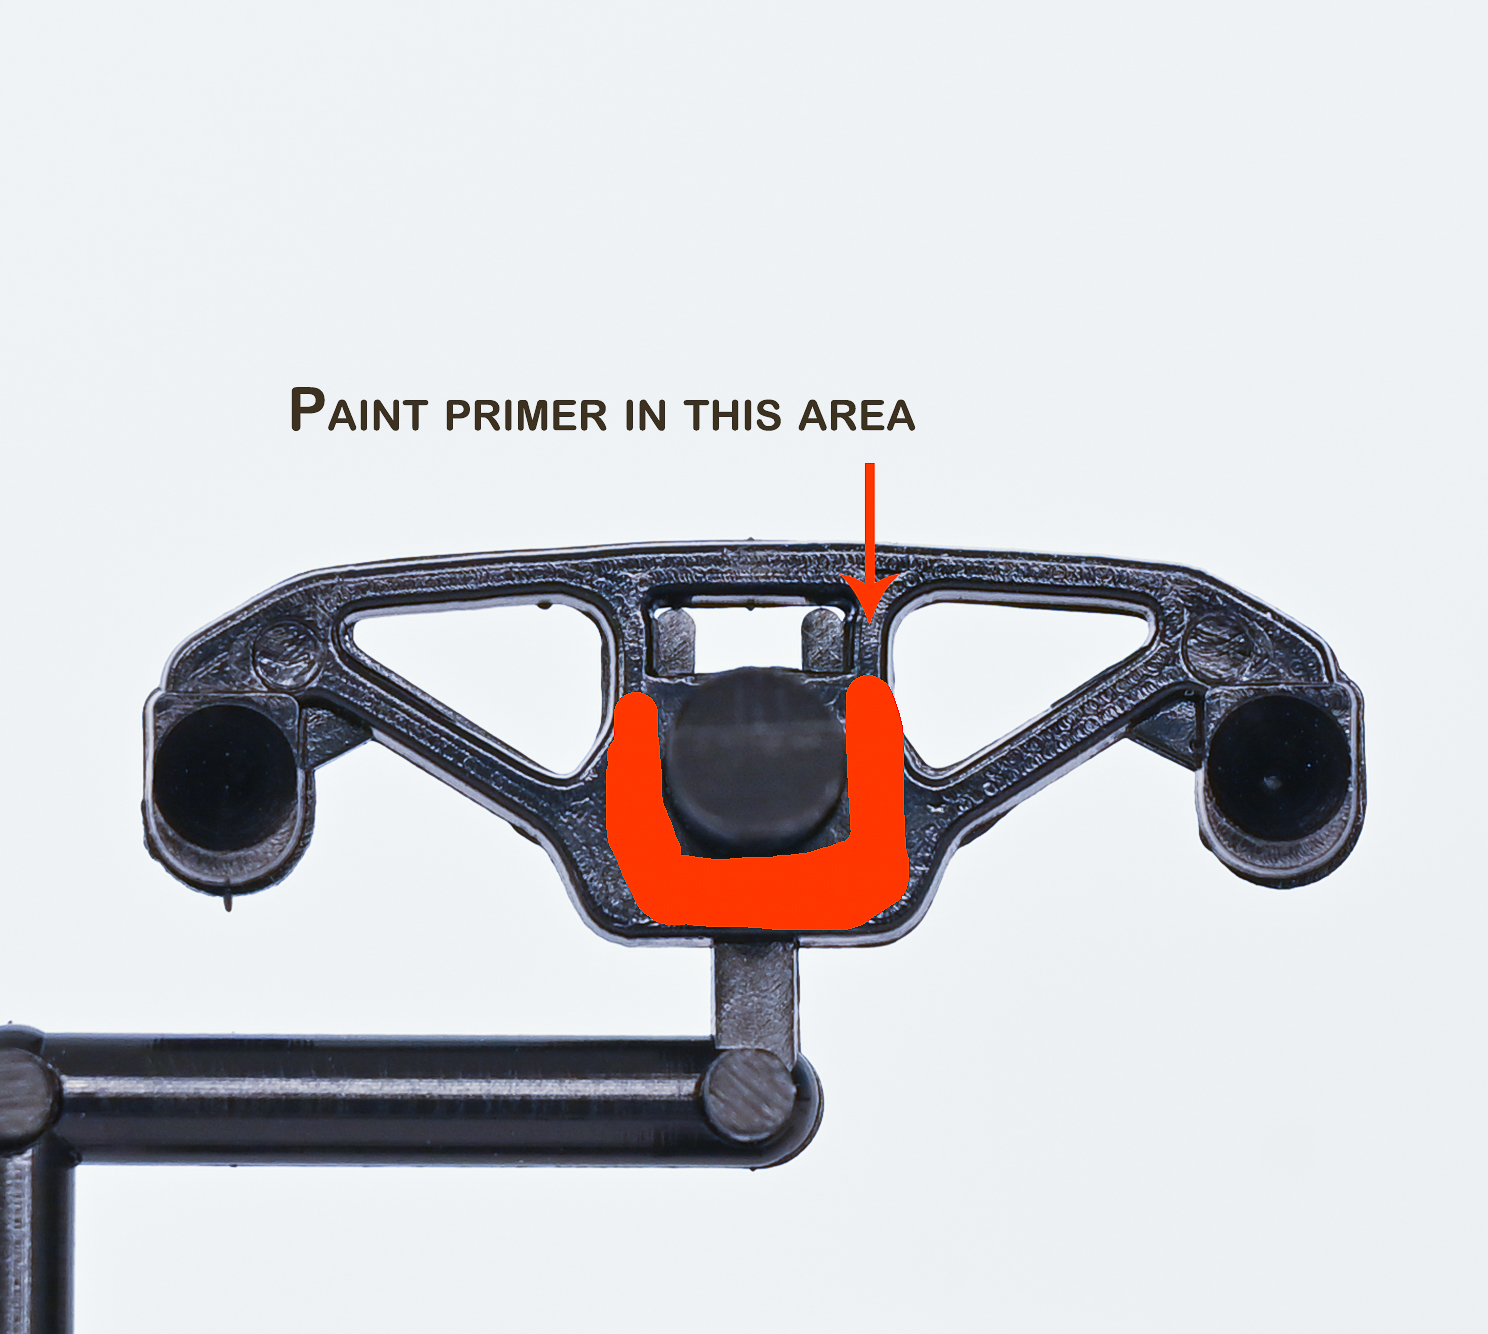
This product was in stock at our local Lowe’s, and I got some to try. I painted on the primer at the locations below, let it dry, then applied the glue to the face of each bolster and the notch of the side frame pin before snapping the bolster and side frame together. I did one side at a time, letting the glue dry 24 hours before gluing the opposite side together. Long story short, I had great success gluing together the RC trucks with this product. The key is to follow the instructions, and make sure everything is perfectly square before the glue sets. You have about 30 seconds of work time before the glue sets up. To be honest, I eyeballed everything under magnification, and 7 out of 8 trucks turned out perfectly. Not bad…
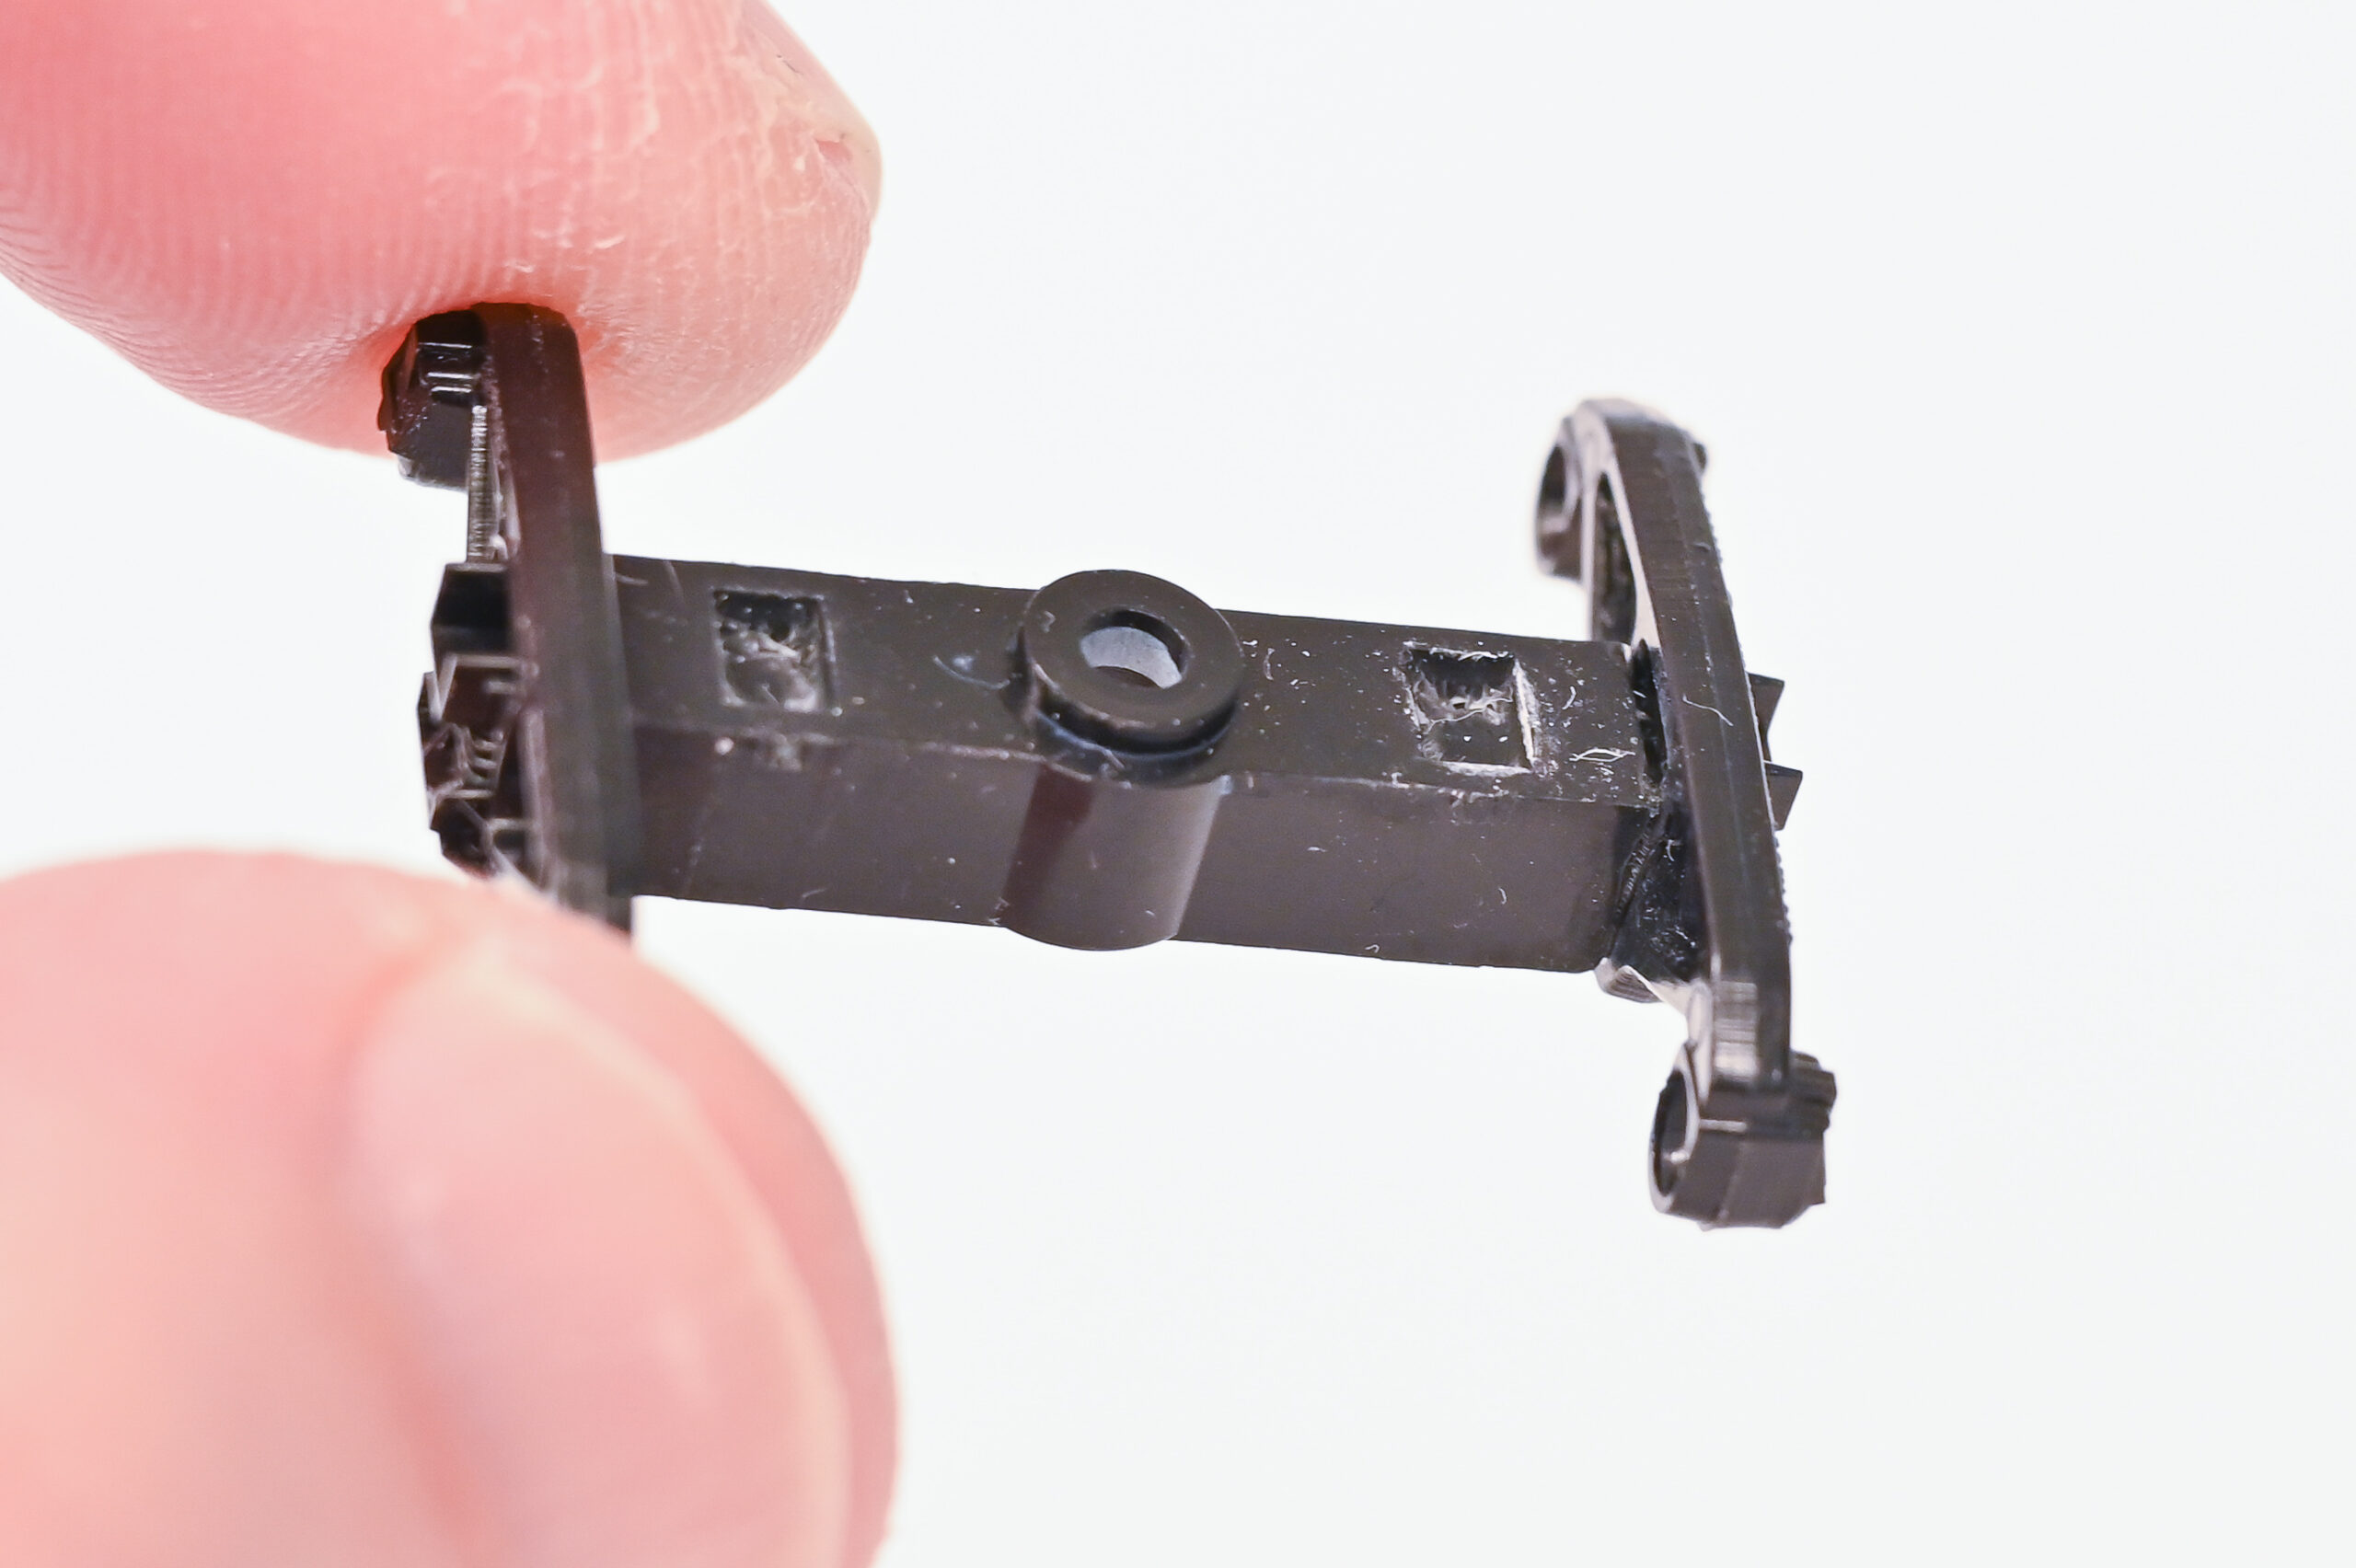
Glued and set.
Done!
The next variable in the problem is the wheelset axle length. Reboxx wheelsets are no longer available, so who makes the longest currently available commercial wheelsets? An excellent question, the answer to which is not readily discernible. However, I solved this problem empirically, by measuring samples of different manufacturer’s wheelsets. The results are averaged measurements of 3-5 individual wheelsets and are shown in the following table:
Wheelset Axle Lengths:
- RC plastic- 0.992”
- Kadee- 1.015”
- ExactRail- 1.000”
- Walthers- 1.011”
- Intermountain- 1.001”
- Bowser- 1.025”
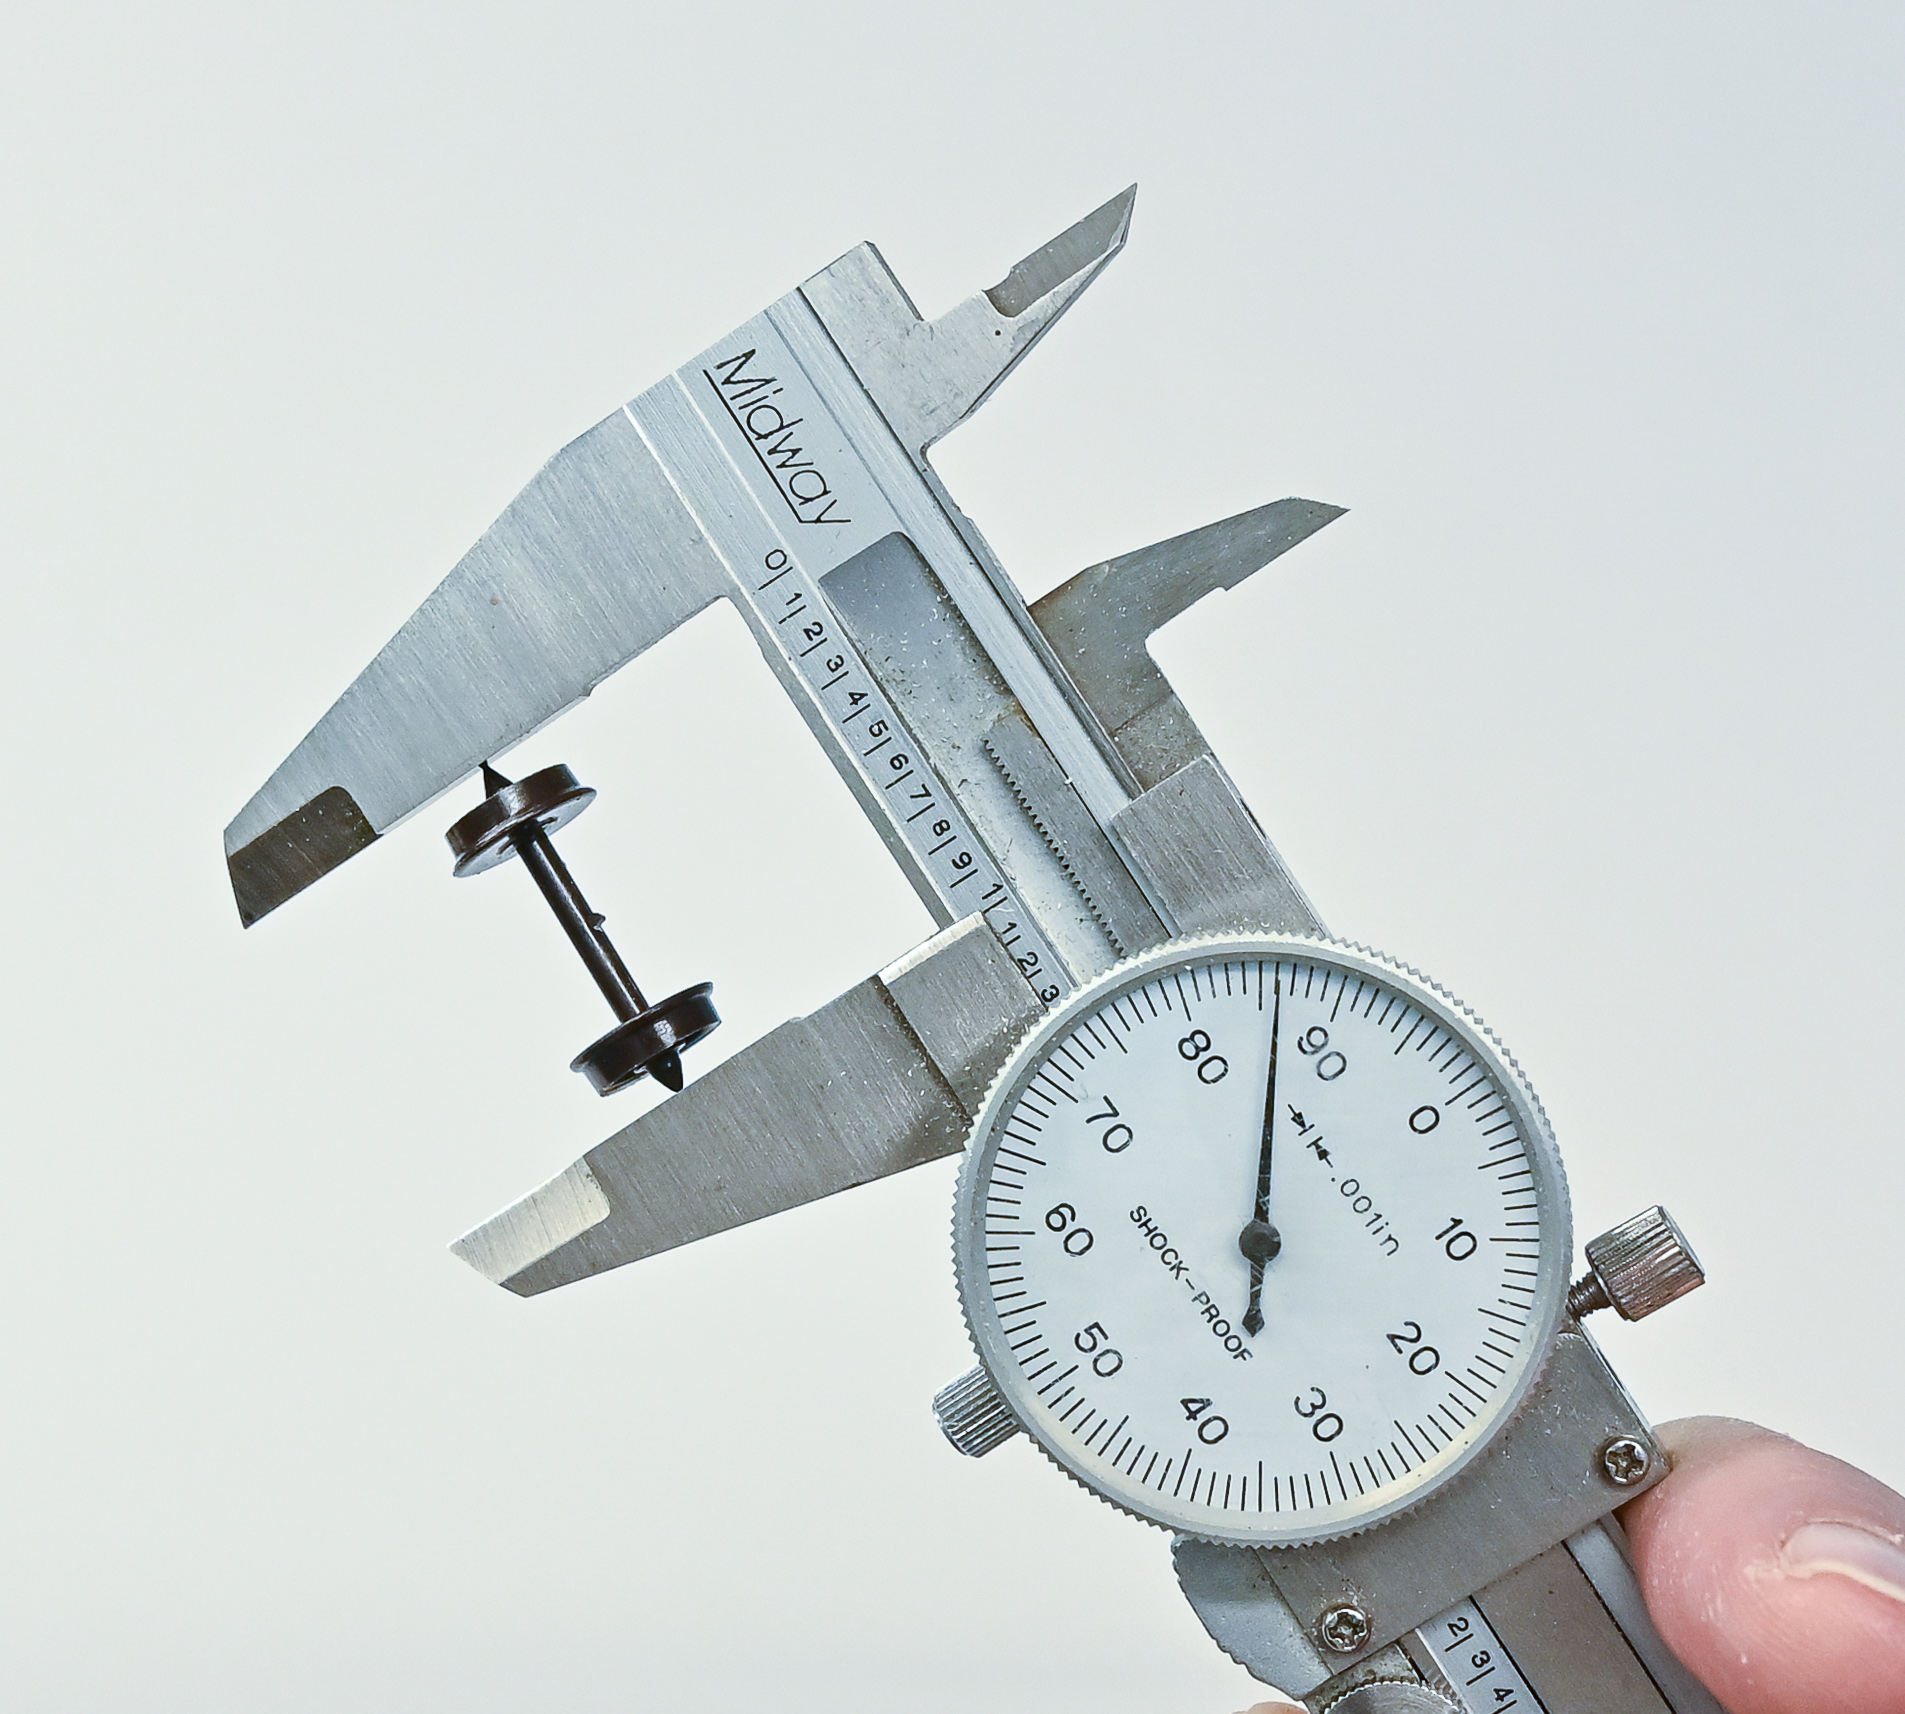
Red Caboose Plastic Wheelset
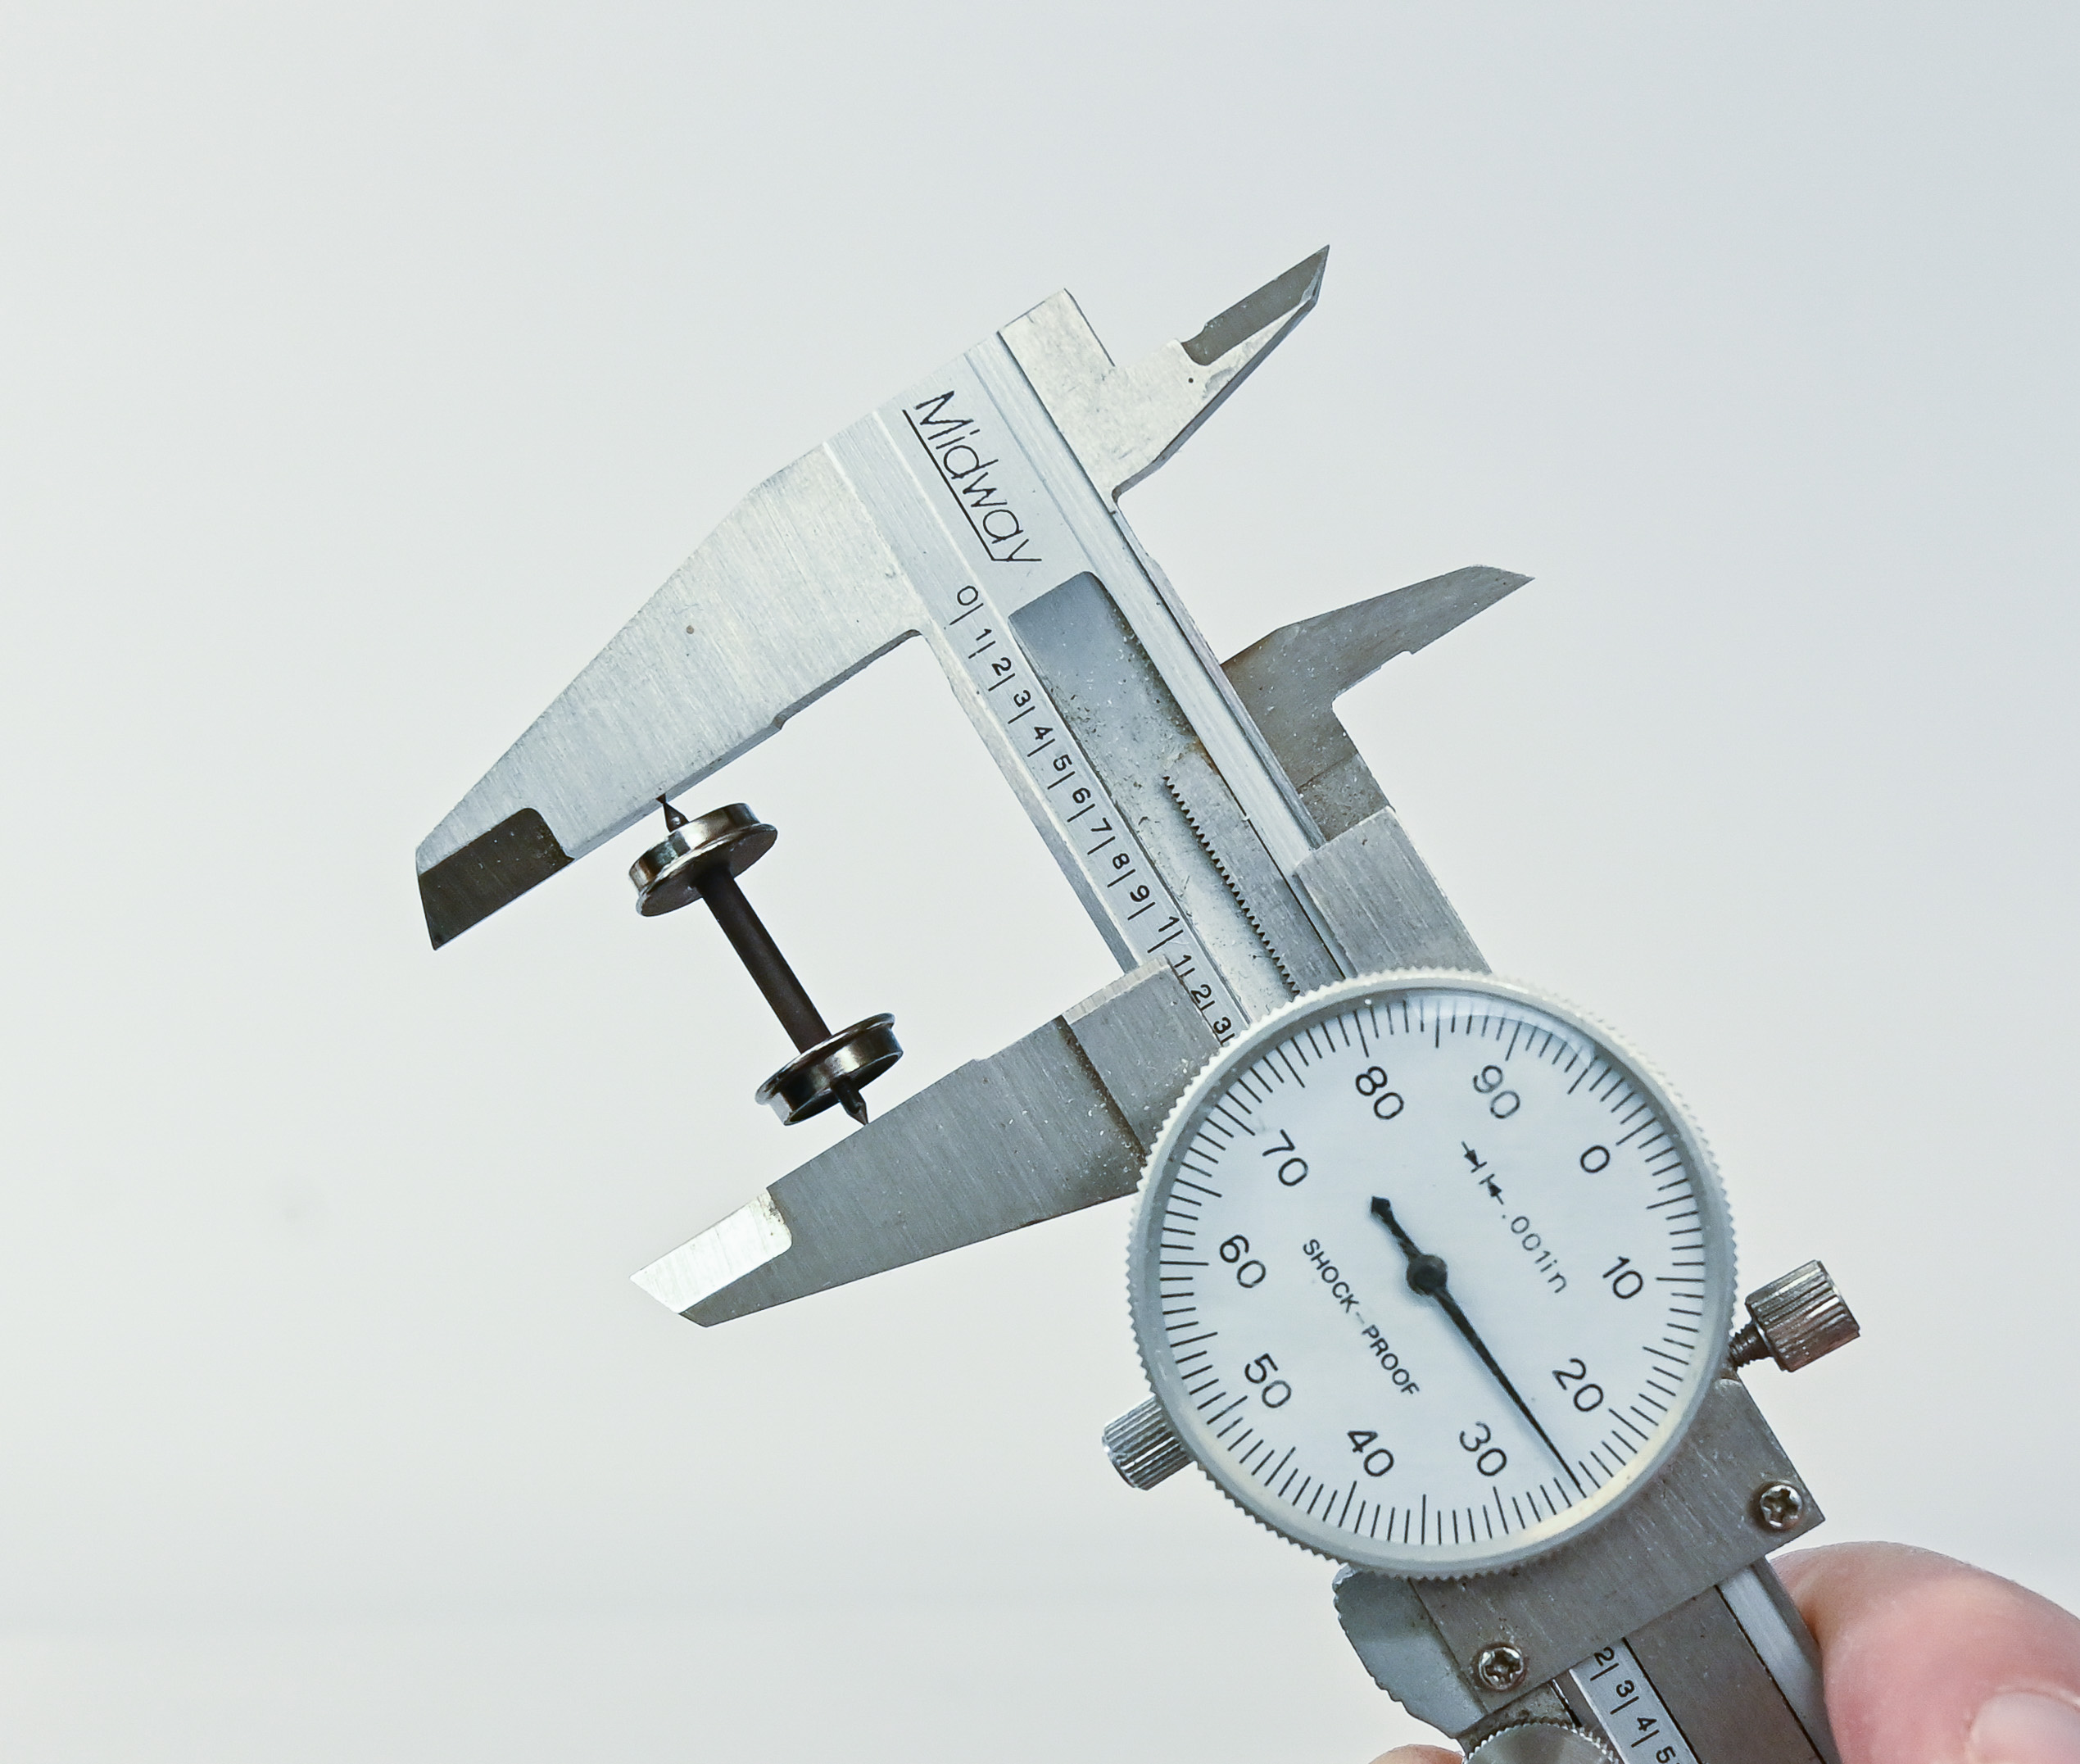
Bowser Metal Wheelset
So, empirically, Bowser wheelsets have the longest axle length, and I used these to replace the stock RC wheelsets.
An aside: double-check the back-to-back gauge of any wheelsets you are using with an NMRA gauge. The Intermountain and Walthers Proto wheelsets were almost all uniformly too narrow by several thousandths. This is easily fixable by use of a Micromark wheelpuller.
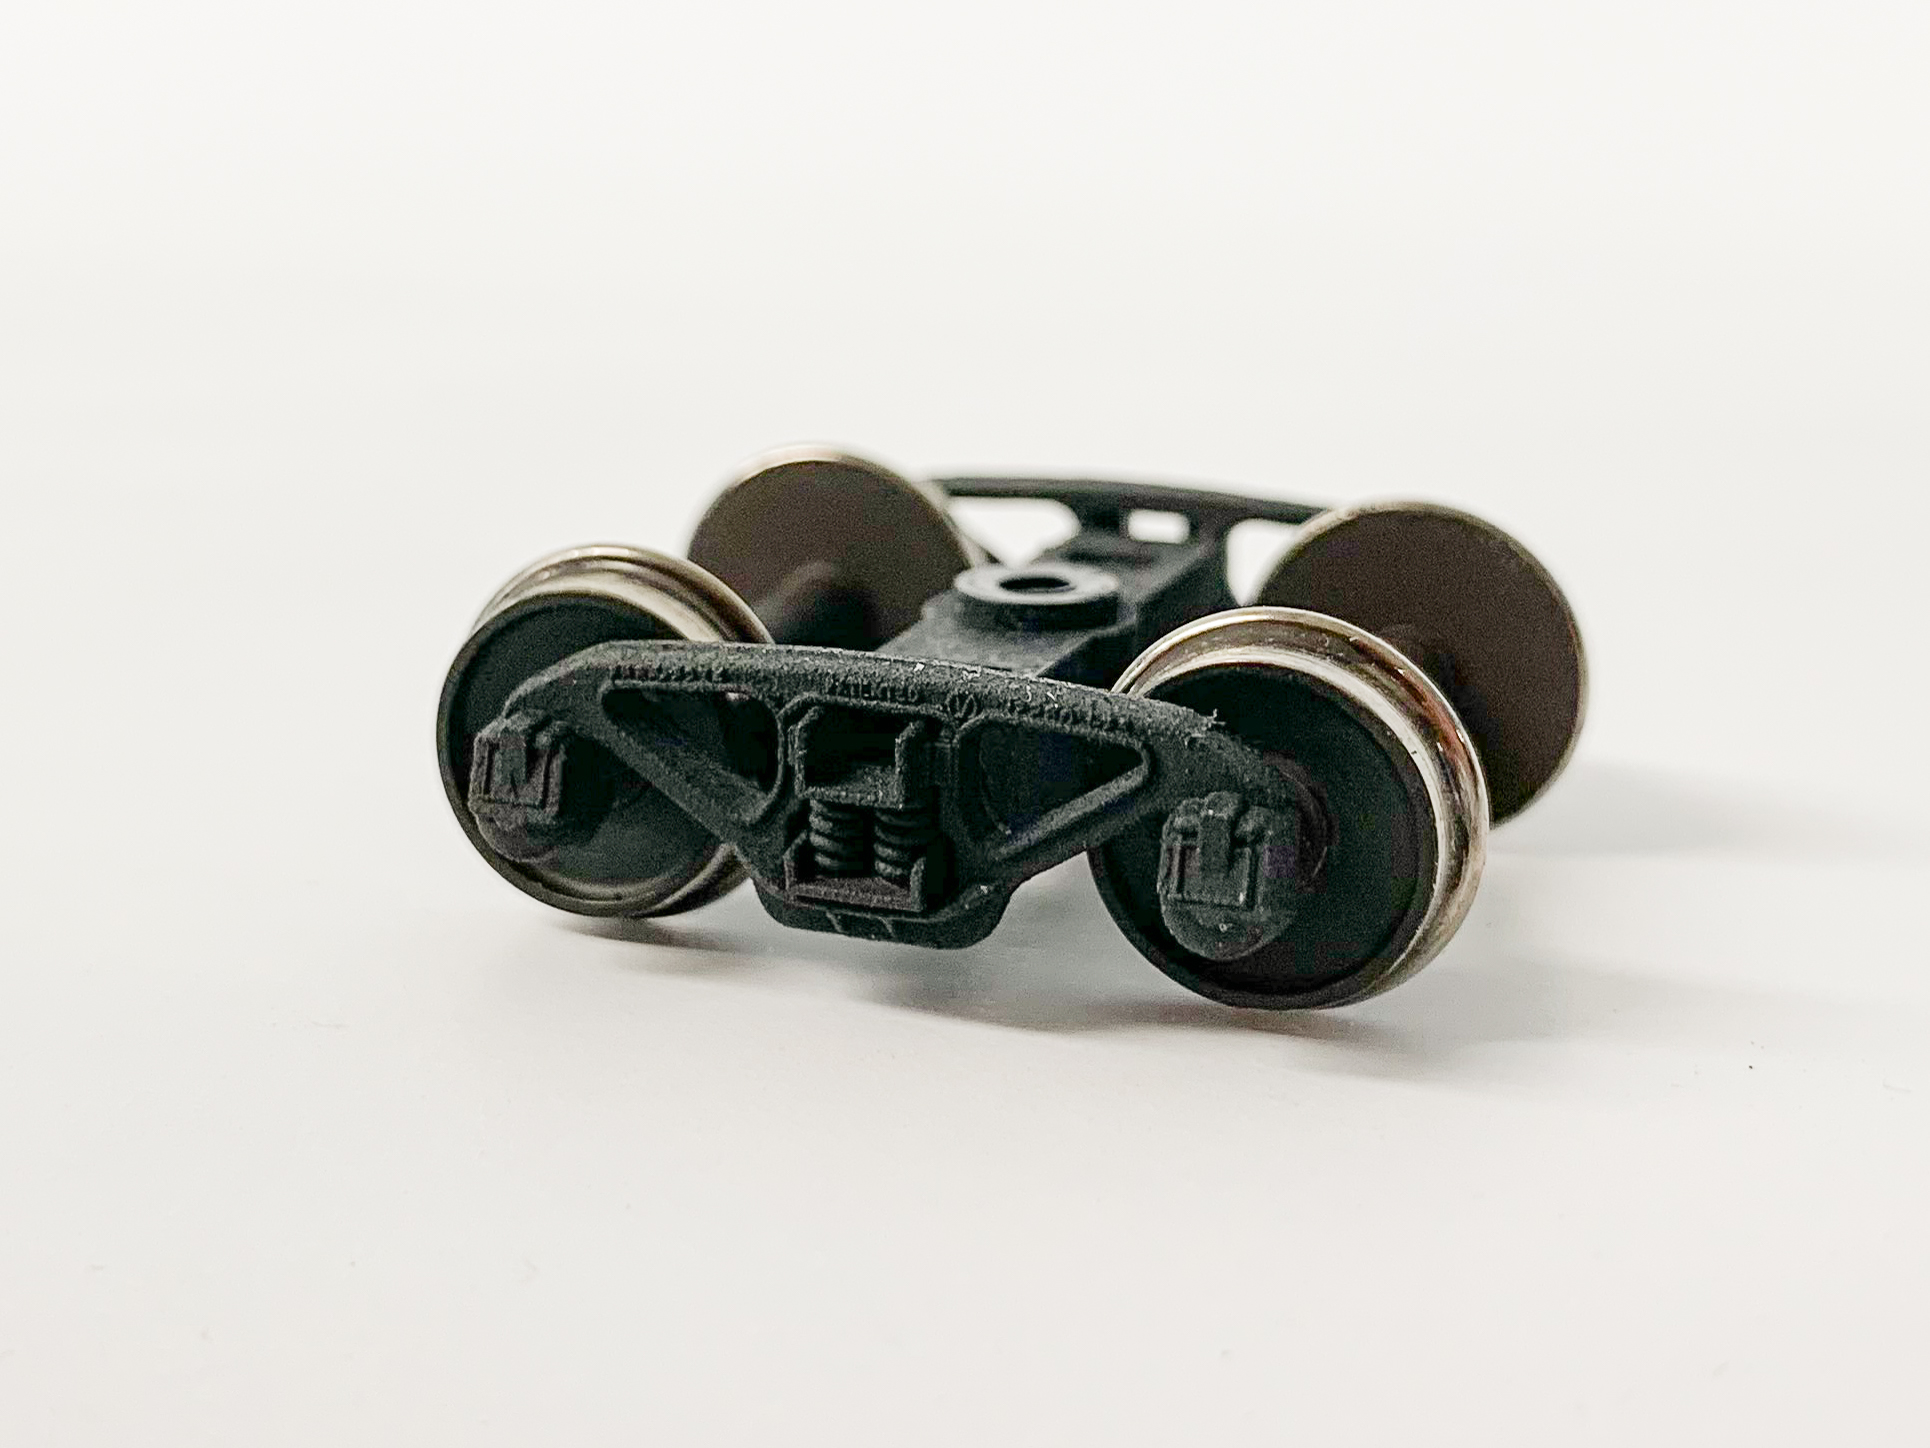
Just needs weathering!
As an experiment, I sprayed the trucks with a charcoal gray auto primer instead of my usual Rustoleum Camo Brown. The auto primer is a little heavy compared with the camo brown, but I’m hoping it will provide a little better “tooth” for PanPastel weathering colors.
The last variable, car weight, is the easiest to solve. I simply bought a 3-pound box of stick-on wheelweights in ¼-oz increments at a local auto-parts store for about $22, and placed enough of these inside the cars to bring them up to NMRA standards before gluing on the roof. Easy-peasy.
Hopefully these 3 fixes will result in a reliably-running X29 fleet. Time will tell!
I know that the name of the company is “Red Caboose”, but the PRR called them “Cabins” per Otto Orr and his son/biographer John Orr.
Good morning!
I took a different route with the Red Caboose 2DF8 trucks. I model the late 1940s and the Bowser 70 ton covered hopper kits I bought along with many of their 50 ton open hopper kits (the former Stewart line of fishbelly hoppers) came with Bowser’s 2DF8 trucks. In the process of replacing those trucks (the covered hoppers got 70 ton trucks from a variety of sources), I had a supply of Bowser 2DF8 trucks that I used for the X29s (and other PRR freight cars).
Doug