
Author’s Collection
Author’s Collection
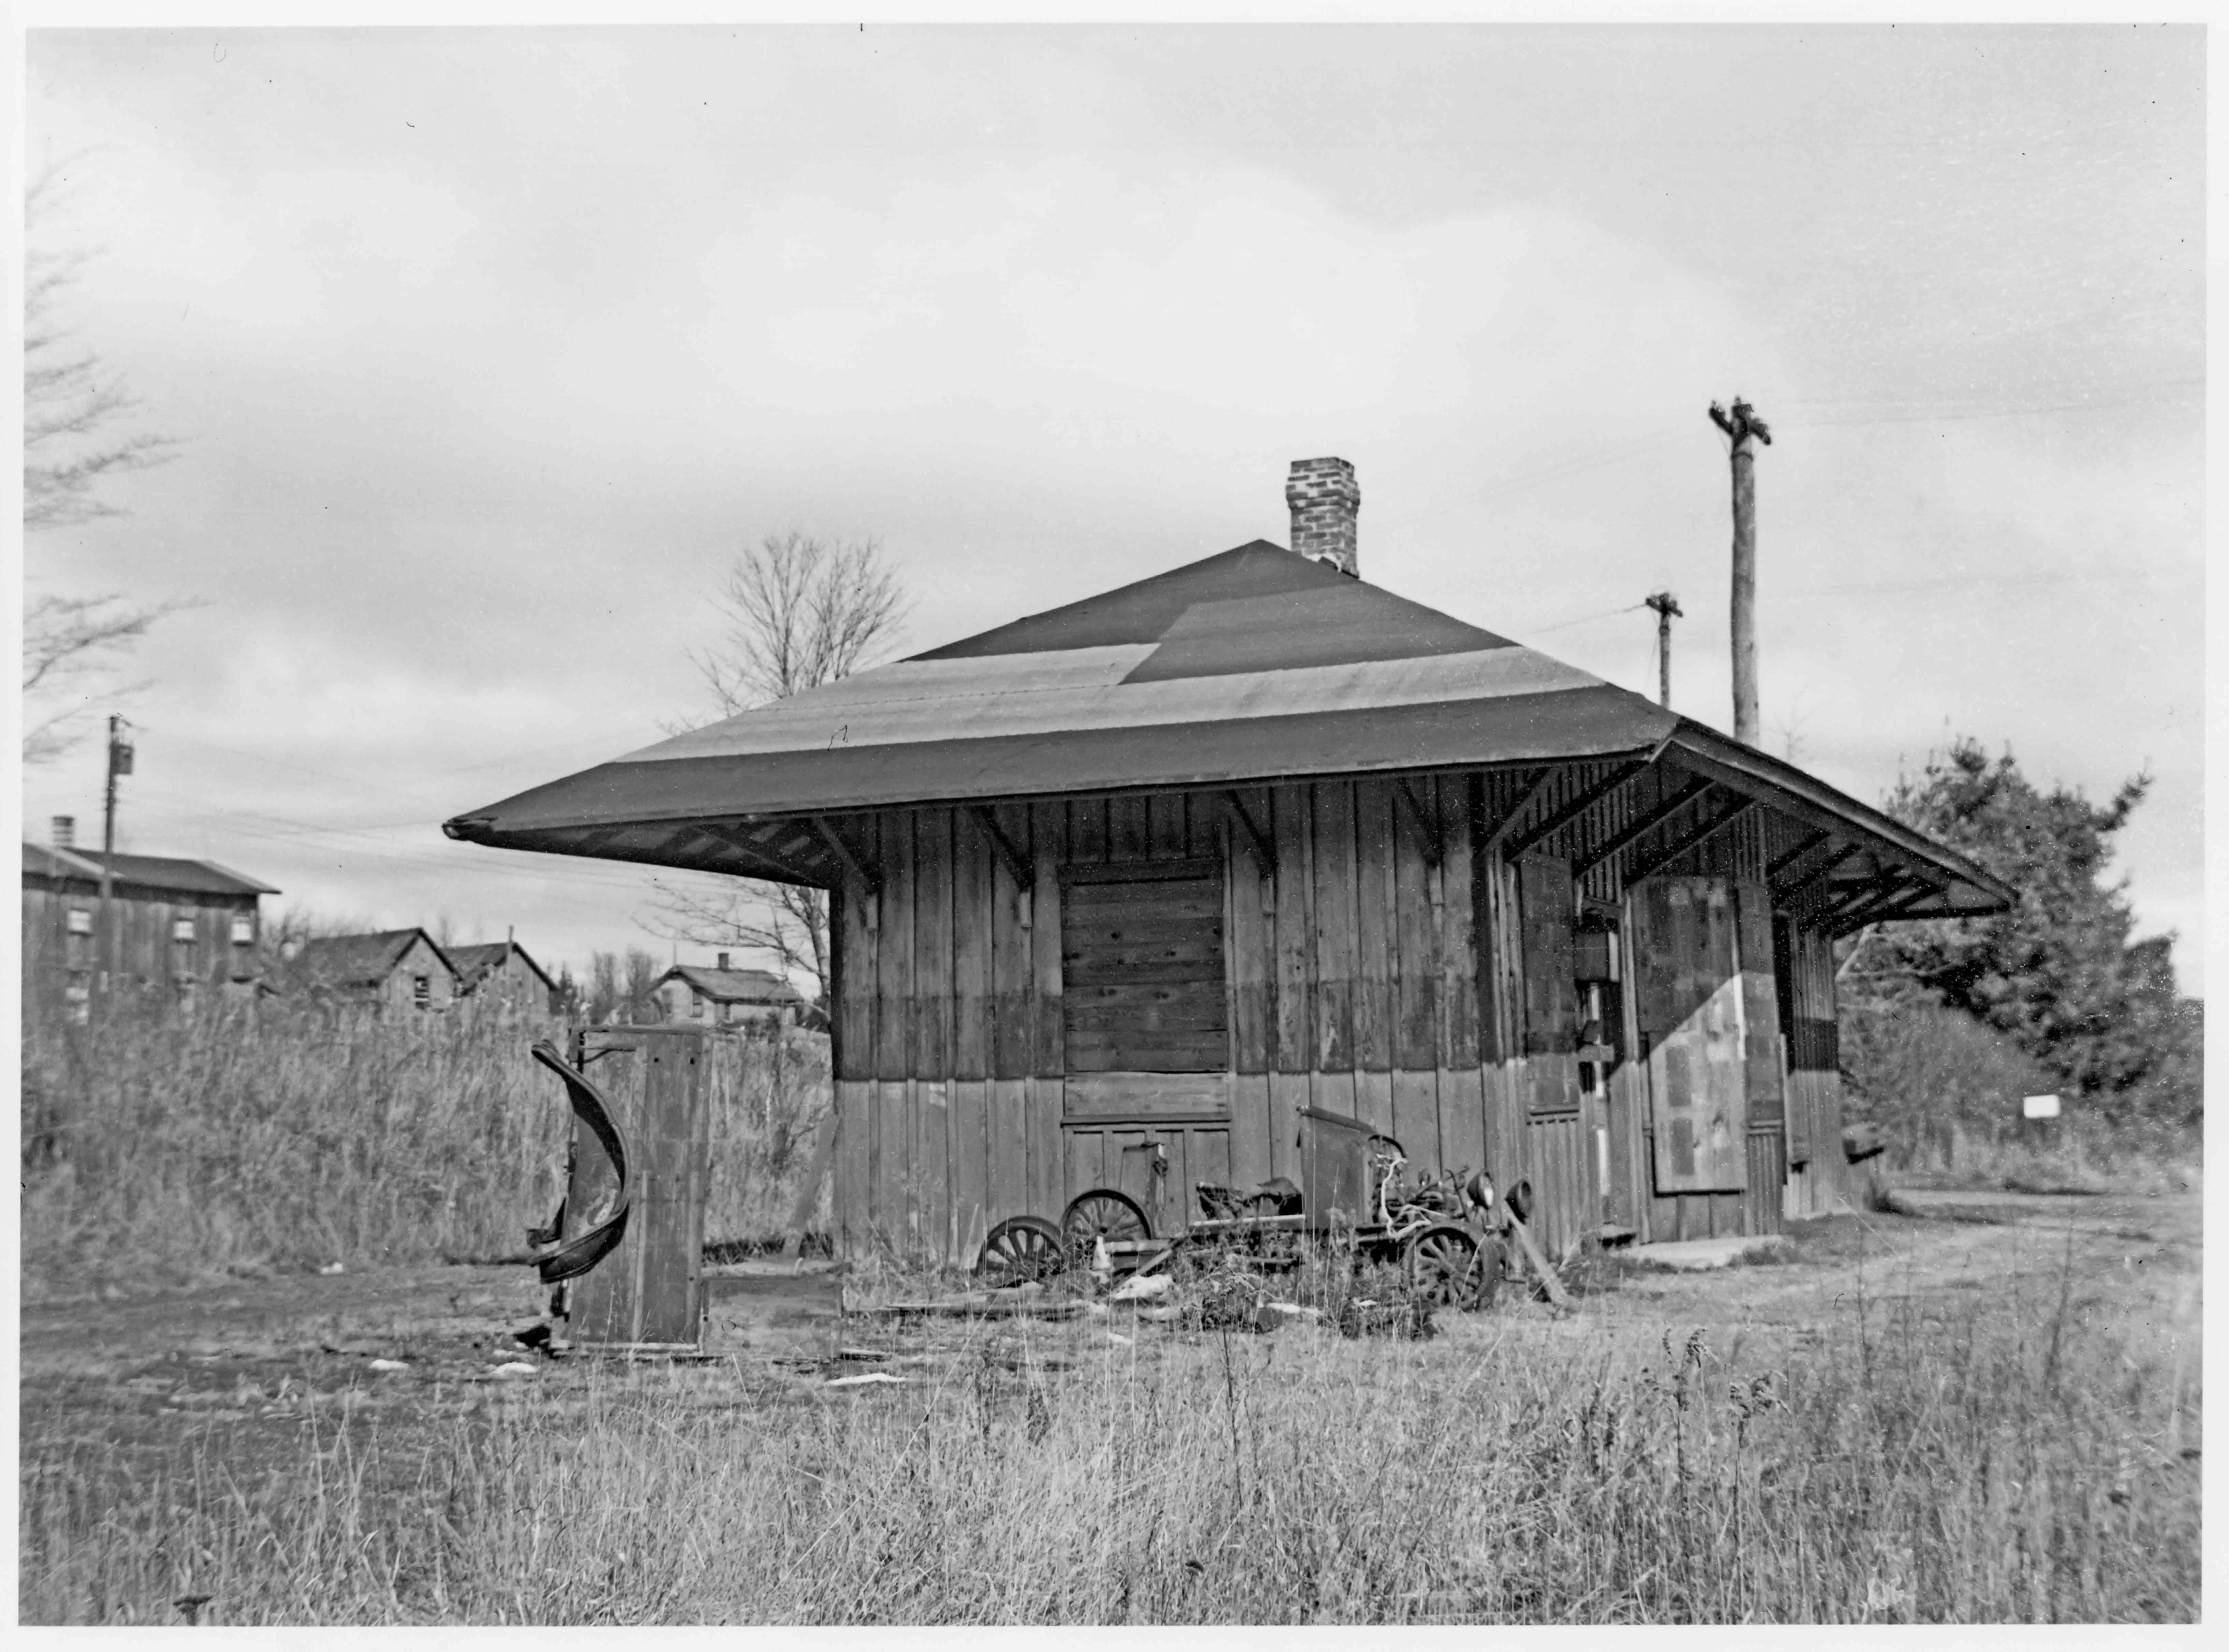
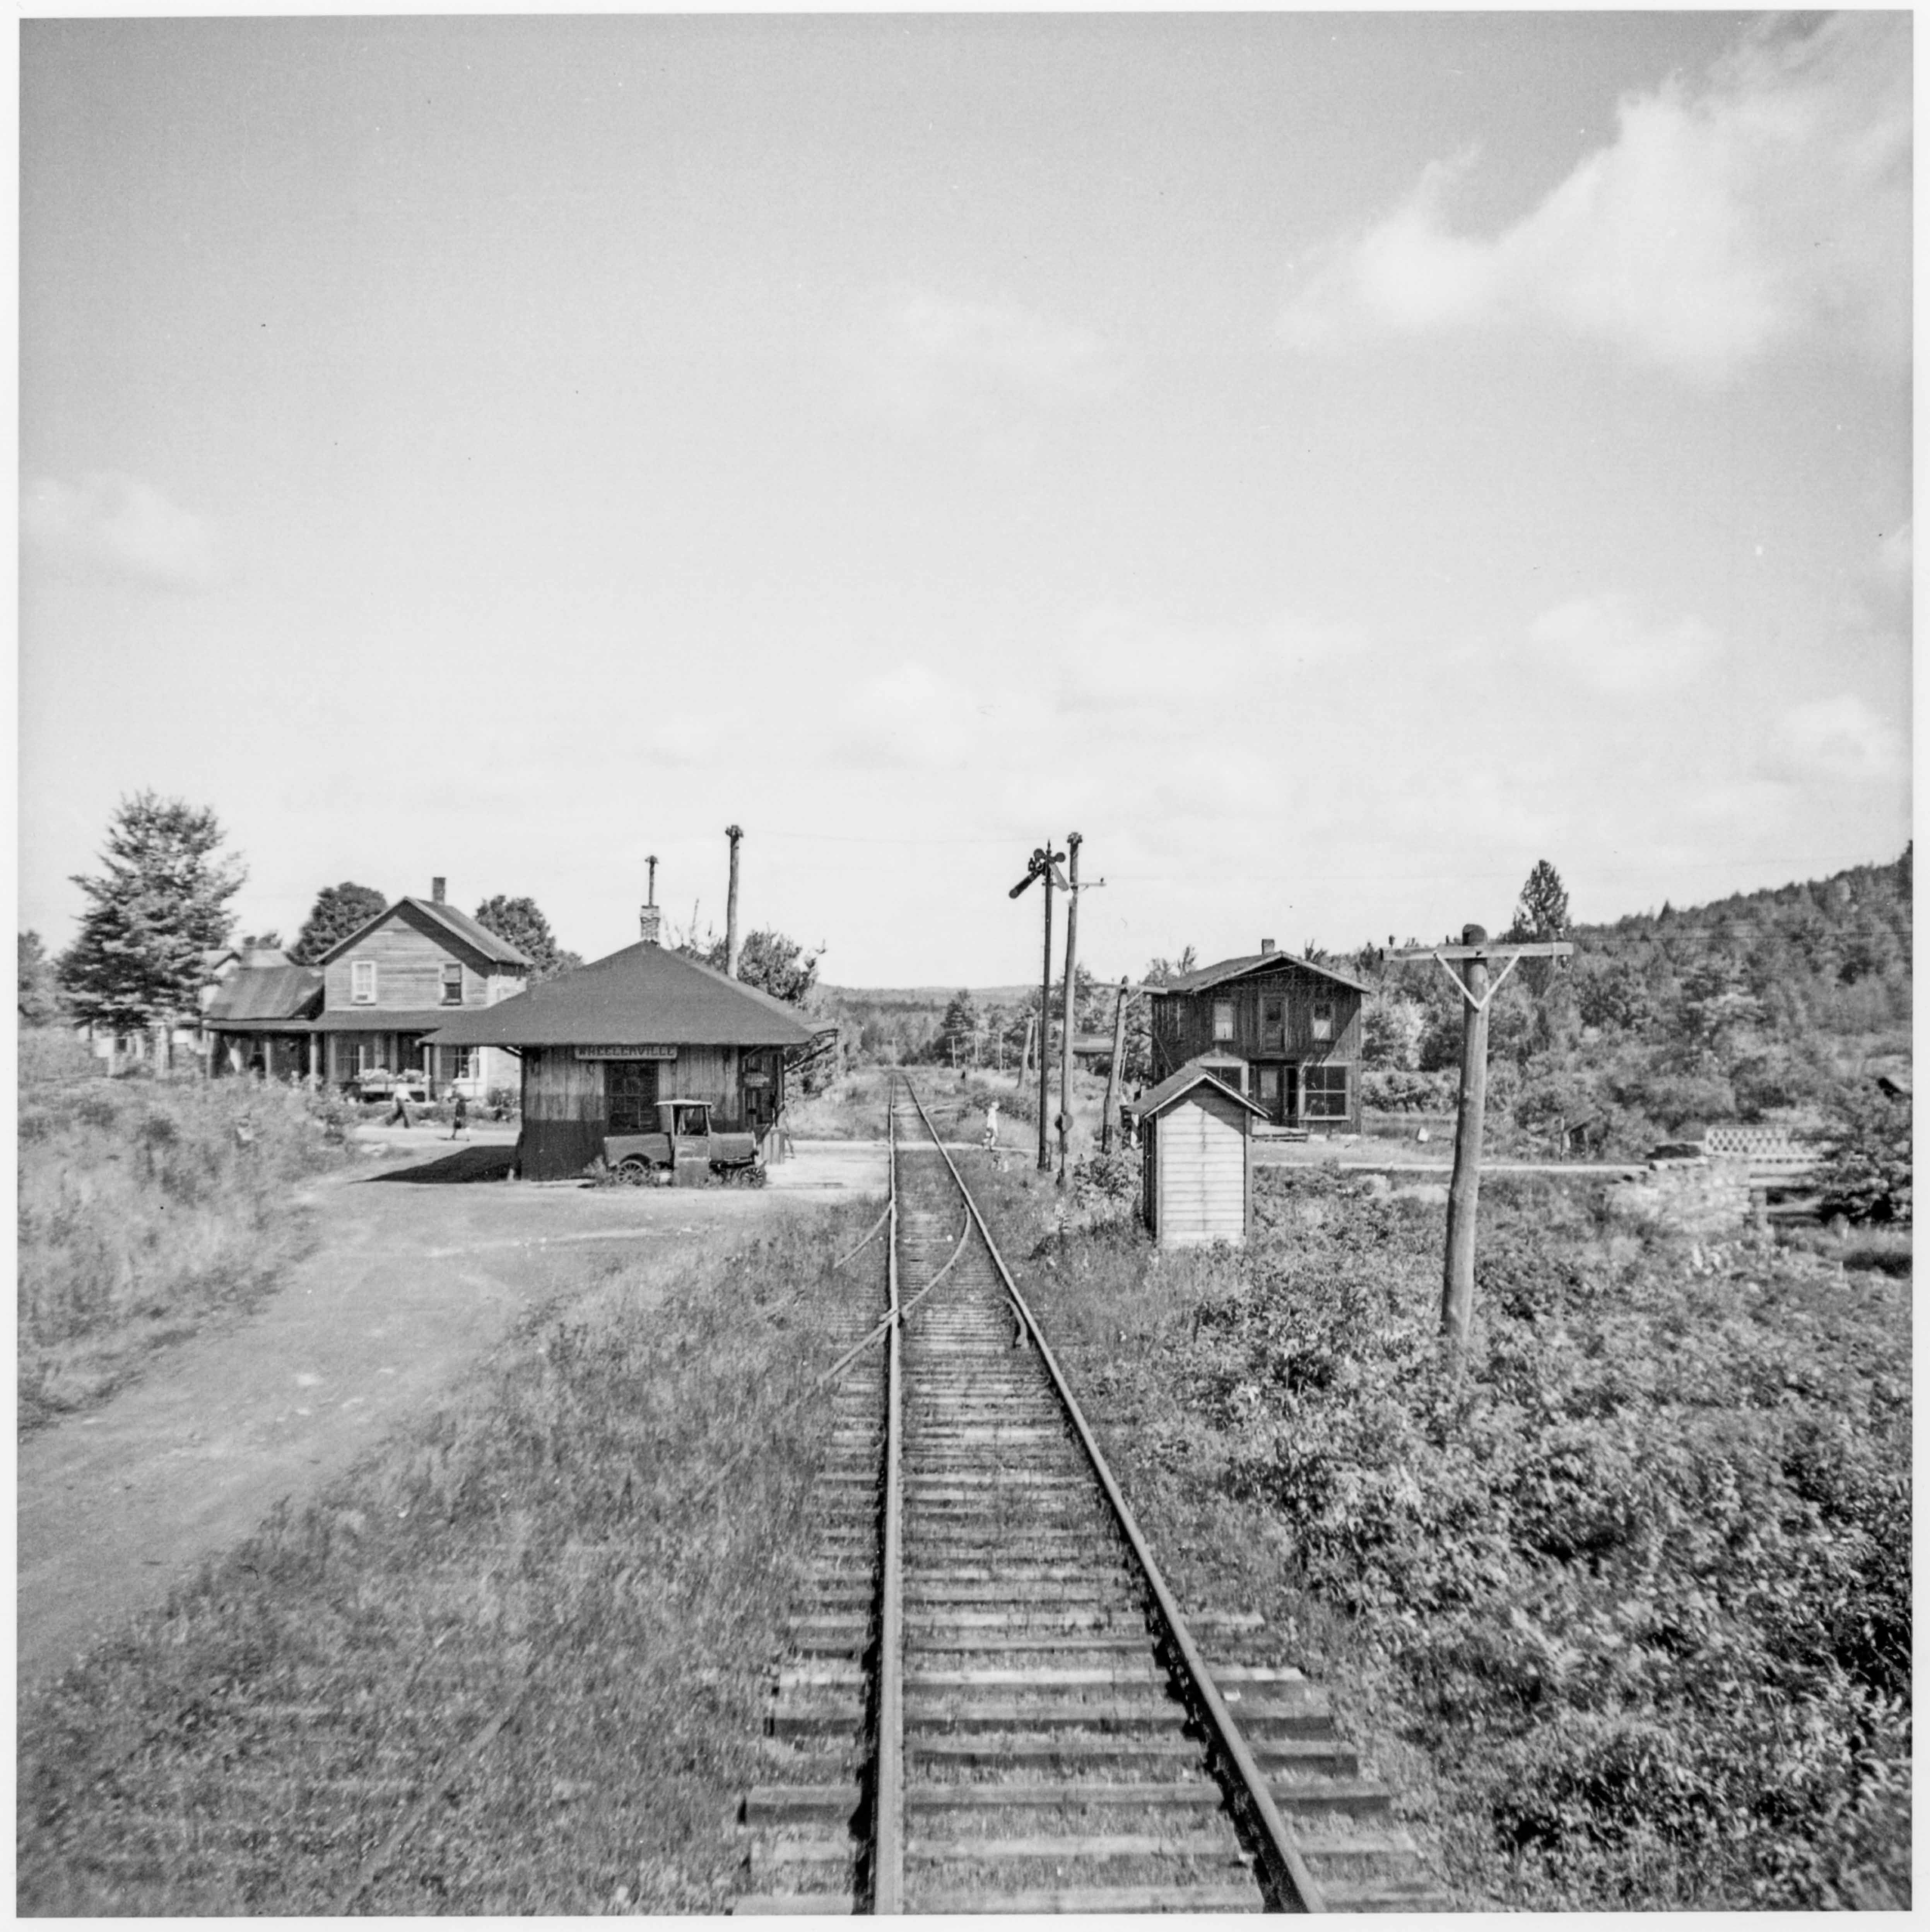
The depot at Wheelerville, PA sits forlorn and abandoned in last week’s “WW #67”. This is a closer shot than “WW #66”, and shows a few architectural details to better effect. The model-T inspection car looks to be vandalized, or partially stripped for scrap in this view as well.
I am uncertain of the date, though it is certainly post-1942 abandonment, and may even be post-war.
I wonder what became of the station sign??
In between working on the scenery around the Masten Loop bridge, I have also been working on the first model structure for the Wheelerville scene.
Some of my sources mentioned a creamery of some type at Wheelerville, but I have never seen photos of this structure. Accordingly, I decided to build the Laser-Art creamery kit #680.
The size of the creamery in the kit is just right to fit the space I had in mind, but I intend to scratchbuild a small boiler-house that will attached to the wall where a separate ice-house kit would go. My thinking is that this will provide an extra car-spot for coal while partially disguising the structure as “that Branchline Trains creamery”
I had never attempted a laser-cut kit before, and assembly was a pleasant surprise. The kit goes together quite well with only a couple of minor caveats.
The first is that the kit, being wood, needs to be braced on the inside like crazy. I used some 1/4″ poplar strips from Lowes.
The second is that the window glazing is actually in 2 different sizes, one for the upper windows, one for the lower. The instructions do not mention this.
Last, I don’t trust the adhesive backing on some of the parts to hold forever, so I reinforced some joints, especially the tiny joins in the loading dock supports, with super glue.
Progress thus far:

The walls, windows, frames, and doors were stained with a random mix of oil-based ivory black and burnt umber thinned with turpenoid. This was then sealed with rattle-can Dullcoat. The Dullcoat also quickly dries the turpenoid and oil paint, preventing any later bleed-through. I then heavily dry-brushed warm-white Americana brand acrylic craft paint on the walls and other exterior parts prior to assembly. I made sure to dry-brush horizontally in the direction of the boards on the main walls.
The loading docks were stained with the same turpenoid mix. I’ll eventually lightly dry-brush these parts with some greys and browns to simulate weathered untreated wood.
To be continued…
Slow progress is being made at extending the small scenicked portion of the railroad. The most recent project is at the model version of the “Masten Loop”. This is a signature scene on the railroad, and is essentially a “layout design element” in itself.
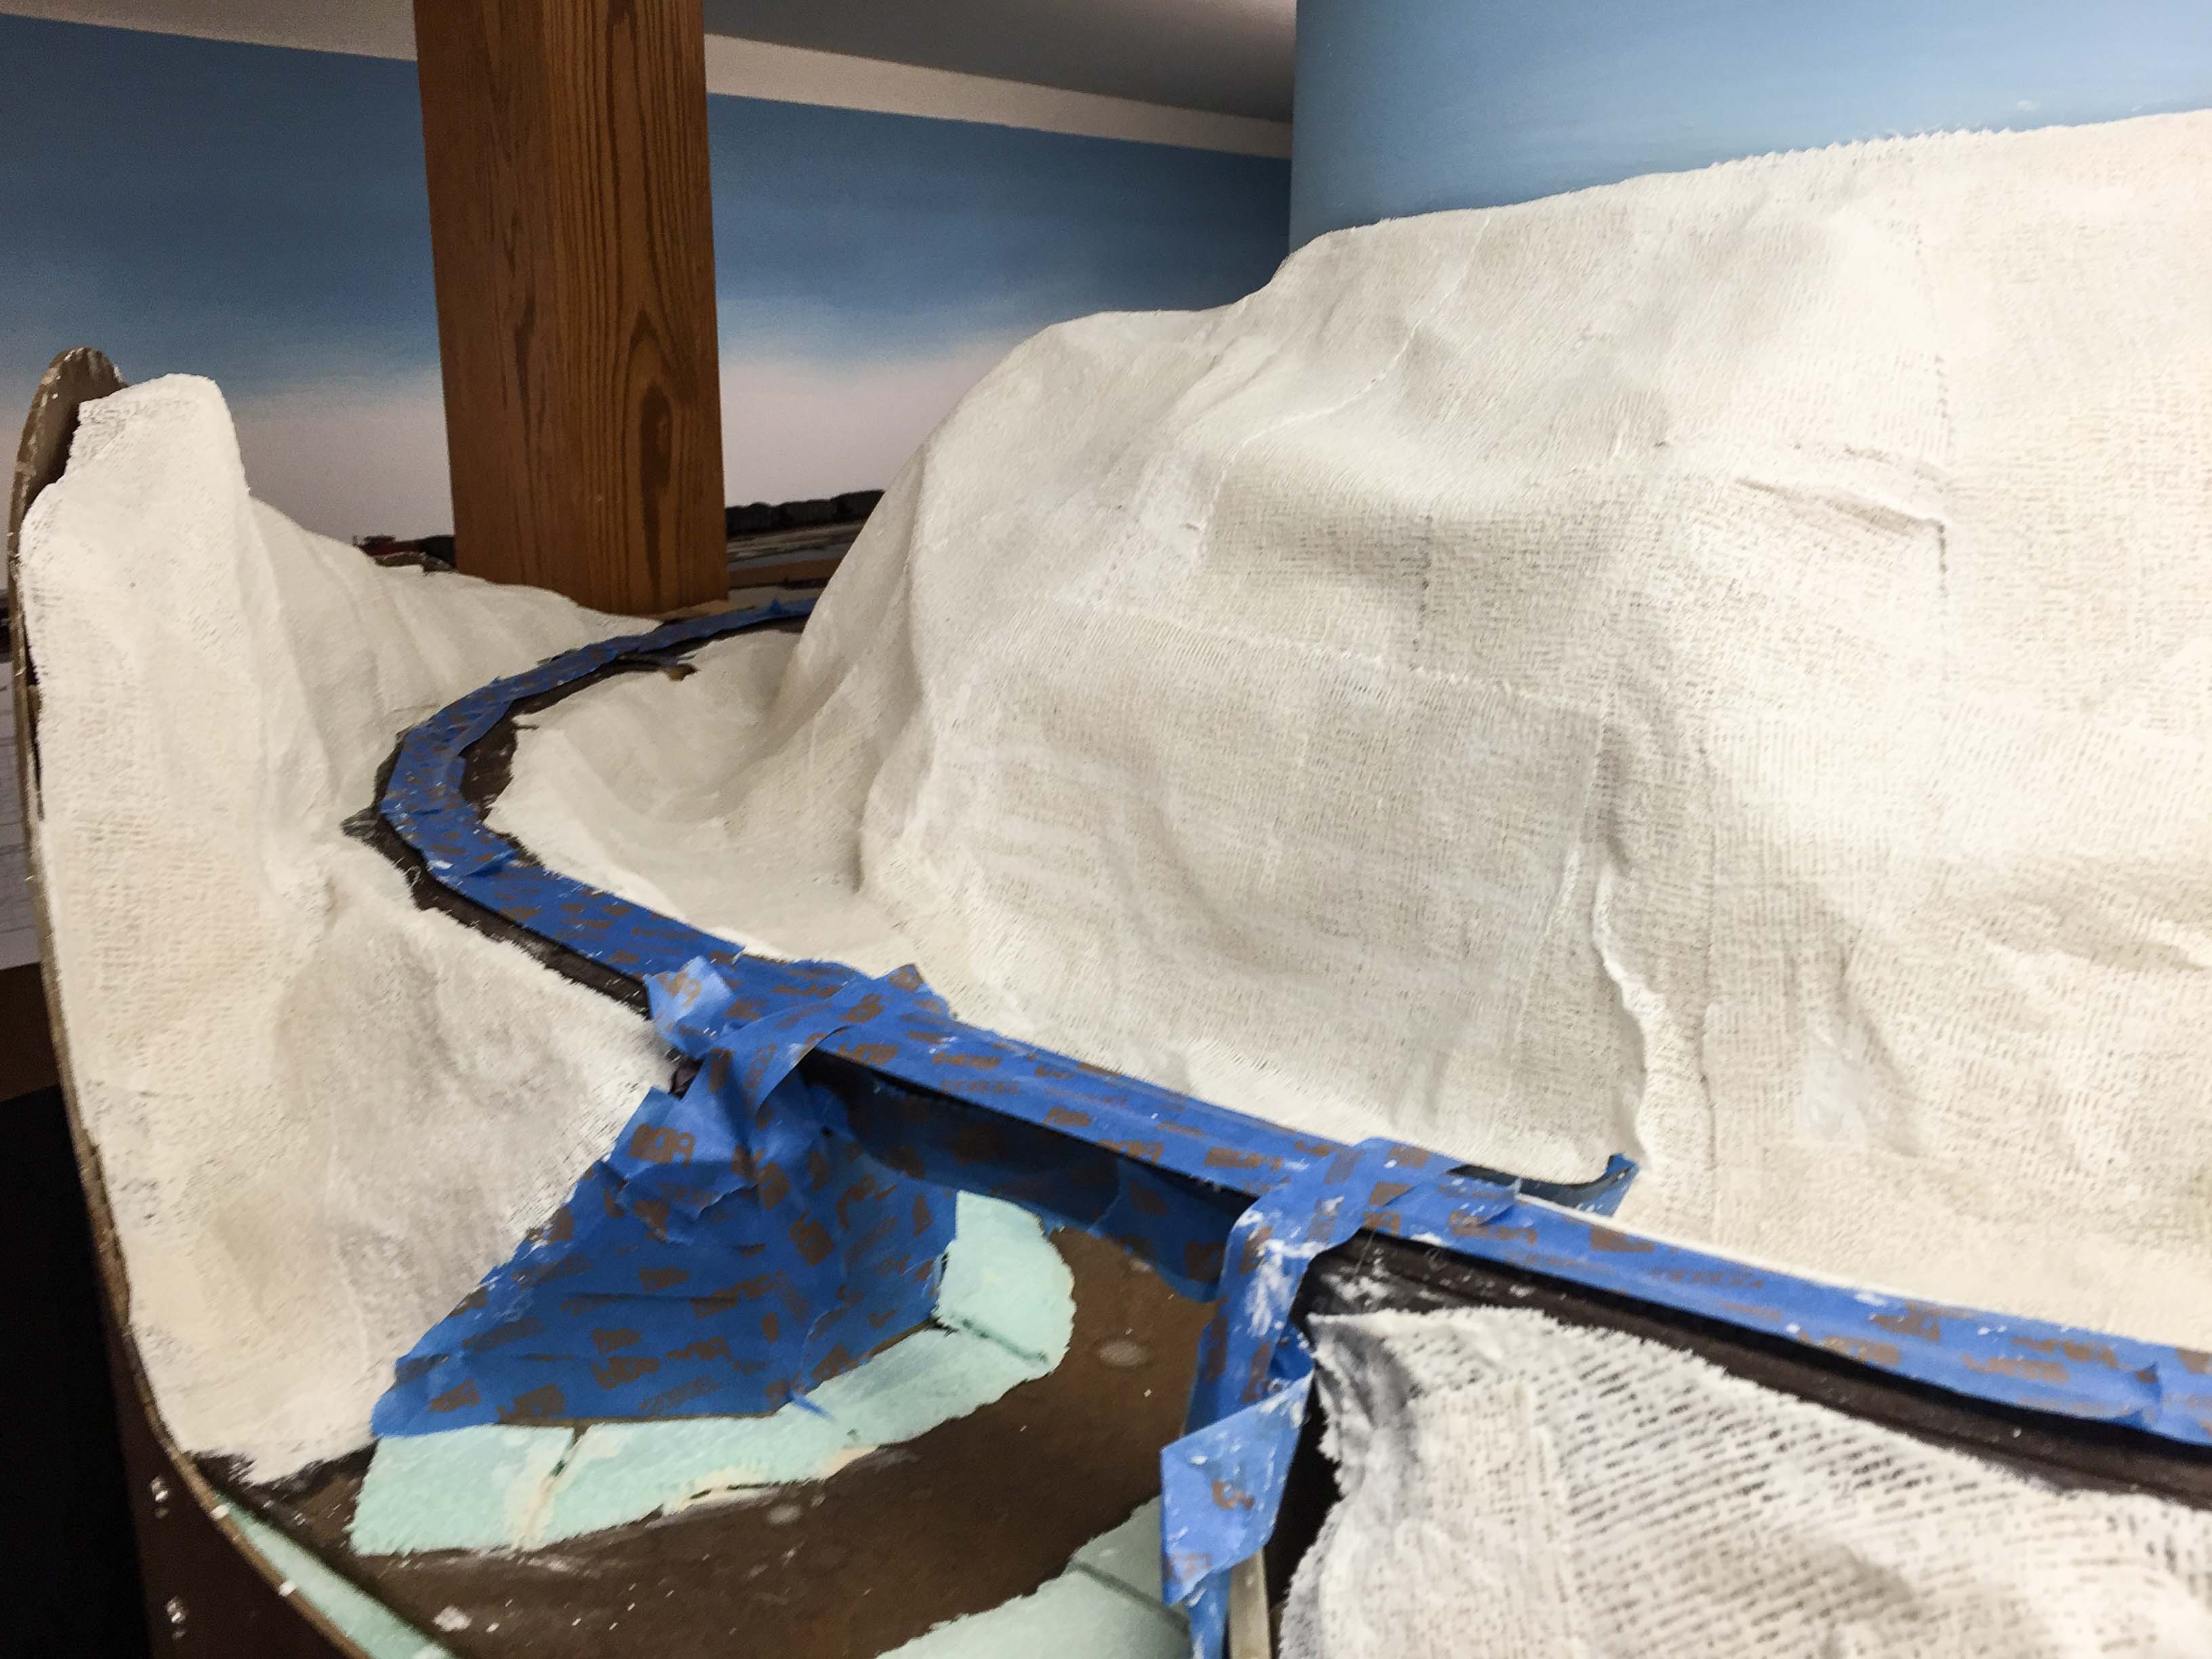
The background mountainside was formed of rough scrap foam supports covered by nylon screen left over from one of the kid’s old school projects. The other basic landforms were roughed in using the usual cardboard lattice technique. I had a bag full of expired plaster bandages I got for free from a hospital were I had worked some years prior, and since the first scenery section was done with rosin paper and white glue, I wanted to try using the plaster gauze both to use up what I had on hand, and to see how this technique compared with the rosin paper.
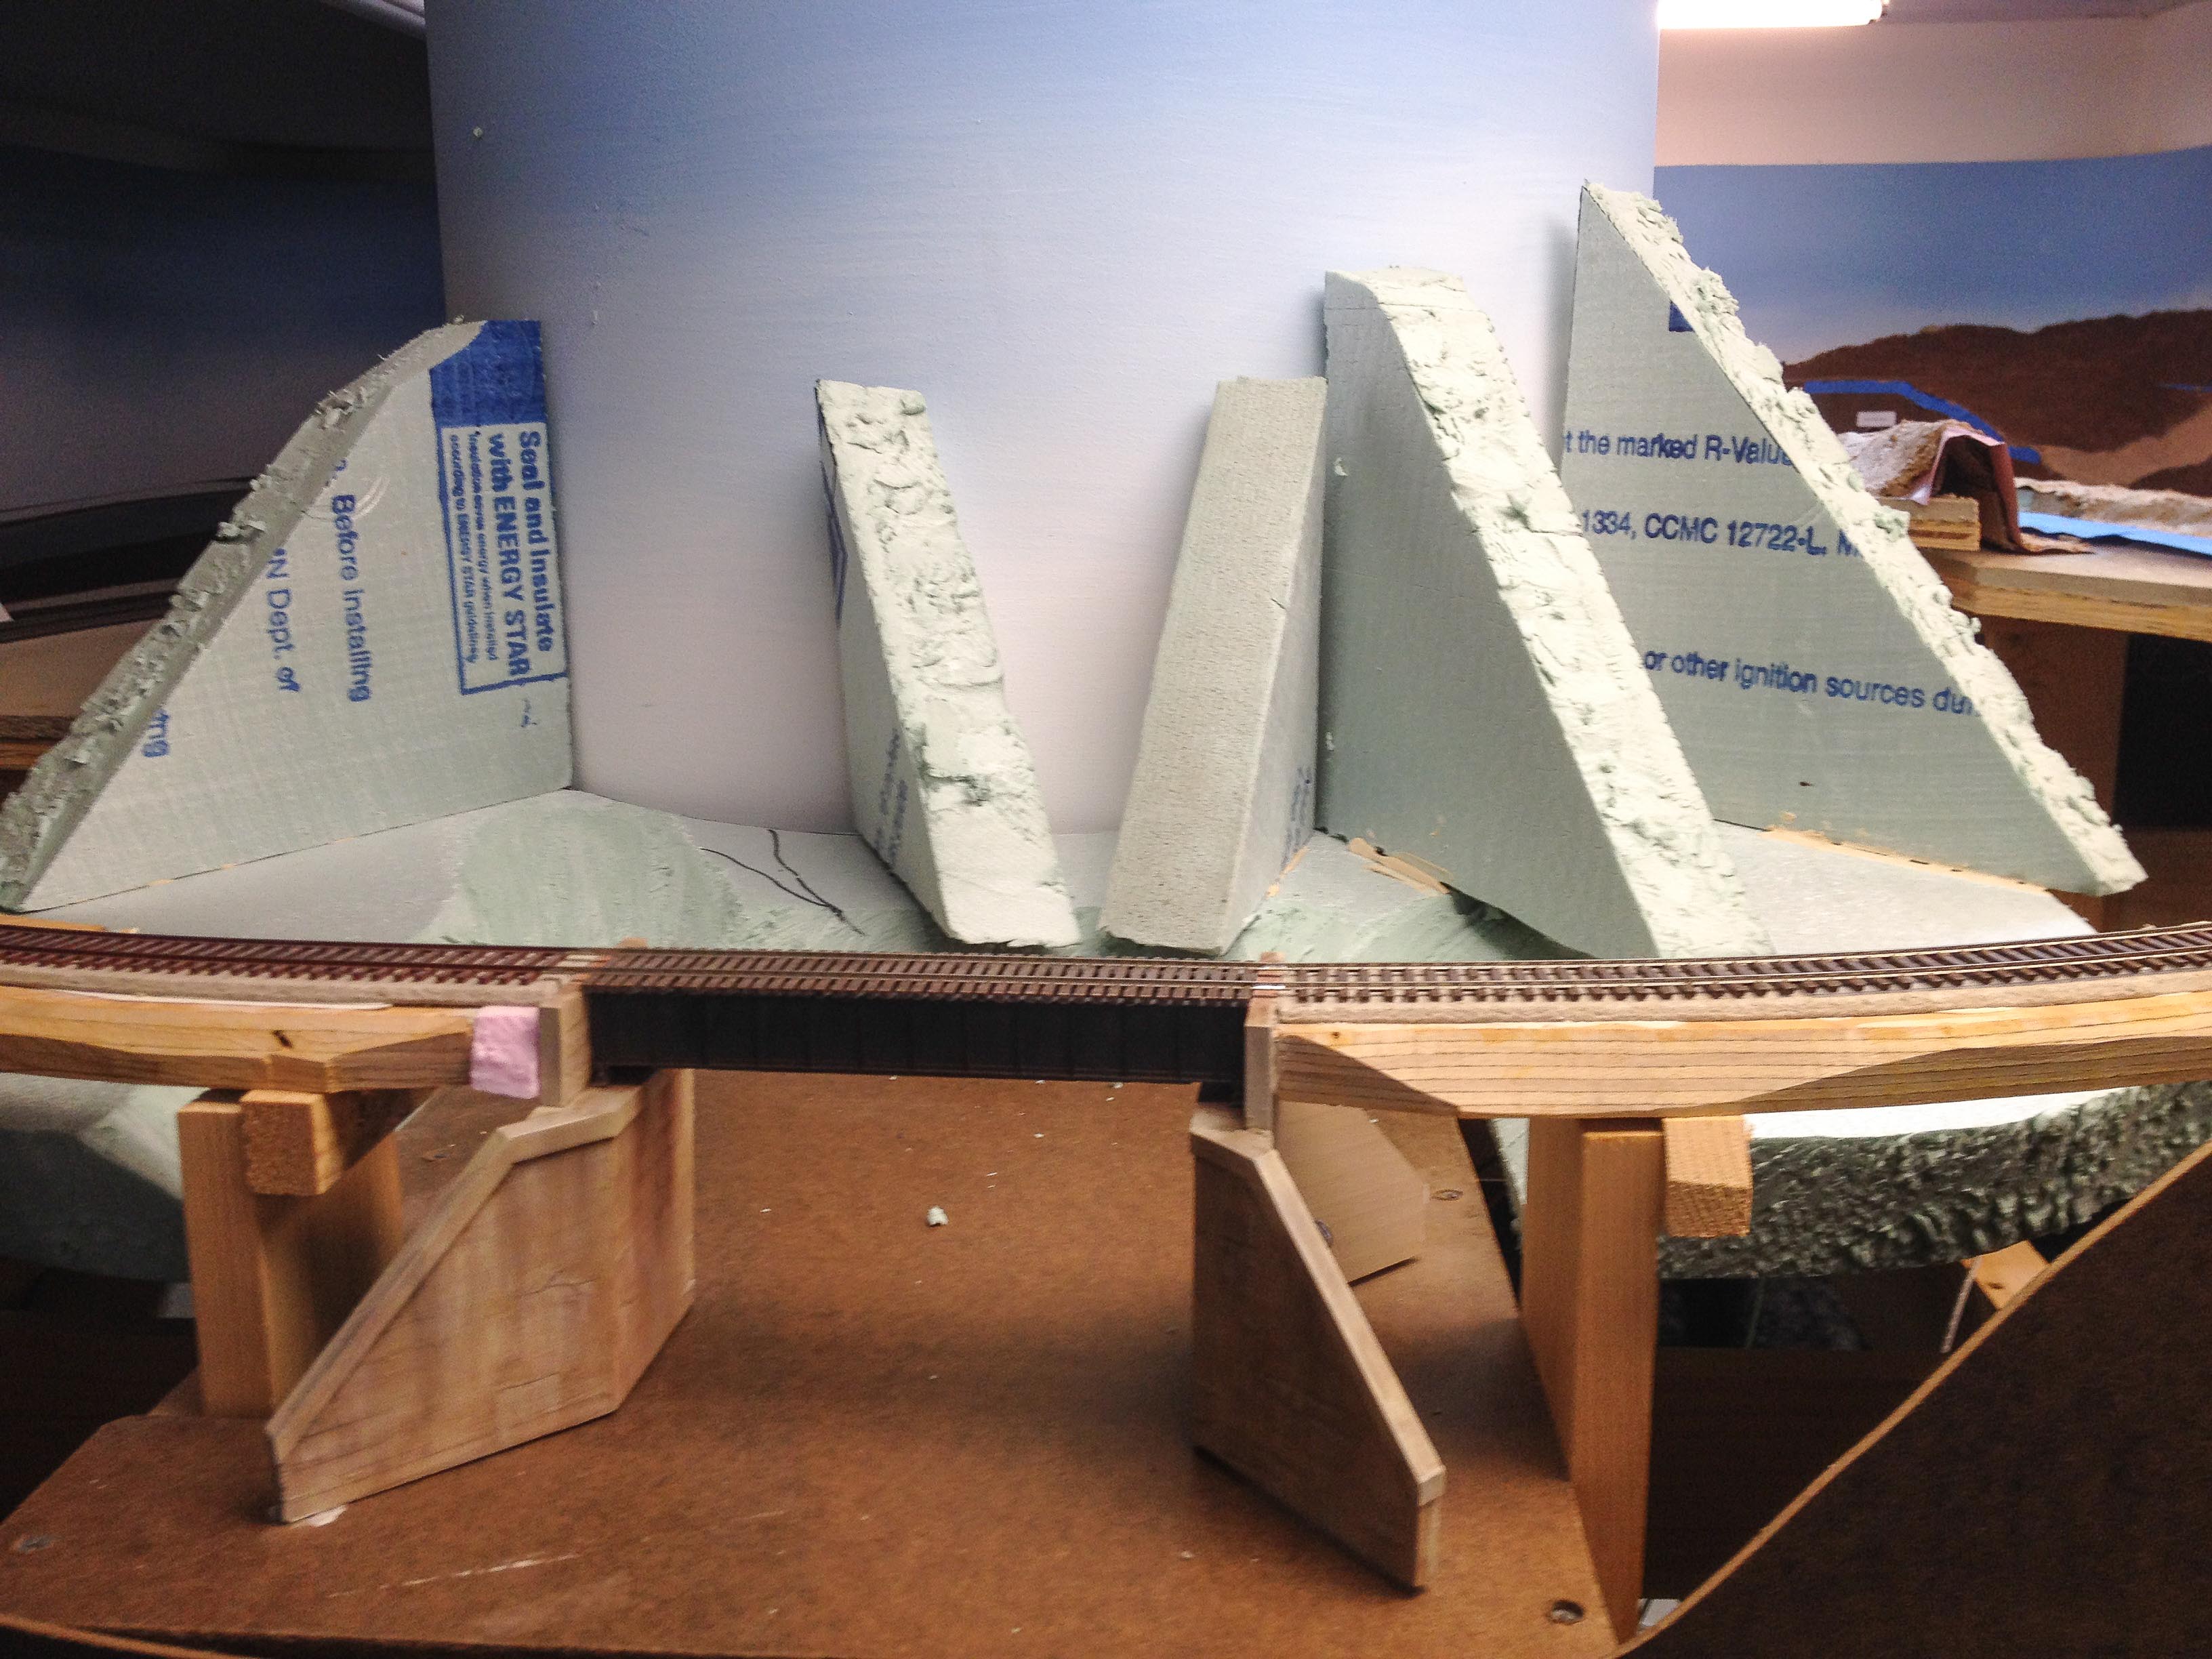
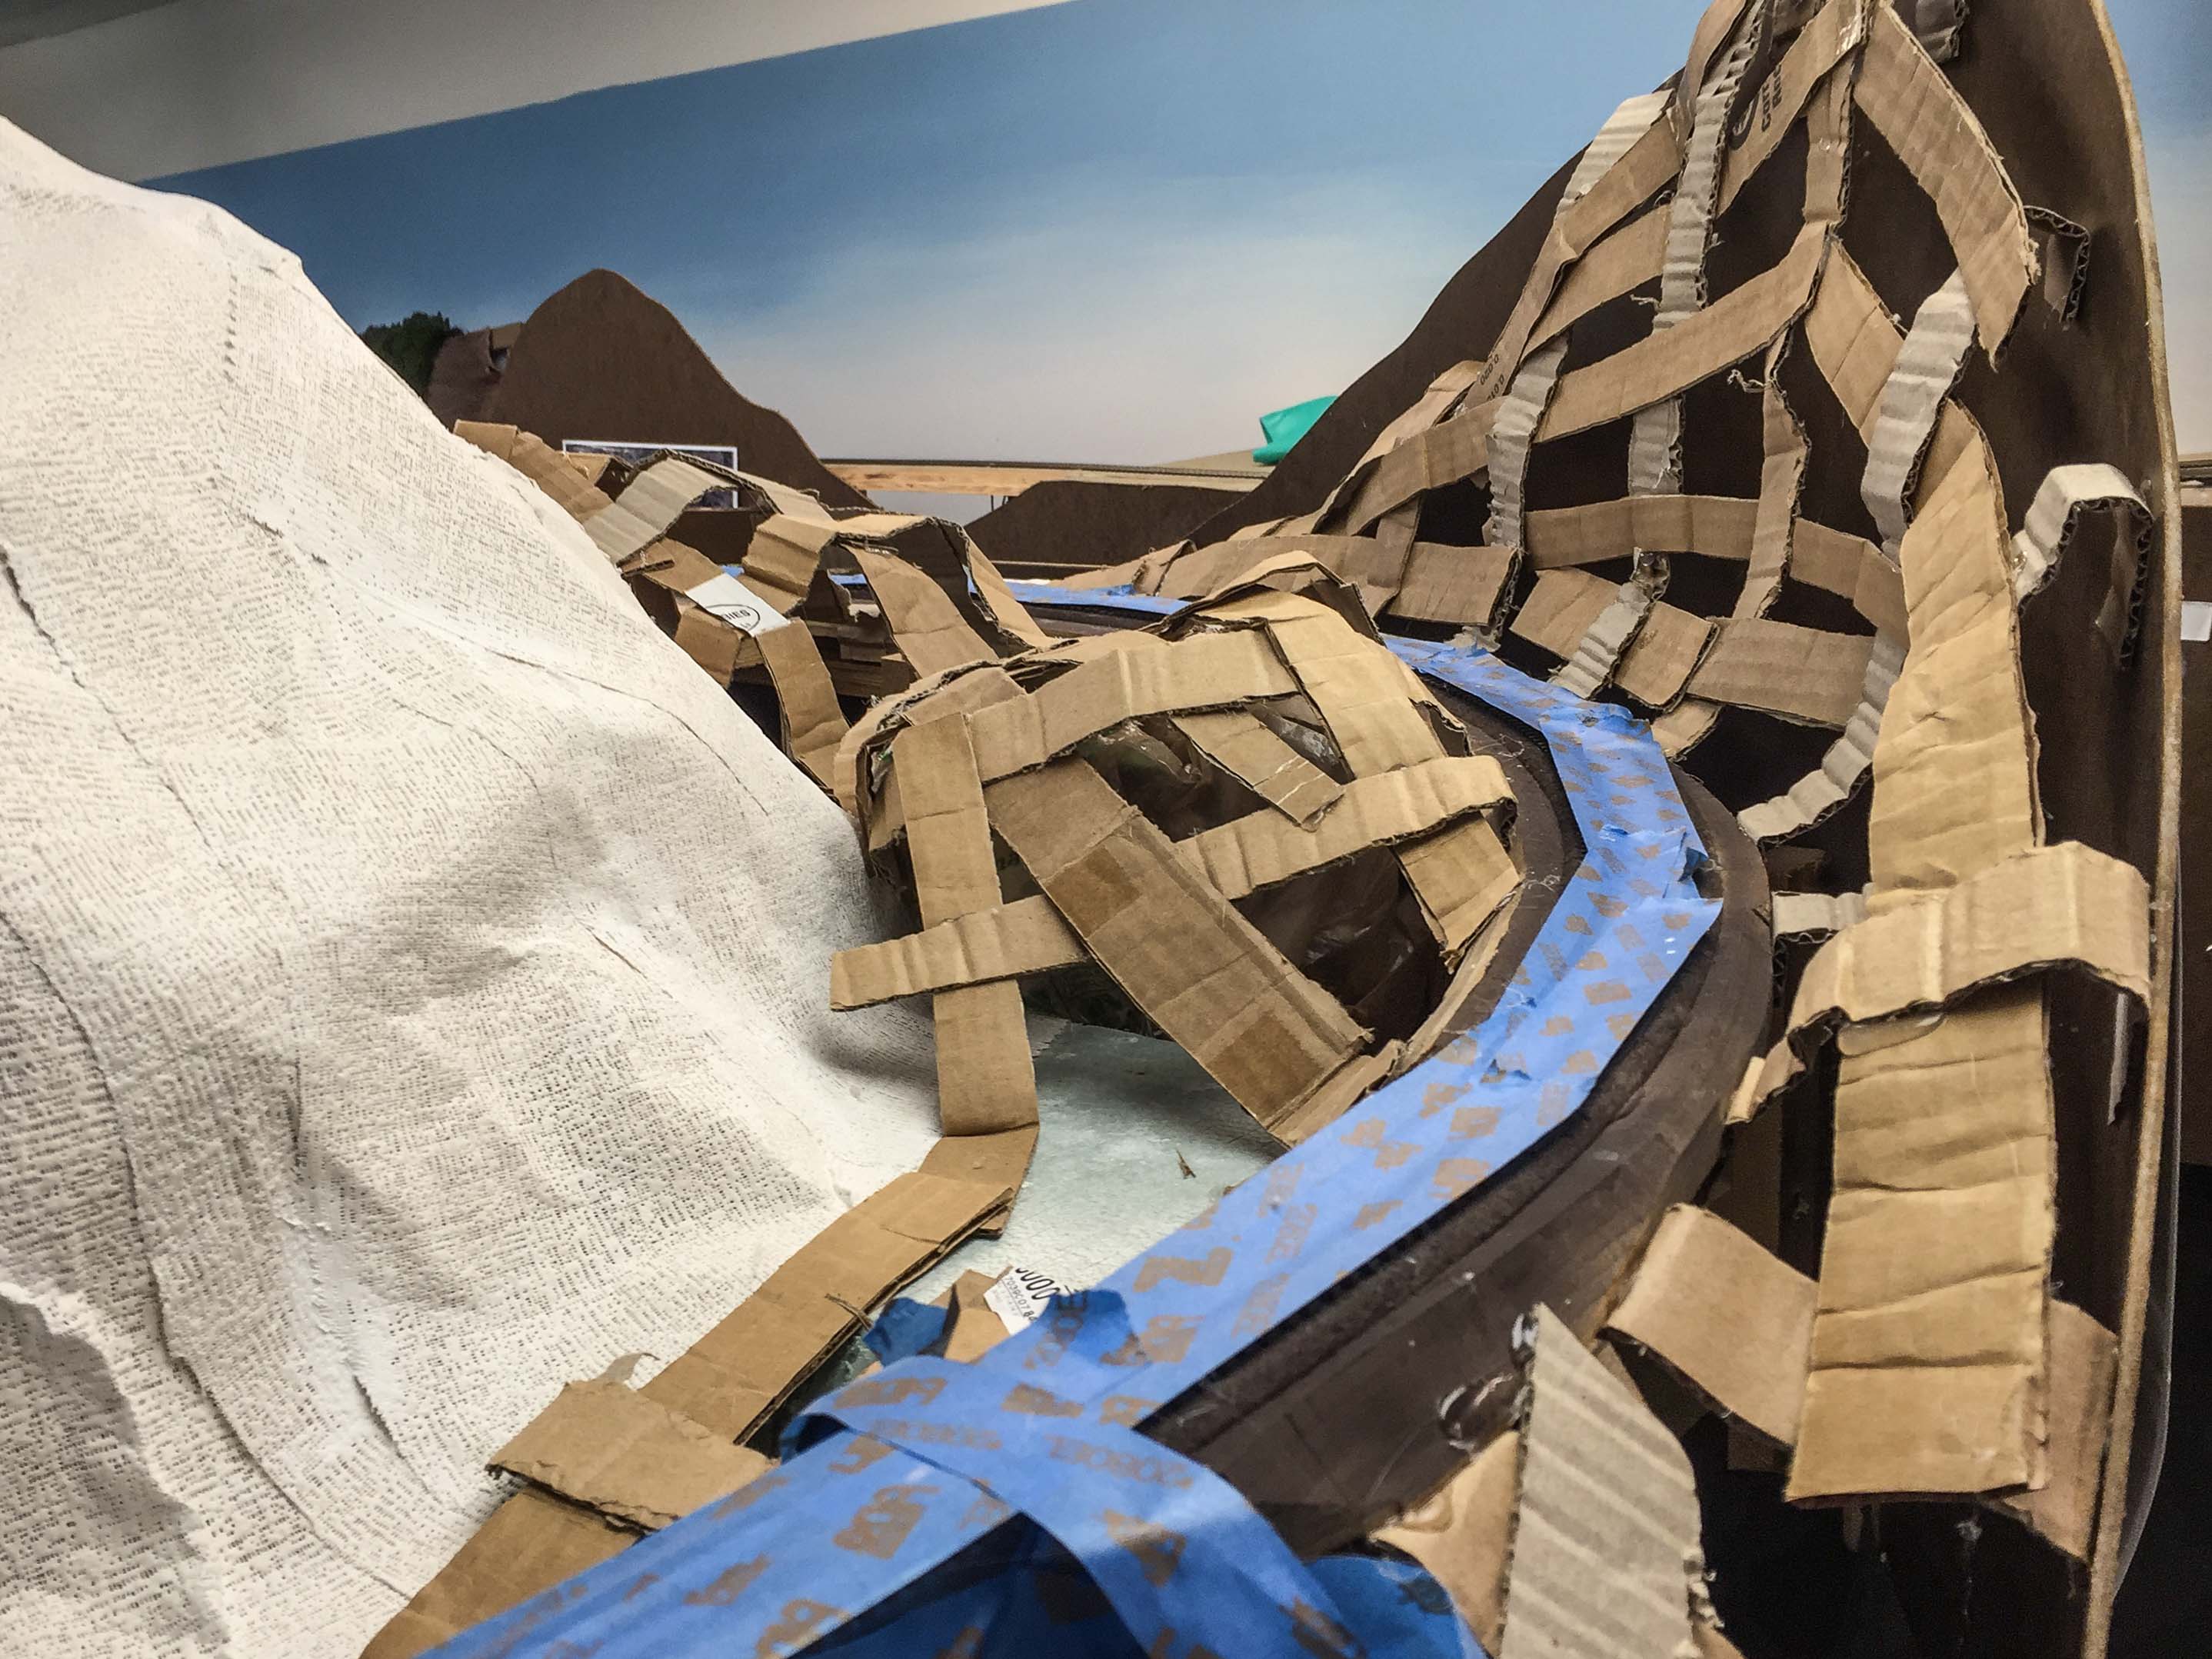
Overall, I thought the plaster gauze technique went quite a bit faster and was actually easier to use than the rosin paper technique, although potentially messier. The rosin paper method has the significant advantage of being significantly cheaper on the other hand. I did run into a slight unforeseen problem with the gauze. Some of the paper wrappers had degraded and torn over the past 10 years, and the rolls were exposed to the air. As a consequence, the plaster in these rolls was “punky”, and instead of setting up hard turned dry and crumbly. This was not a show-stopper though, and the punky plaster was easily covered and fixed in place later by a layer of paint and/or ground goop.
The stream banks were carved out of scrap construction foam and glued in place with Liquid Nails. This actually was one of the more tedious parts of the project. The background mountainside was painted flat black, since it will be entirely covered by puffball trees and no ground detail would be visible.
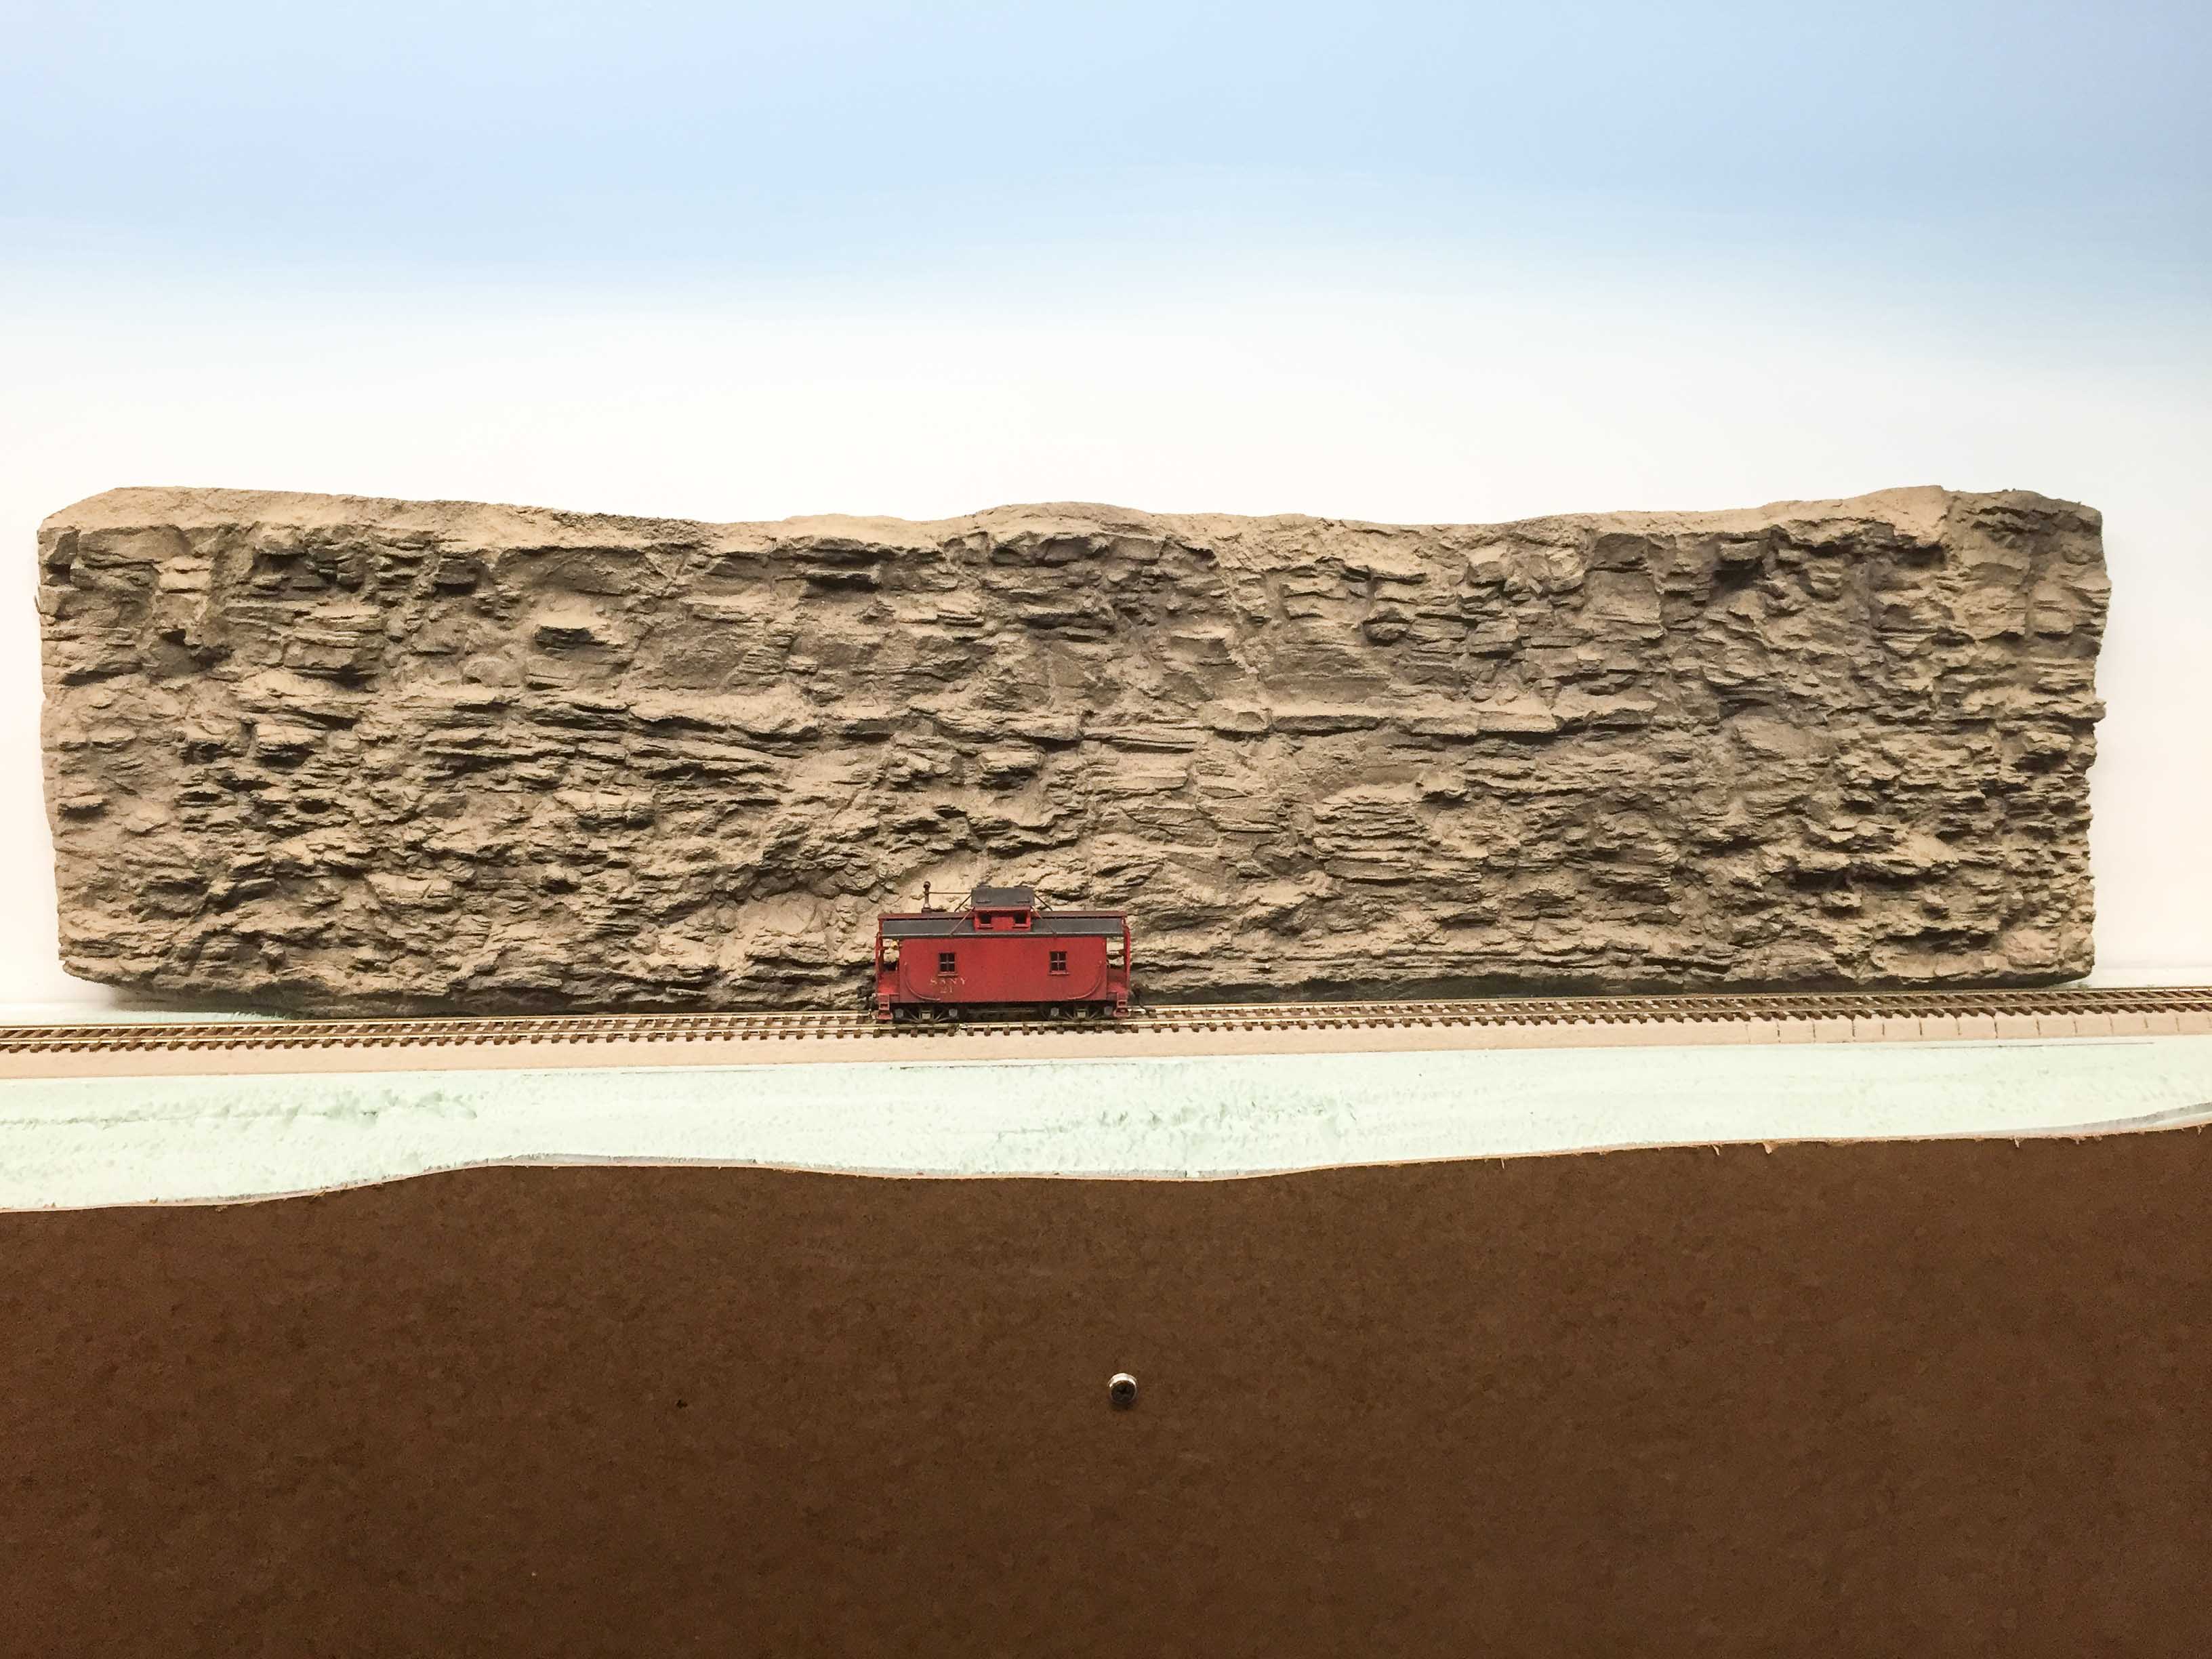
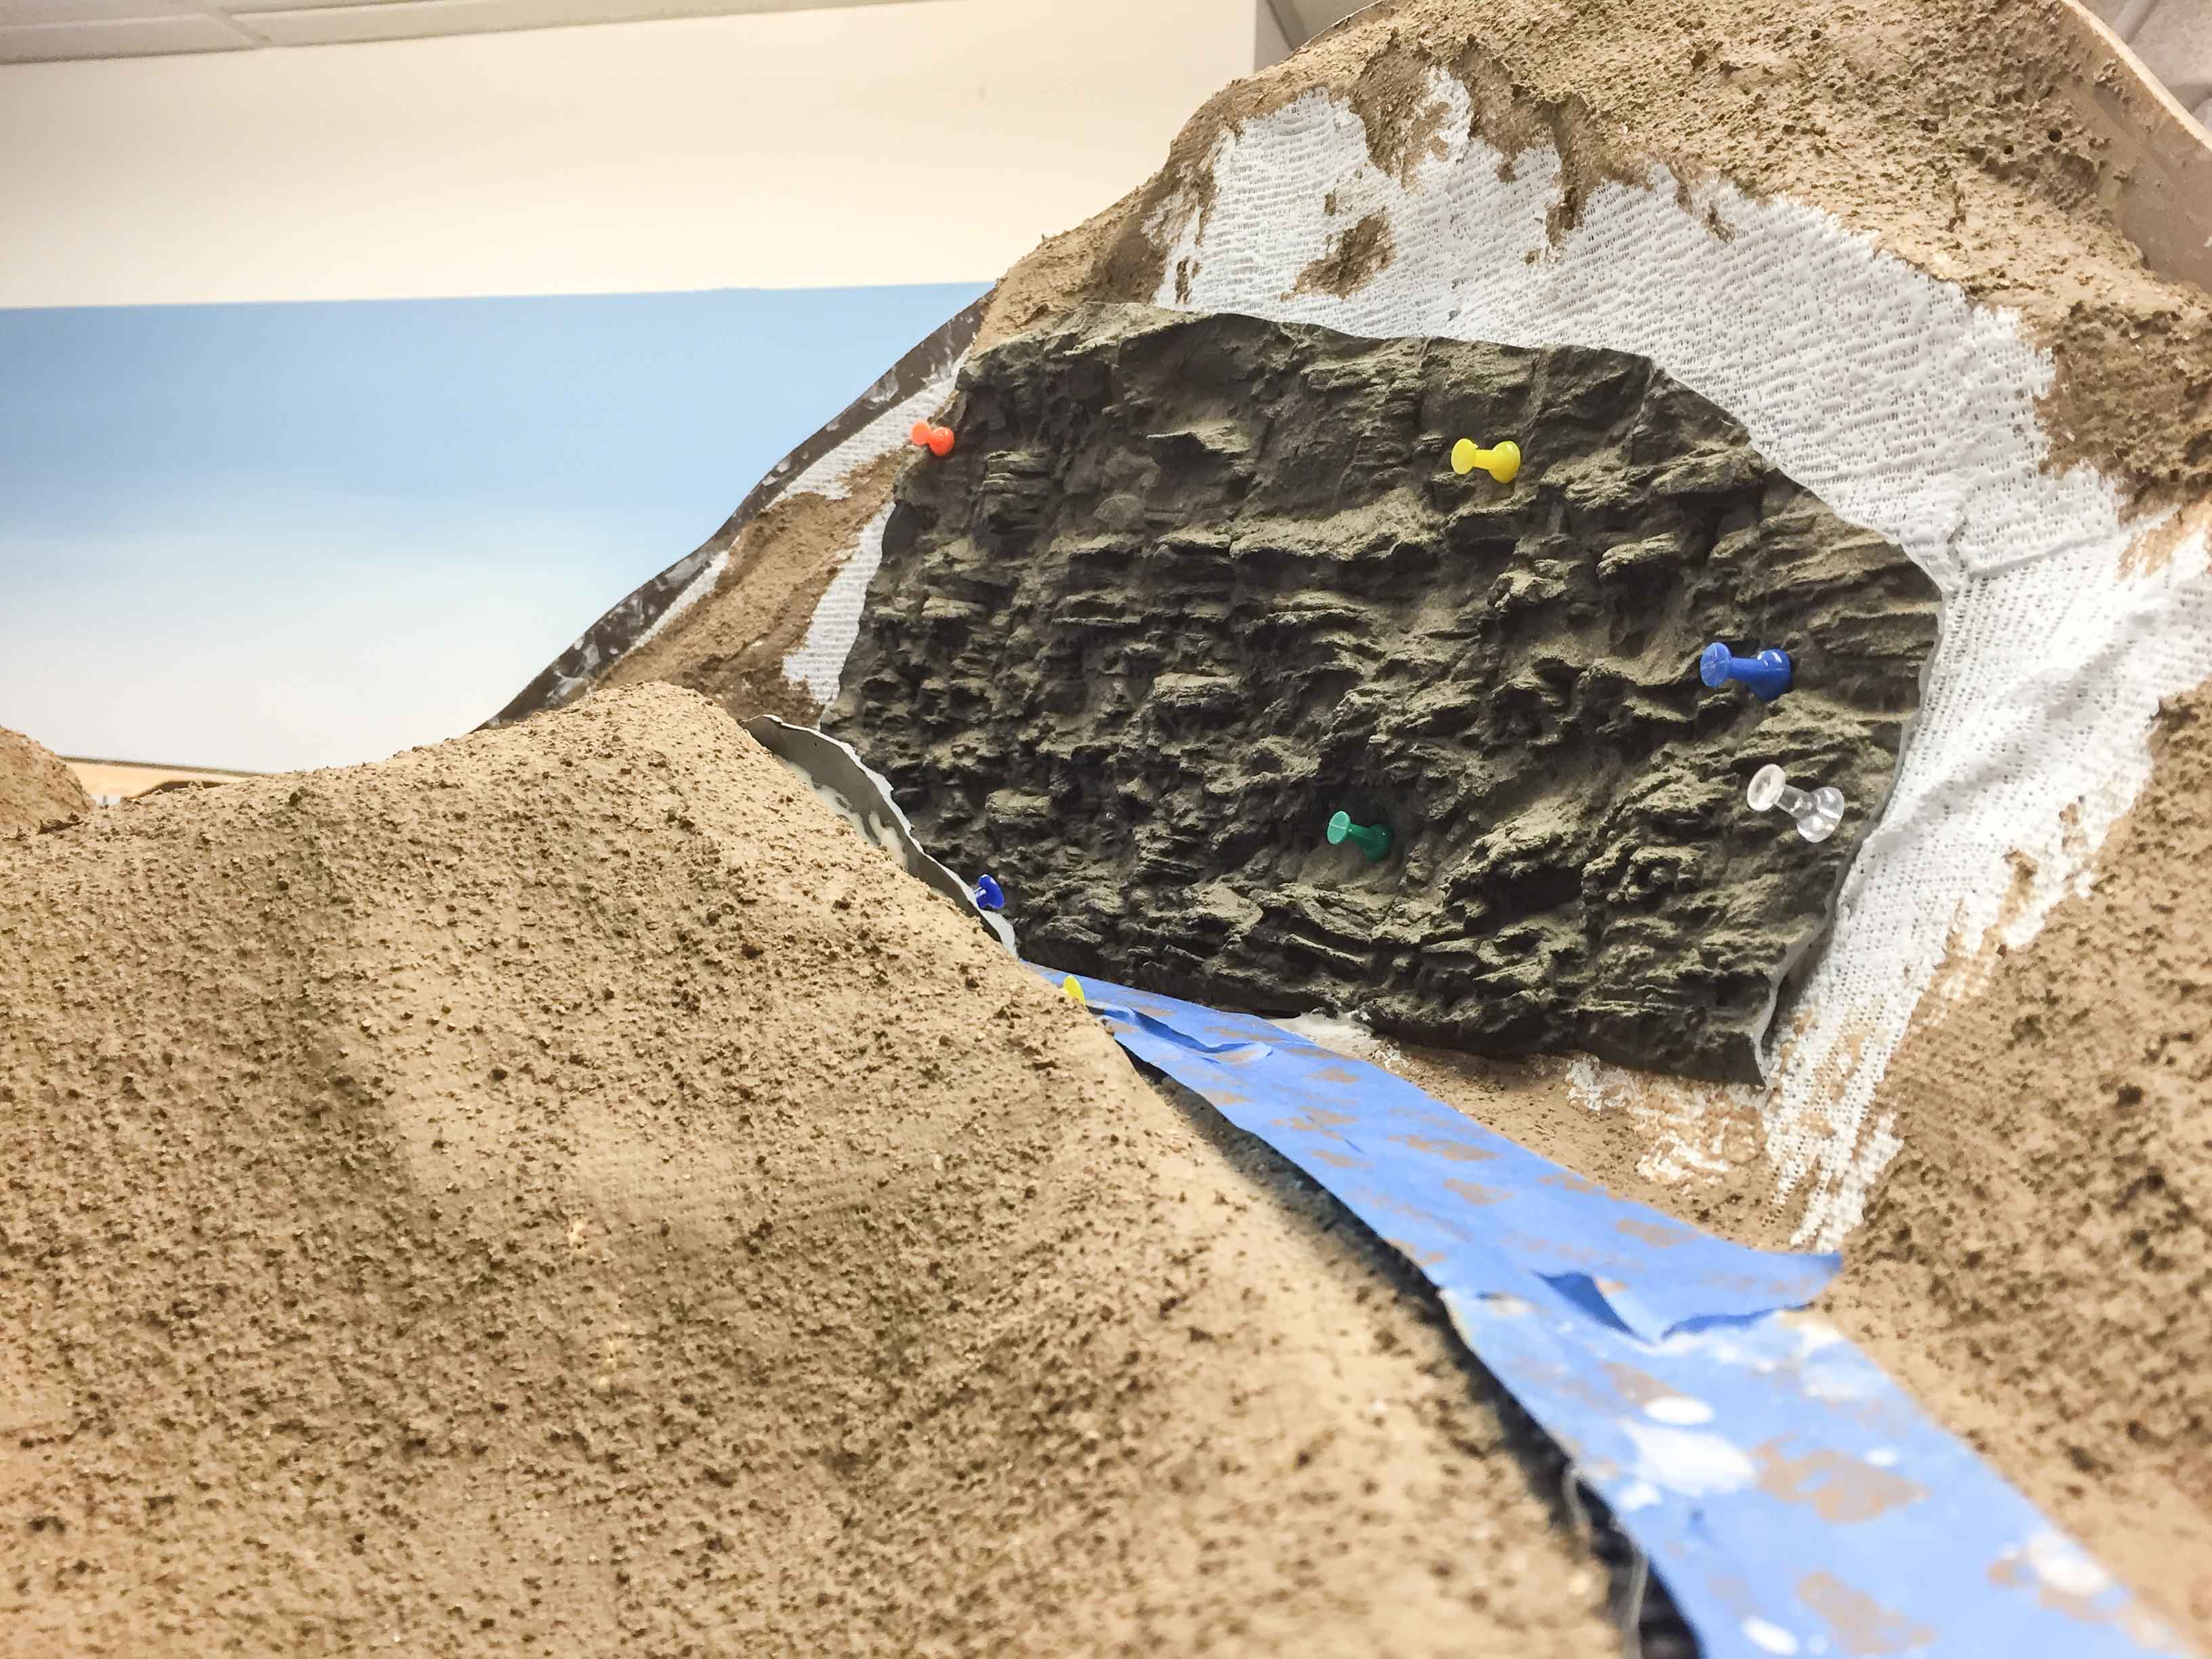
For the rock cuts I decided to experiment with “rubber rocks” from Cripplebush Valley Models for several reasons.
First, there was only about 3 inches of clearance from the track to the fascia board. The Woodland Scenics rock molds I have on hand are easy to use, but I worried that the thickness of the castings could cause problems.
Second, the track curves through the cuts, and it would be difficult to get rock castings in a curved shape of the proper radius.
Third, given the height and length of the biggest cut, I would have to use multiple rock castings and blend them together.
Last, none of the Woodland Scenics molds look quite like a large shale cut typical of the Eastern U.S., in my opinion.
The CVM products seemed to solve all these problems. I chose “Shale 18” both for the look and the overall size. While a bit on the expensive side (Shale 18 is $50, plus $15 shipping), for this specific application I believe it was worth the expense. I actually was able to cut out 4 large one-piece walls from the single piece seen above, plus I was able to use some of the rest to form the stream bank under the bridge.
I used Liquid Nails to glue the pieces to the plaster. The product comes from CVM with a nice two-tone brownish coloration, but as the project progresses I will use some heavy dry-brushing to add more depth and color variety.
I was a little reluctant to just start cutting up the large piece, given the cost, so I made a couple of rough templates out of paper as a guide.
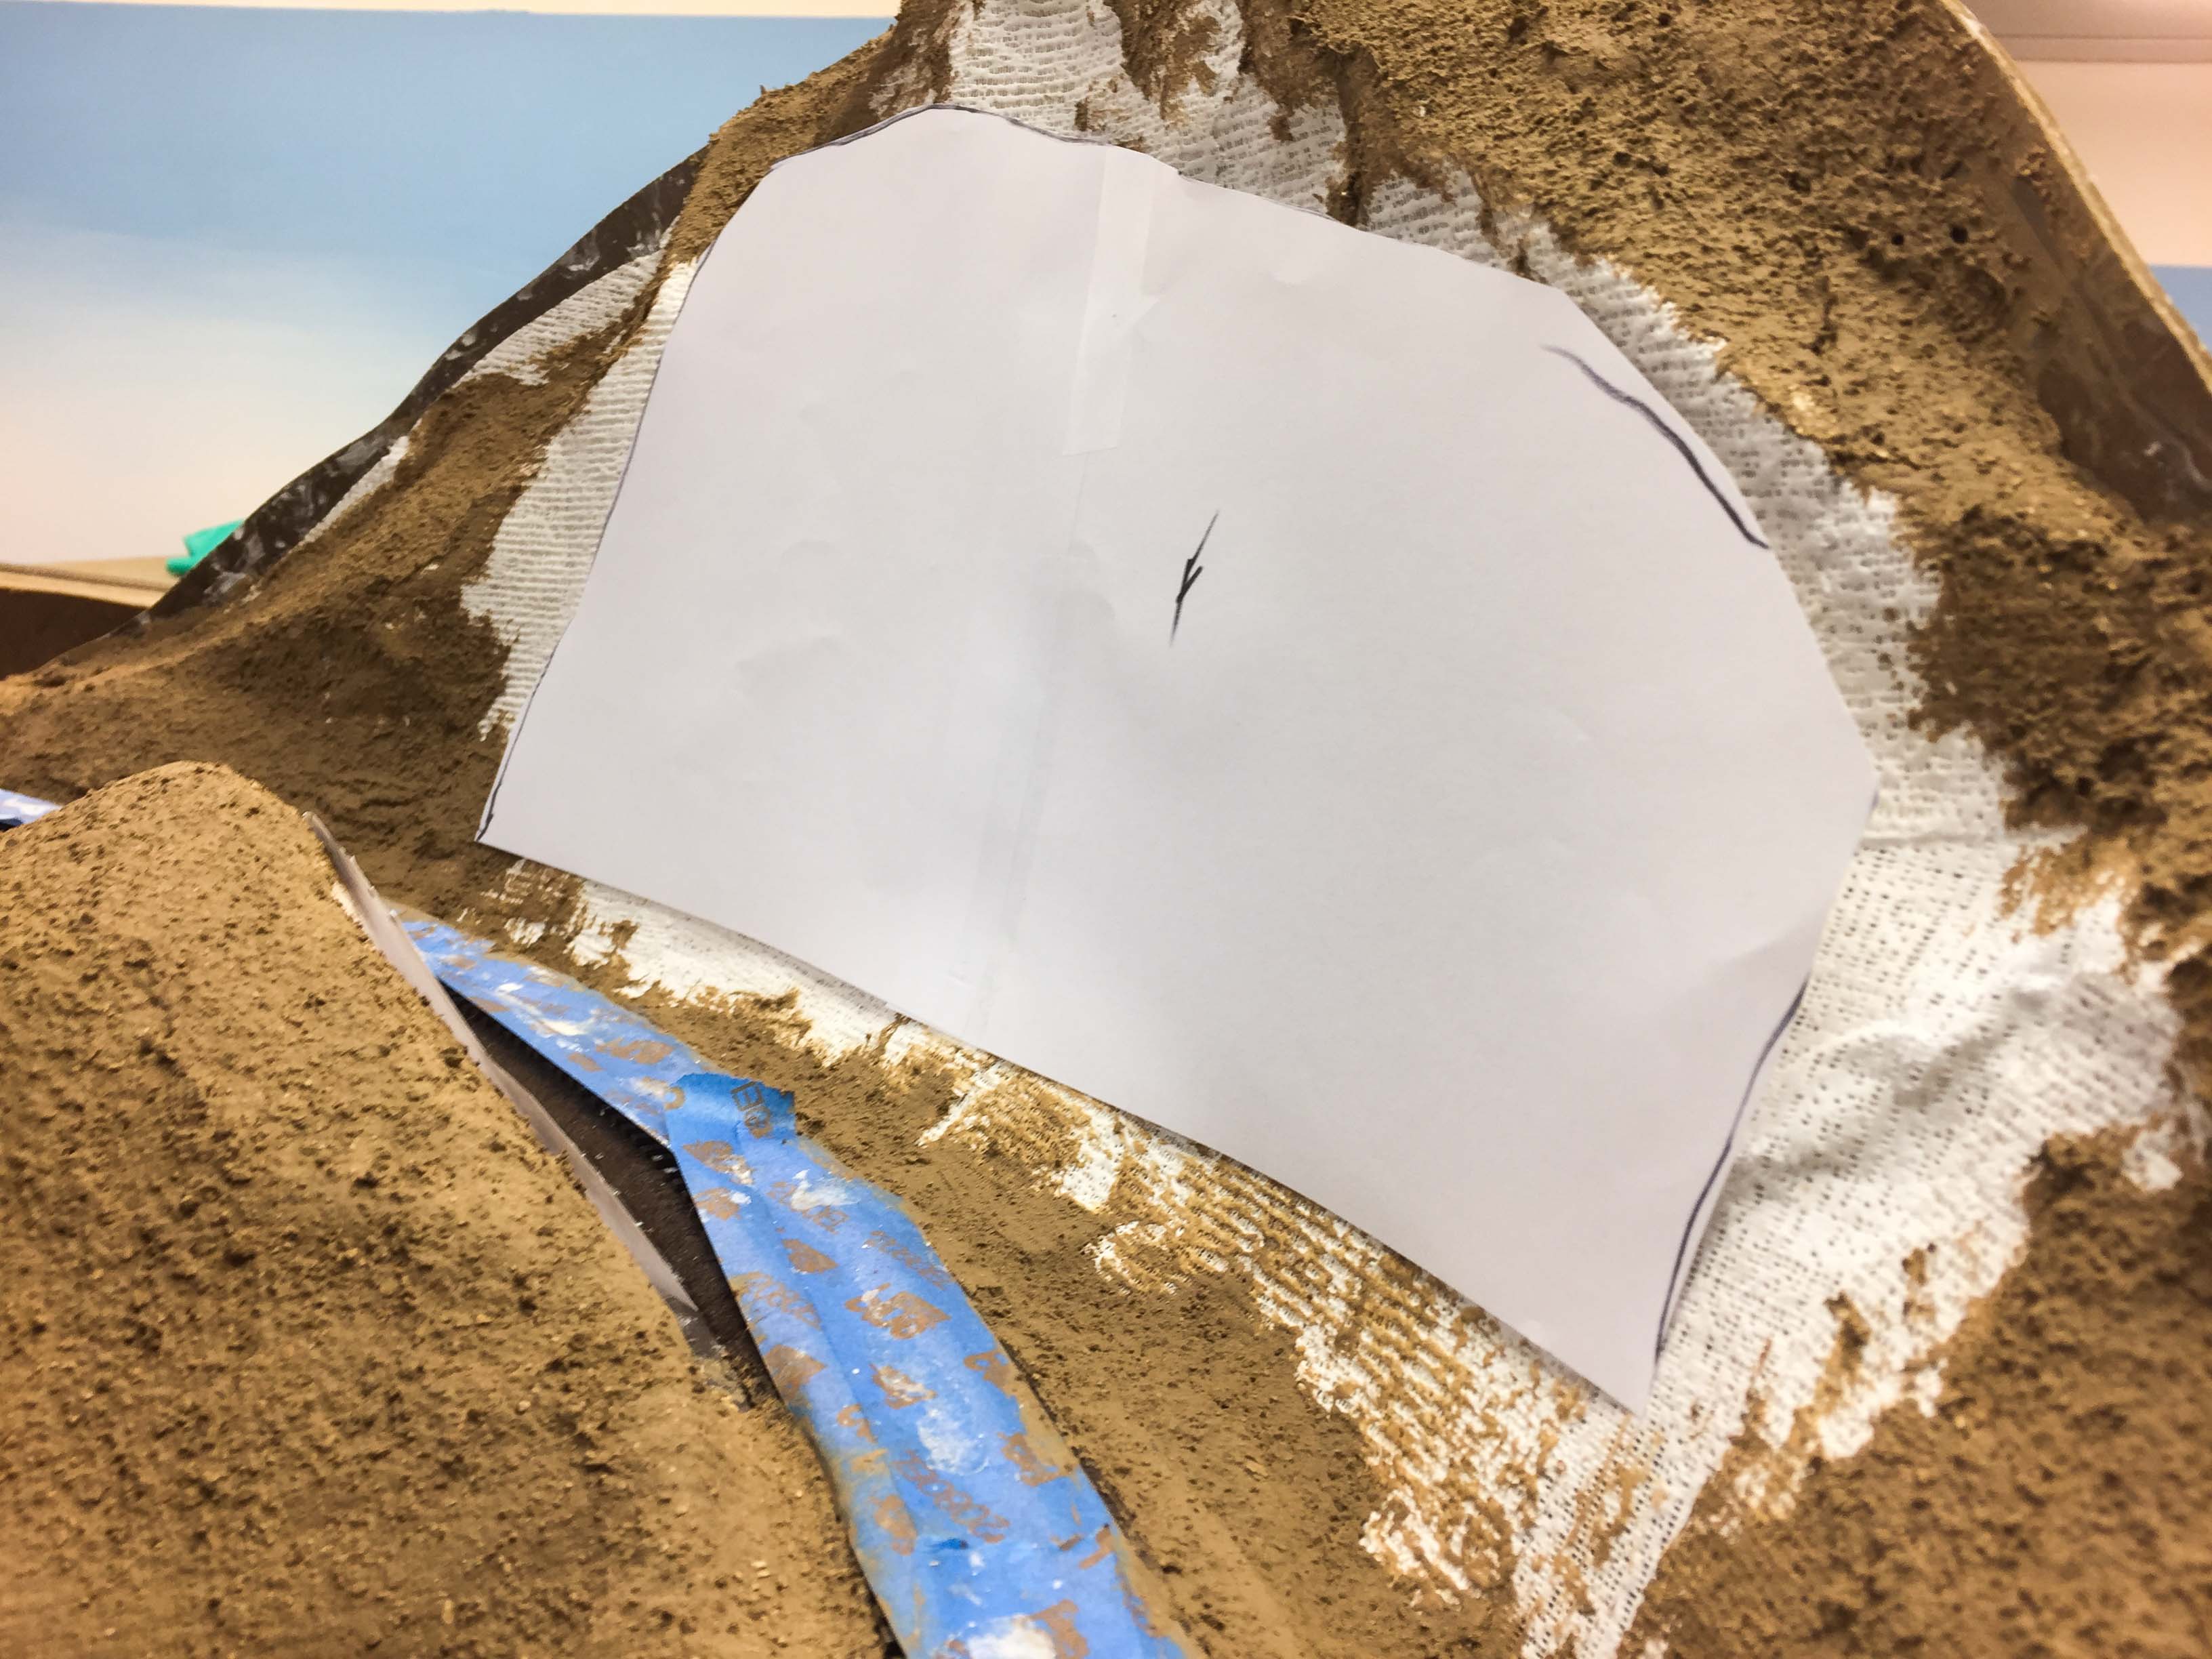
I then glued them in place, using some pins to help hold them while the Liquid Nails set.
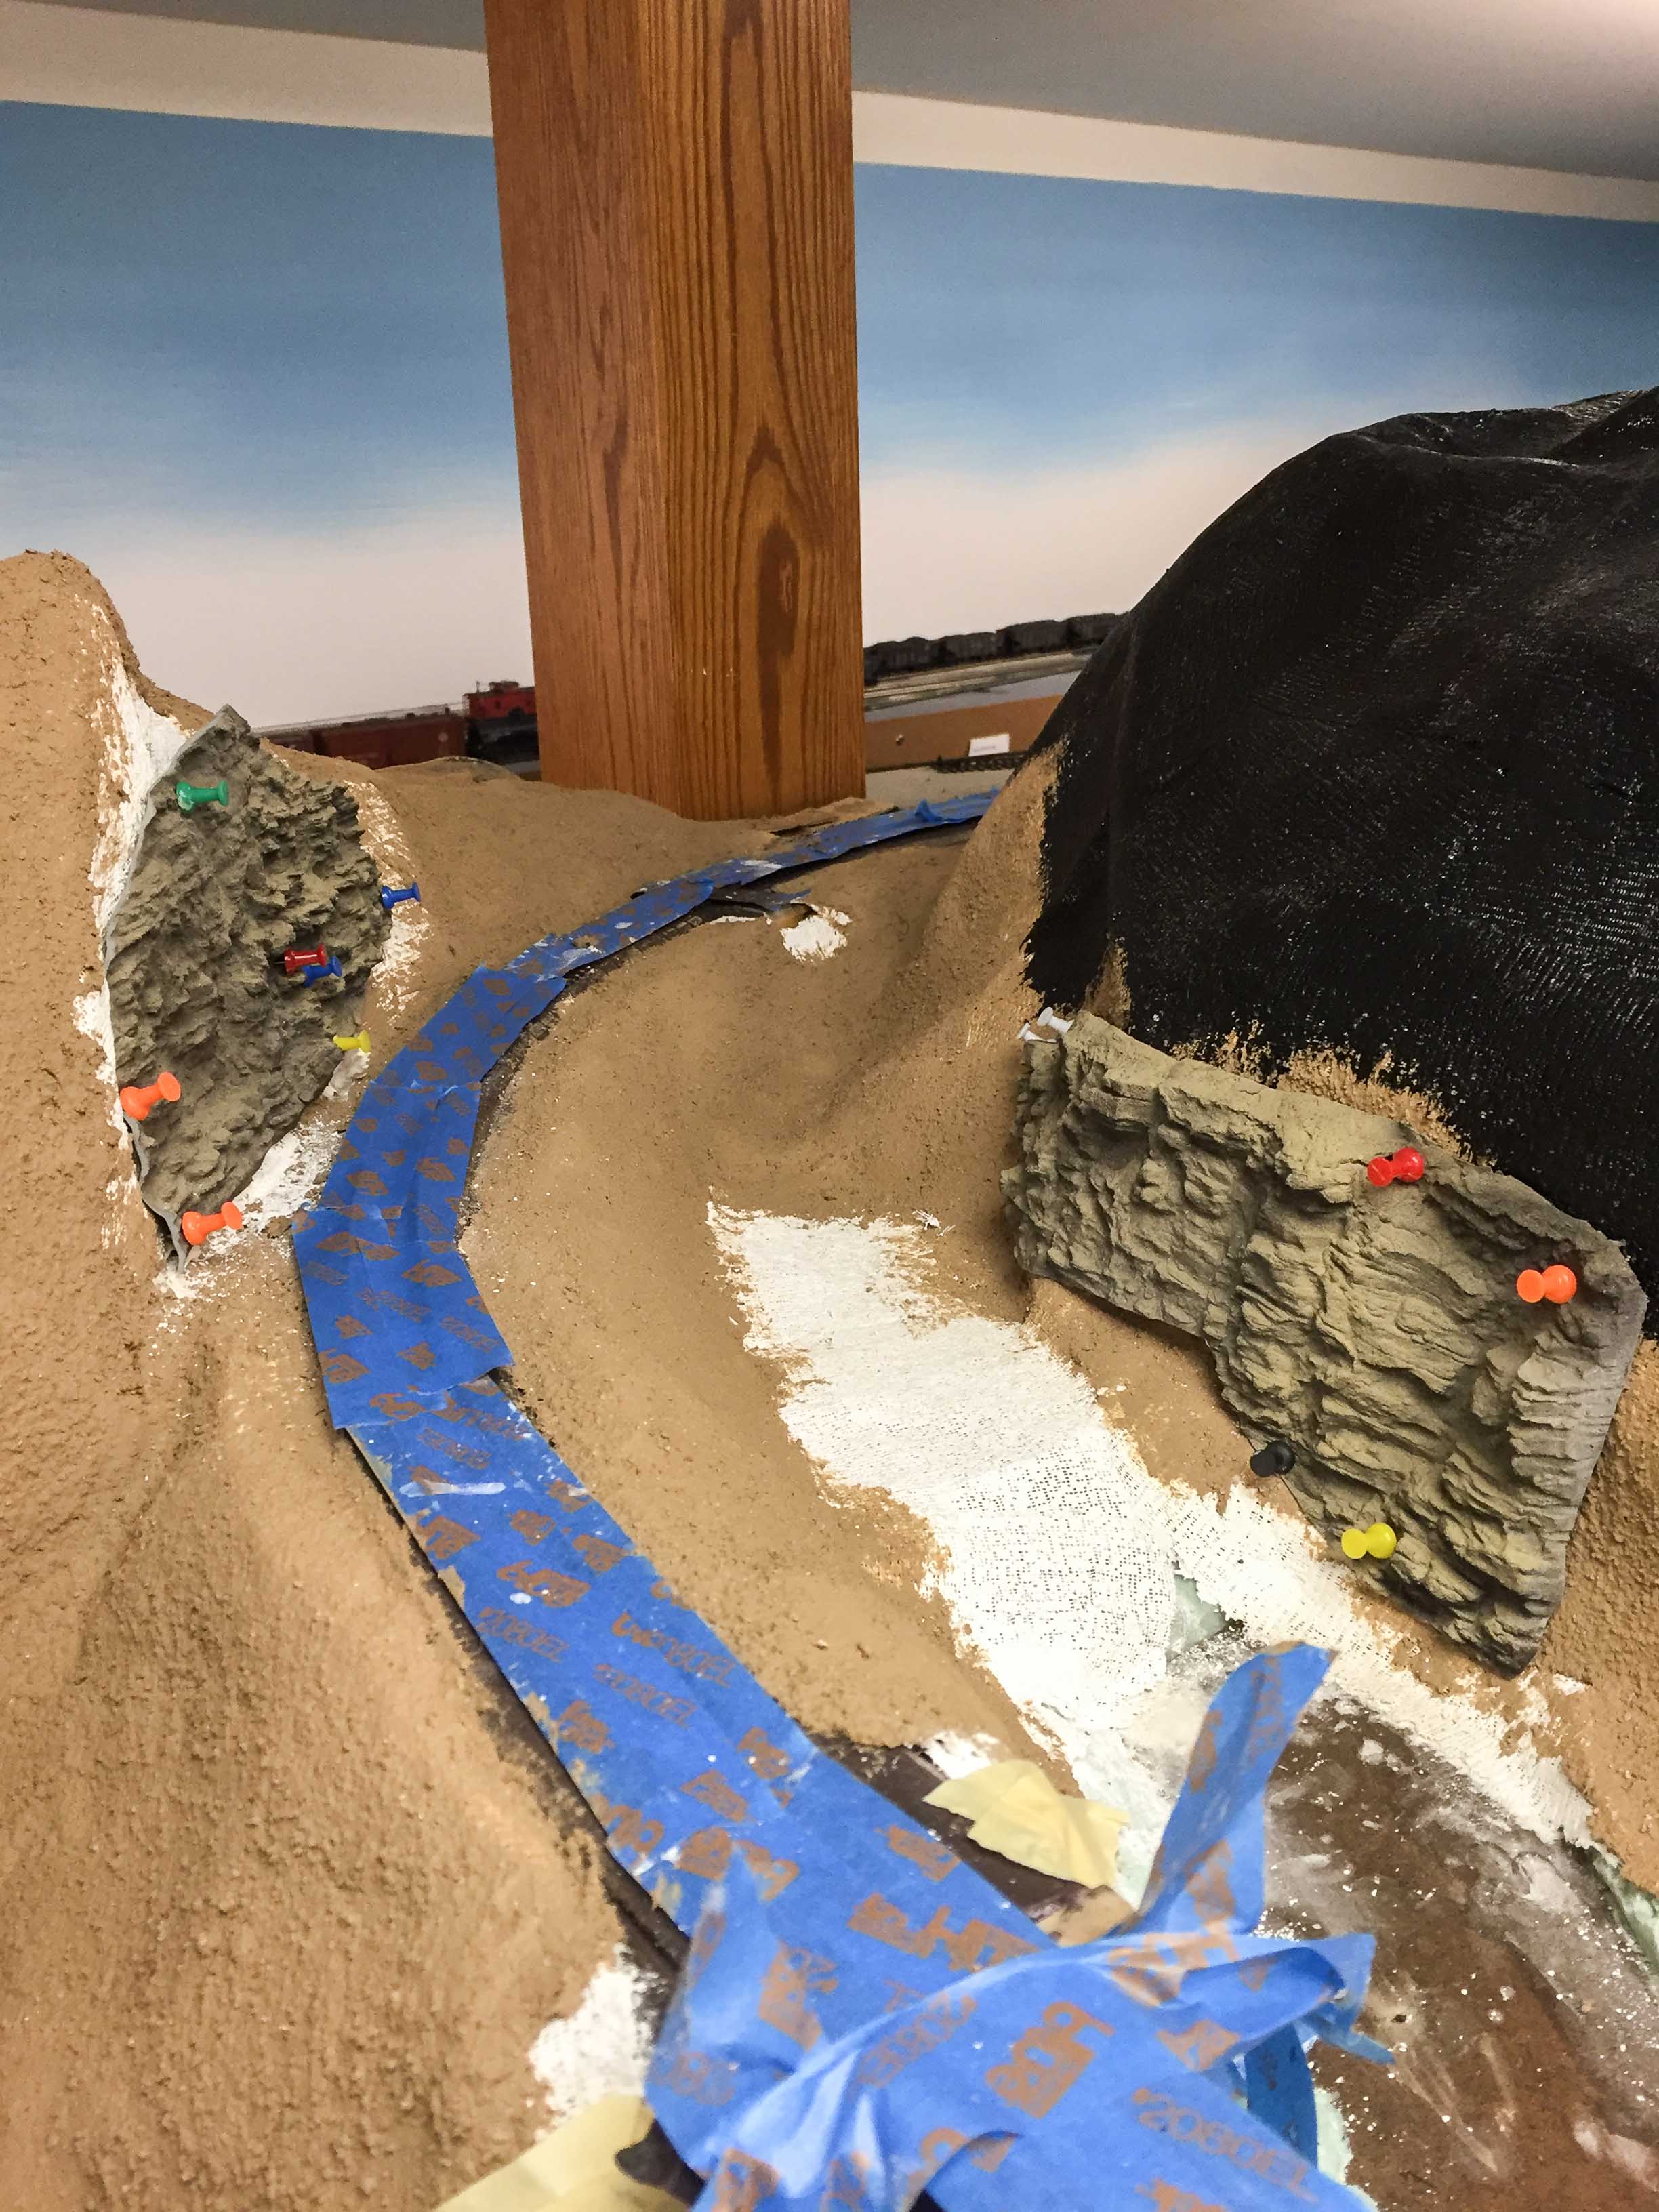
I filled in around the edges with ground goop and Sculptamold, which was then painted my “dirt” color.
To be continued….
Author’s Collection
Last week’s “WW #66” gives us an excellent overview of Wheelerville, PA, probably taken from the rear platform of a caboose on an eastbound train.
There is a wealth of detail for the modeler in this photo, which makes it all the more valuable. To the left, we have an excellent look at the eastern or southern side of the Wheelerville station. Rusting away in the weeds next to the station is an inspection car, likely built from a Ford Model T. This should be an easy project using a Jordan kit and a bit of judicious rust weathering powders. Across the tracks, a phone box and train order signal keep vigil. The passing siding is nearly obscured by weeds in the (presumed) late summer view.
In the background, a large flowerbox decorates the front porch of a home, whose front has the appearance that it might have been a general store in the past. Despite the remote location and small size of the village, there are at least three pedestrians going about their business on the county road.
All in all, a fascinating little vignette of the past…
Author’s Collection
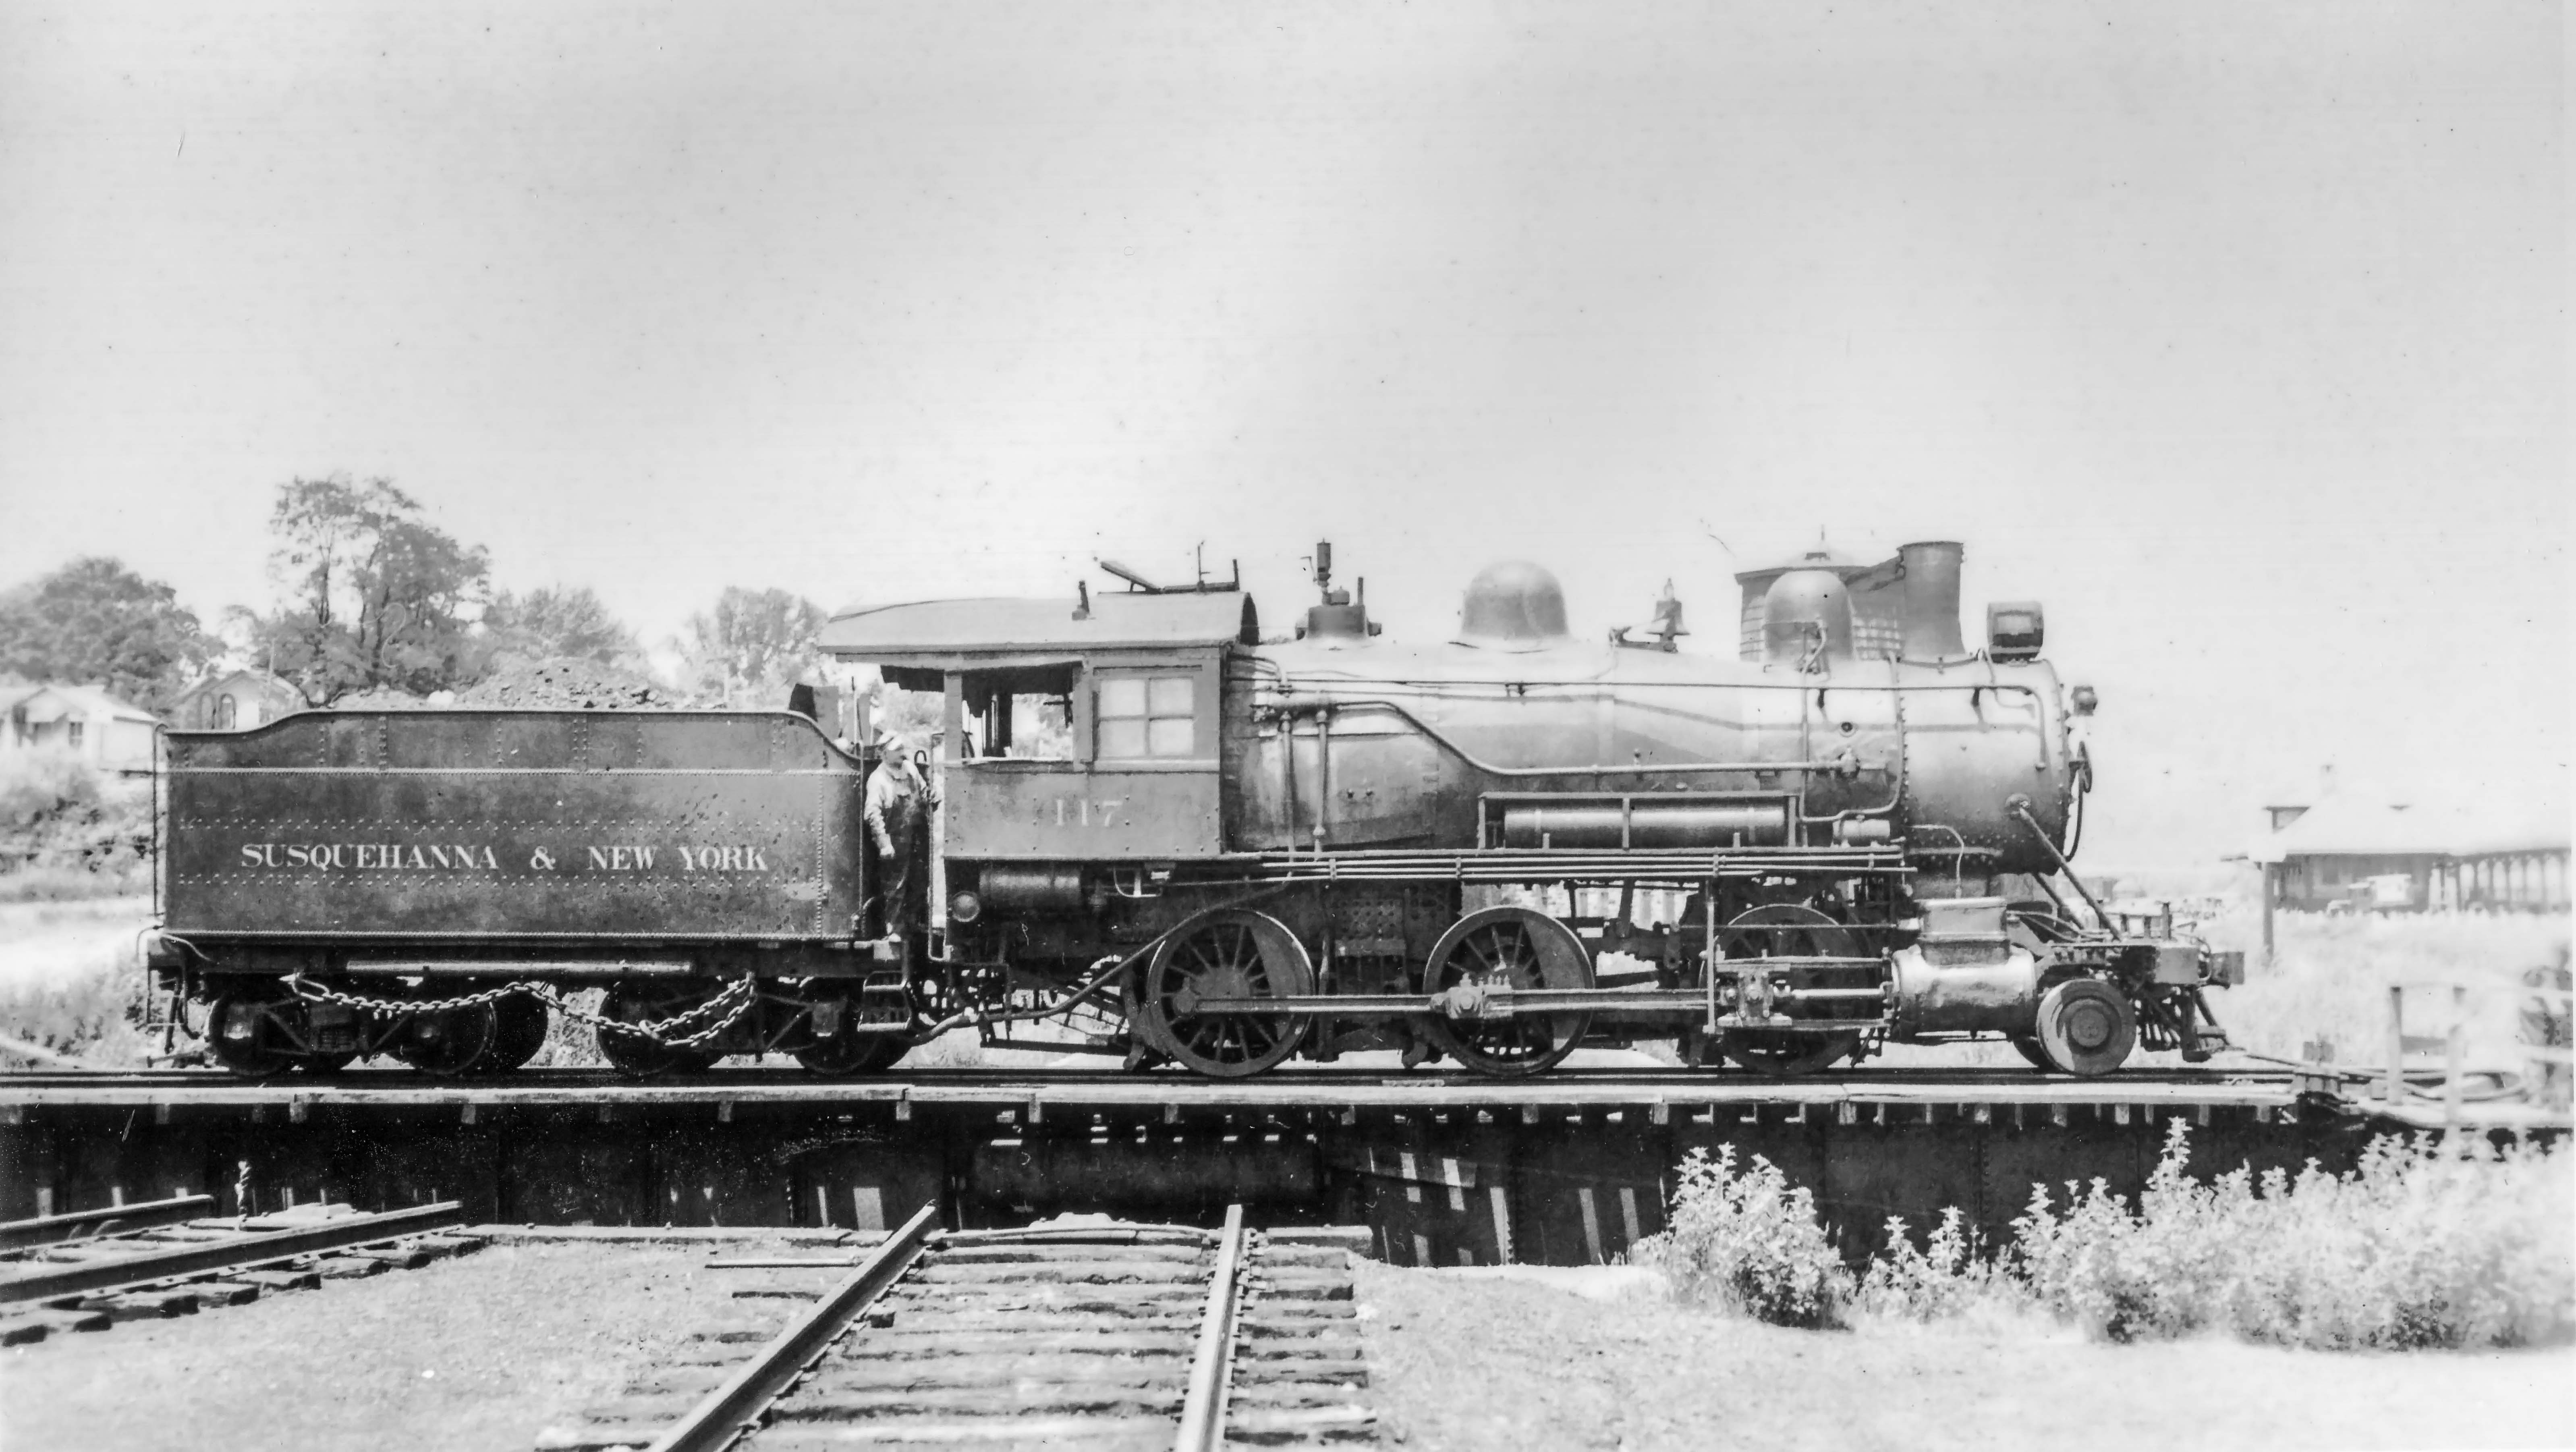
S&NY 2-6-0 #117 goes for a spin on the turntable at North Towanda in last week’s WW#65.
The #117 was built for the NYC at ALCo’s Schenectady works in 1900, and was bought by the S&NY in 1926. The engine was reportedly scrapped after abandonment.
Op session #11 was held on Saturday 27 February 2016. Hard to believe the railroad has been in operation for 2 years now. Scenery progress had been on hiatus for many months due to family matters and other projects, but has recently resumed.
The other projects include re-motoring, tweaking and painting weathering another PFM engine; installing a new decoder, painting and weathering a Bachmann 4-4-0; and re-motoring, painting, weathering, and decoder-ing an EMC motorcar. Several fluorescent fixtures in one layout room were also replaced.
The timetable continues to be tweaked between sessions with some success. During the latest session, the dispatcher only had to write a couple of orders, and 2 of those were to give running authority to the coal extra.
Hopefully I’ll upload a few in-progress photos of some of these projects soon.
Here westbound #5 meets #22 working the station at Wheelerville:
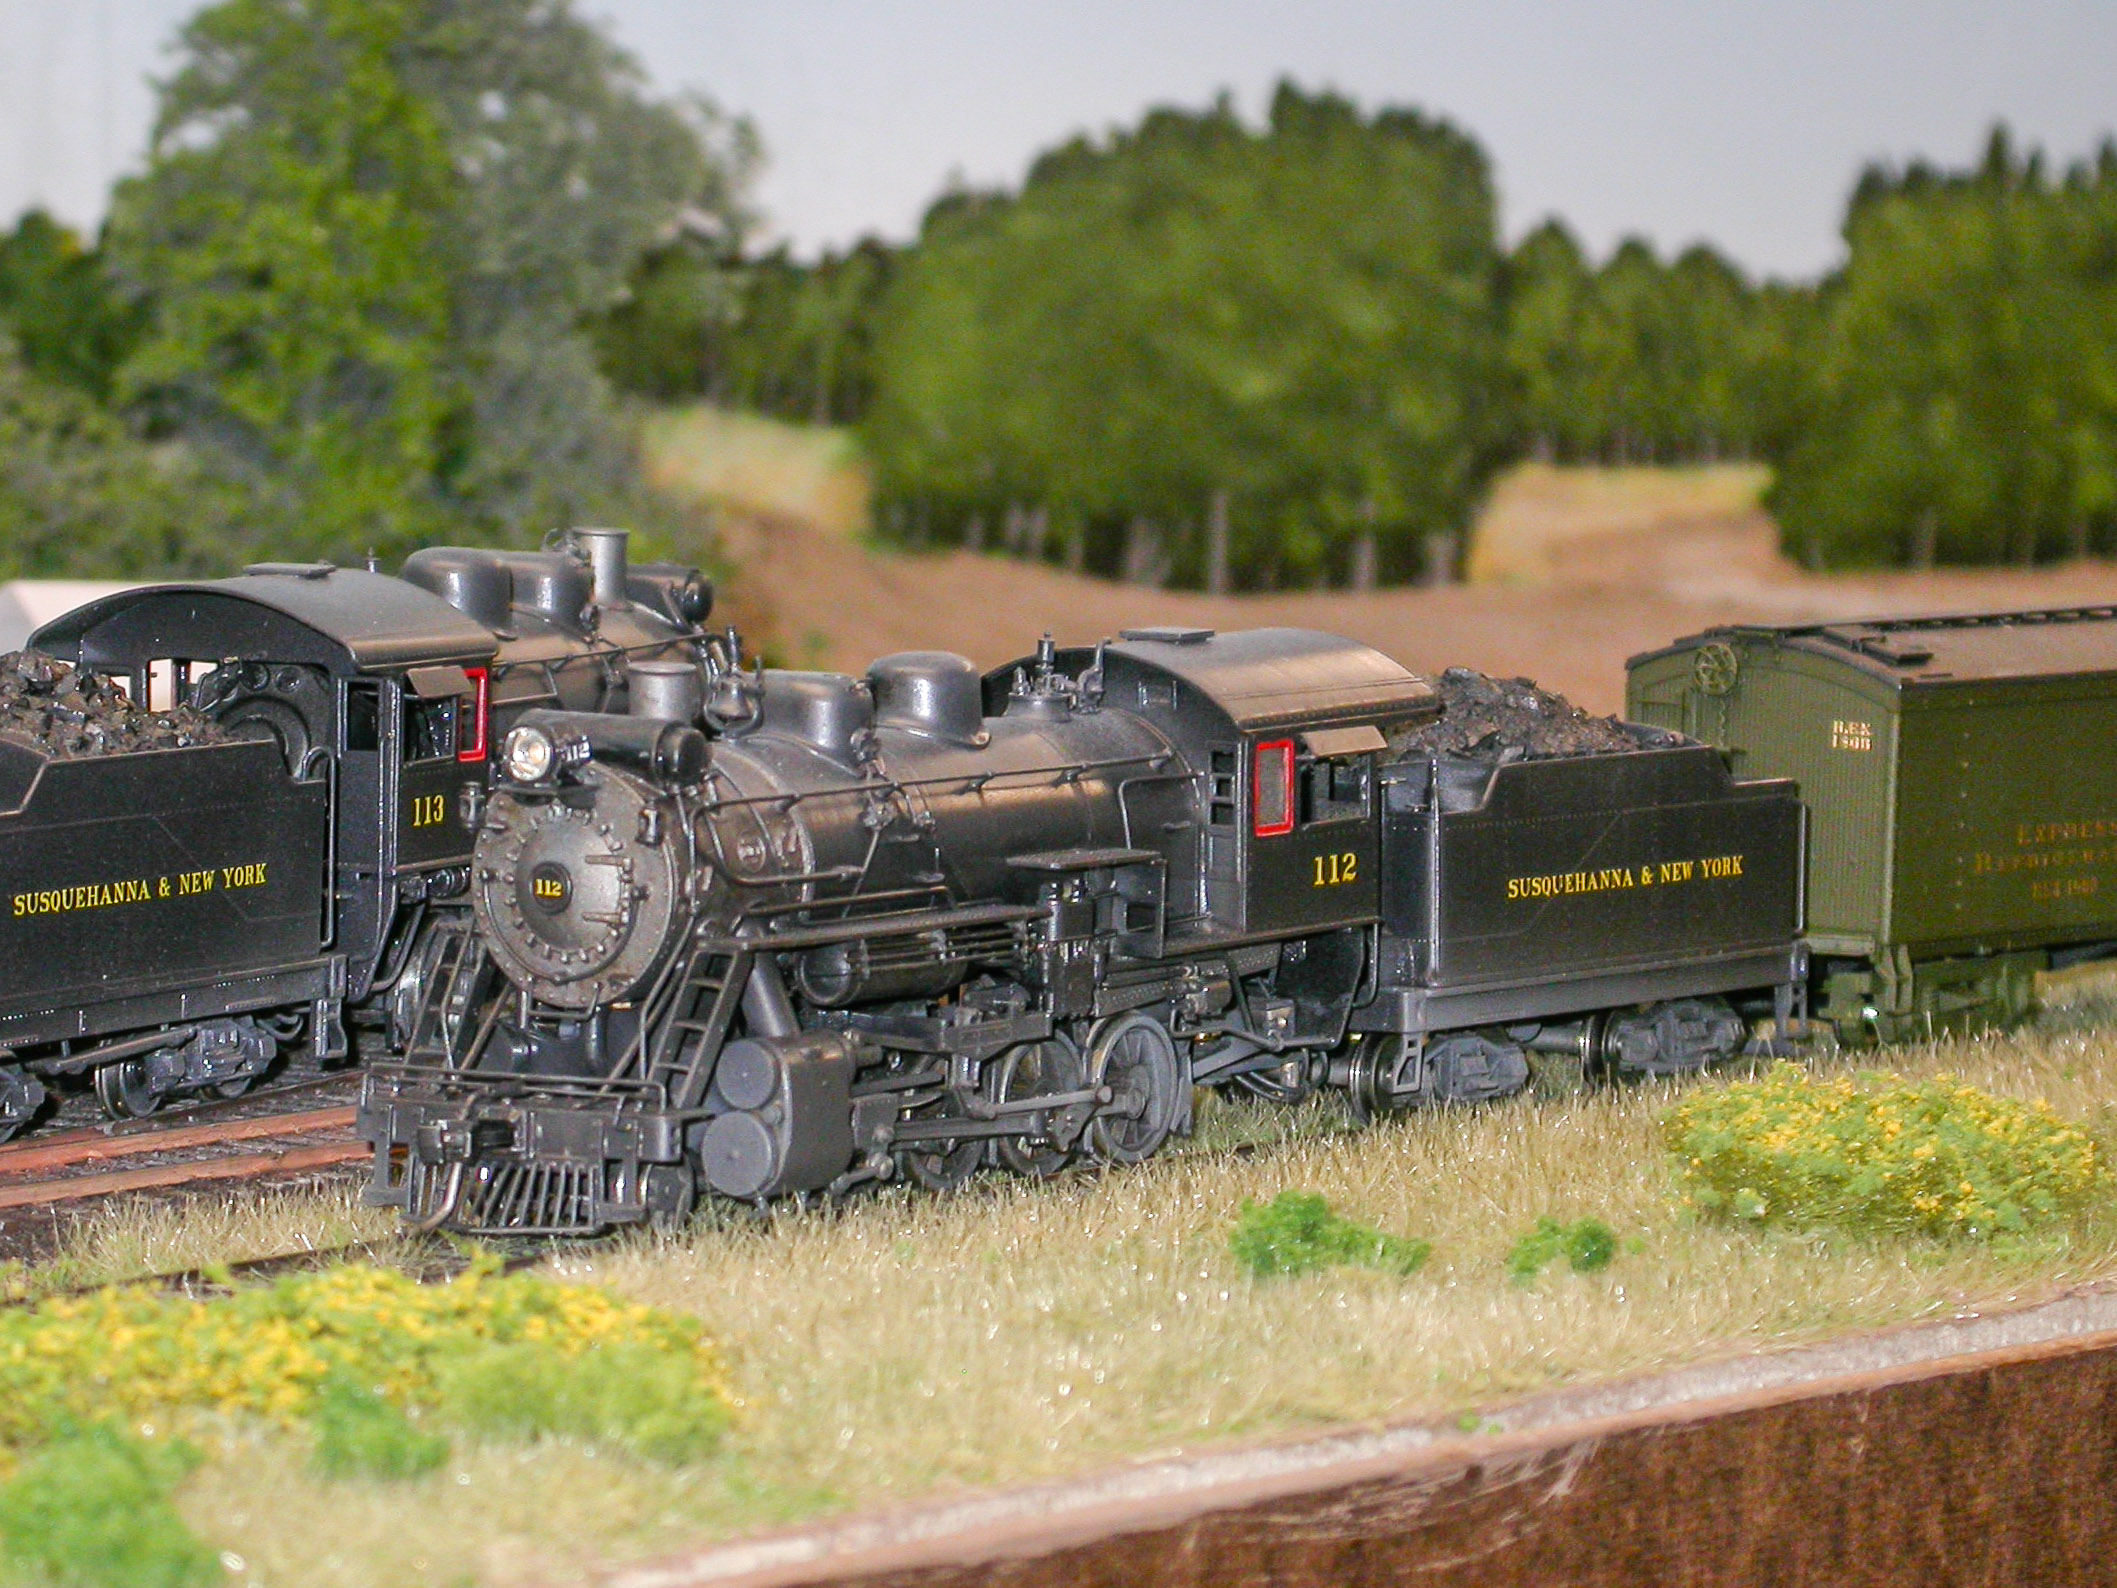
Photo by John Webster
In this photo, #23’s caboose waits in the weeds at Wheelerville for #6 to double the hill eastbound out of Marsh Hill:
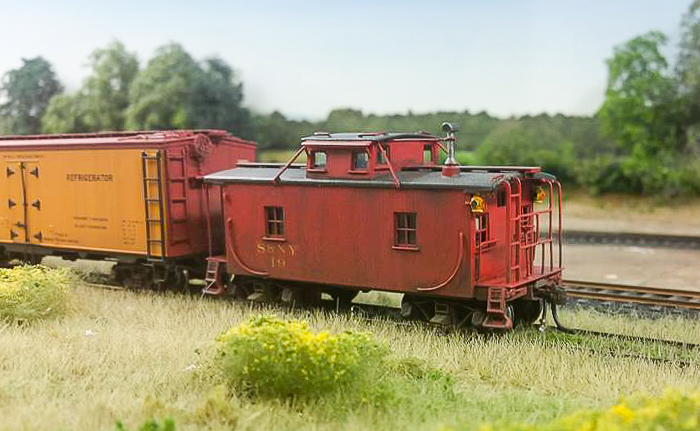
Photo by Brad White
Bill Caloroso – Cal’s Classics
Recent Comments